
Beginner-friendly leather paint brands are those that offer highly flexible, water-based acrylic formulations specifically engineered for leather surfaces. These paints should require minimal thinning, provide excellent opacity in a few thin layers, and be available in comprehensive starter kits that include essential preparation and finishing mediums. Choosing a specialized formulation ensures that your customized designs on sneakers, bags, or wallets remain vibrant and intact without cracking, peeling, or stiffening over time.
When starting your leather crafting journey, navigating the wide array of art supplies can feel overwhelming. Selecting the right medium is the single most important decision you will make, as regular paints cannot withstand the constant flexing and stretching that leather goods undergo. By focusing on specialized leather acrylics, you set yourself up for a smooth, frustration-free application process that yields professional-looking results.
To make an informed choice, you need to understand how different formulations behave on leather surfaces. Evaluating key product specifications, mastering the essential preparation steps, and knowing how to select compatible finishing sealers will ensure your custom projects stand the test of time.
Products mentioned in this guide
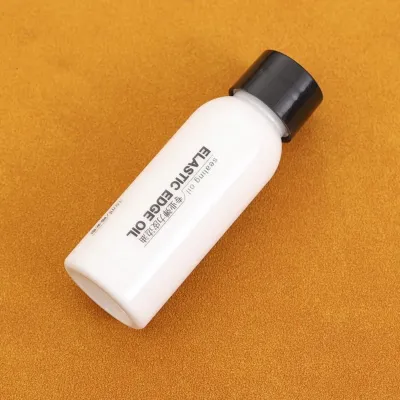
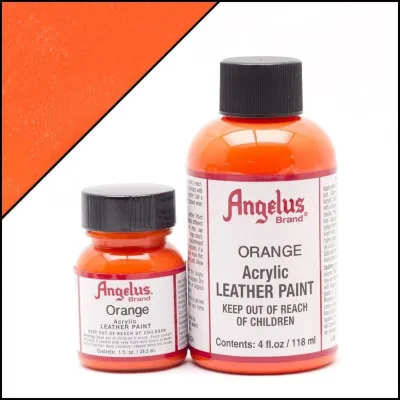
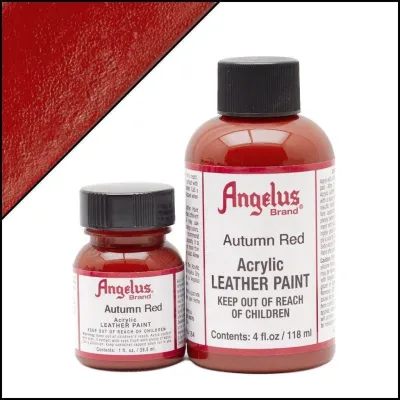
Prices are valid at publication and may change. Please refer to the product page for the latest price.
Understanding the Main Types of Leather Paint
Leather colorants generally fall into three distinct categories: water-based acrylic paints, alcohol-based paints, and penetrating leather dyes. Each formulation has a unique chemical structure that dictates how it adheres to the leather, how flexible it remains, and how forgiving it is for a beginner.
Water-based acrylic leather paints are widely considered a highly practical choice for novices. These paints consist of pigment suspended in an acrylic polymer emulsion that sits on top of the leather fibers, forming a cohesive, highly flexible film. Because they are water-based, they can be easily thinned with water or specialized flow improvers, and they allow for simple clean-up with soap and water while wet. This formulation is incredibly forgiving, as minor mistakes can be wiped away with a damp cloth before the paint cures.
Alcohol-based paints and penetrating leather dyes behave very differently from acrylics. Dyes penetrate deep into the leather pores, chemically bonding with the fibers to change the color from within. While dyes offer excellent durability and preserve the natural texture of the leather, they are highly fluid, prone to bleeding, and virtually impossible to correct once applied. Alcohol-based paints dry almost instantly, which makes blending colors and achieving smooth, brush-stroke-free gradients exceptionally difficult for someone still developing their brush control.
For a beginner, the opacity and surface-level adhesion of water-based acrylics make them the most practical choice. They provide a solid block of color that can easily cover dark leather surfaces, whereas dyes are translucent and can only darken the existing leather color. Acrylics also give you the freedom to paint intricate designs, logos, and detailed illustrations, which is highly challenging with runny dyes.
What Makes a Leather Paint Beginner-Friendly?
When evaluating different leather paint brands, several key characteristics determine how easy the product is to use for a beginner. The first factor to consider is the drying time and “open time”—the period during which the paint remains wet and workable on the surface. A paint that dries too quickly can leave unsightly brush marks and make blending colors difficult, especially in warm or dry environments. Conversely, a paint that dries too slowly can prolong your project and increase the risk of dust settling into the wet paint.

In tropical climates with high humidity, such as Singapore, the ambient moisture can naturally extend drying times. Beginner-friendly paints are formulated to maintain a predictable drying rate under varying environmental conditions, allowing you to build up layers efficiently without waiting hours between coats.
Built-in flexibility is another non-negotiable feature of high-quality leather paint. Leather is a dynamic, organic material that bends, creases, and stretches with use. Beginner-friendly formulations incorporate advanced adhesion promoters and highly elastic acrylic polymers that stretch alongside the leather fibers. This prevents the paint from cracking or flaking off when applied to high-wear items like the toe box of a sneaker, the strap of a handbag, or the fold of a wallet.
Ready-to-use consistency is also crucial for those new to the craft. The paint should flow smoothly from the bottle with a consistency similar to heavy cream, requiring no immediate dilution or complex mixing with auxiliary mediums. This allows you to focus entirely on your brush technique and design placement rather than worrying about achieving the correct chemical balance.
Crucial Prep and Finish Steps for Lasting Results
No matter how high the quality of your leather paint, the final result depends heavily on proper surface preparation and finishing. Skipping these steps is the most common reason beginner projects fail, often resulting in paint that peels off in sheets after just a few wears.
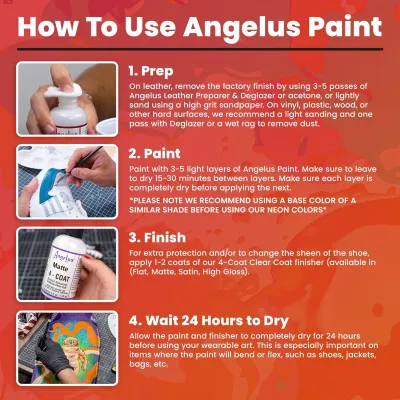
Commercial leather goods are almost always treated with a factory finish—a protective topcoat of wax, silicone, or polyurethane designed to repel moisture and dirt. This factory finish will also repel paint, preventing it from adhering to the leather. To prepare the surface, you must use a leather preparer or deglazer, which is typically an acetone-based solvent. Applying this solvent with a lint-free cloth or cotton pad strips away the factory finish and slightly opens the leather pores, creating a clean, receptive surface for the paint.
During the preparation phase, it is important to work in a well-ventilated space, such as near an open window or on a balcony. The deglazer should be applied gently; the goal is to remove the shiny topcoat without saturating or drying out the underlying leather fibers. Once the surface feels matte and slightly tacky, the leather is ready for paint.
After completing your painted design and allowing it to cure, you must apply a protective acrylic finisher or sealer. This final layer acts as a barrier against friction, moisture, dirt, and UV damage. Finishers are available in various sheens, including matte, satin, semi-gloss, and high-gloss, allowing you to customize the final look of your project. Applying a compatible finisher ensures that your hard work remains protected against daily wear and tear.
How to Shortlist and Evaluate Leather Paint Brands
To find the most suitable leather paint for your needs, you should establish a practical framework for researching and comparing brands rather than relying on unverified online lists. Start by verifying that the manufacturer explicitly designs the paint for leather surfaces. Generic craft acrylics or multi-surface paints lack the necessary plasticizers and will inevitably crack when the leather flexes.
For beginners, evaluating starter kits or bundle sets is highly recommended. These kits are often curated by manufacturers to include a versatile selection of primary colors, a bottle of leather preparer, a protective finisher, and sometimes a set of detail brushes. Purchasing a kit is generally more cost-effective than buying individual bottles and helps ensure that all the products you use are chemically compatible with one another. A typical starter kit can range from S$20 to S$50, providing an affordable entry point into the hobby.
When shortlisting brands, check official manufacturer websites or authorized local art supply retailers for product safety data sheets (SDS) and clear usage instructions. Reputable brands prioritize consumer safety, ensuring their water-based formulations are non-toxic and low-odor, making them safe for use in home environments. Furthermore, brands that offer extensive educational resources, video tutorials, and clear mixing charts are incredibly valuable for beginners trying to master new techniques.
Finally, consider the availability of individual replacement bottles. As you paint more, you will inevitably run out of popular colors like white, black, or primary blue much faster than others. Choosing a brand that is widely stocked by local art shops or reliable online marketplaces ensures you can easily replenish your supplies without paying exorbitant shipping fees or waiting weeks for international delivery.
Common Application Mistakes to Avoid
Achieving a smooth, durable finish on leather requires patience and attention to detail. One of the most common mistakes beginners make is applying the paint in thick, heavy coats. Thick layers of acrylic paint cannot cure properly and will quickly crack or peel when the leather bends. Instead, always apply multiple whisper-thin coats, allowing each layer to dry completely before applying the next. The first coat may look streaky and uneven, but subsequent layers will build up solid, vibrant opacity.
Another frequent error is skipping the deglazing step or painting over a dirty, oily surface. Dust, fingerprints, and factory oils will prevent the paint from bonding with the leather, leading to premature peeling. Always take the time to prep the surface thoroughly, and avoid touching the prepped area with your bare hands before painting.
Using incompatible sealers or applying them before the paint has fully cured can also ruin your project. Applying a sealer over wet or partially dry paint can trap moisture, resulting in a cloudy, sticky finish that never fully dries. Always allow your painted design to cure for at least 24 to 48 hours in a dry, well-ventilated area before applying the protective finisher.
Frequently Asked Questions (FAQ)
Can I use regular acrylic paint on leather?
Regular craft acrylic paint is not recommended for leather customization. While it may look acceptable immediately after application, standard acrylics lack the specialized plasticizers and adhesion promoters found in dedicated leather paints. As a result, regular acrylic paint is brittle and will quickly crack, flake, and peel when the leather bends, flexes, or is exposed to moisture.
Do I need to seal leather paint after it dries?
Yes, sealing your leather paint with a compatible acrylic finisher is highly recommended. The sealer protects the painted design from friction, scuffs, moisture, and environmental wear. It also helps to lock in the paint, ensuring the design remains vibrant and intact over time while allowing you to achieve your desired sheen, whether matte, satin, or gloss.
How long should I wait between applying coats of leather paint?
You should generally wait 15 to 30 minutes between applying thin coats of leather paint, depending on the ambient temperature and humidity. The paint should be completely dry to the touch and not feel tacky before you apply the next layer. To ensure proper adhesion and prevent lifting the previous layer, always consult the manufacturer’s label for specific drying and curing instructions.

Community discussion
Share your experience or ask a question. Comments are reviewed before publication.