
Starting embroidery in Singapore is an exciting creative outlet, but the sheer variety of individual supplies can feel overwhelming. For a complete beginner, the most practical choice is an all-in-one embroidery kit that contains every necessary tool and material to complete a project from start to finish. This approach eliminates the need to source hoops, needles, and specific thread colors separately, allowing you to focus entirely on learning the basic stitches. A suitable beginner kit should feature a sturdy hoop, pre-printed fabric, color-coded embroidery floss, appropriate needles, and clear instructions. By selecting a well-curated kit, you can avoid the common pitfalls of mismatched materials and enjoy a smooth, frustration-free introduction to needlework.
Essential Components to Verify in an All-in-One Embroidery Kit
Before purchasing any embroidery kit, you must verify that it is truly comprehensive. Some products are marketed as kits but only contain thread and fabric, leaving you to purchase essential hardware separately. Checking the product description and packaging details carefully will save you from unexpected trips to the craft store.
The embroidery hoop is the foundation of your project, holding the fabric taut as you work. Look for a hoop equipped with an adjustable metal tension screw rather than a simple snap-together plastic ring. A screw mechanism allows you to adjust the tightness of the fabric precisely, which is critical for preventing puckered stitches. Sturdy wooden hoops or high-quality, thick plastic hoops are preferred, as they provide a reliable grip on the fabric without slipping during long stitching sessions.
Products mentioned in this guide
![[SINGAPORE] GRAQITUDE.SG DIY Embroidery Sewing Kit Beginners with Instructions Manual](https://img.lazcdn.com/g/p/07e27a50f633ff4bf1242c316ee4869a.png_400x400q80.png_.webp)
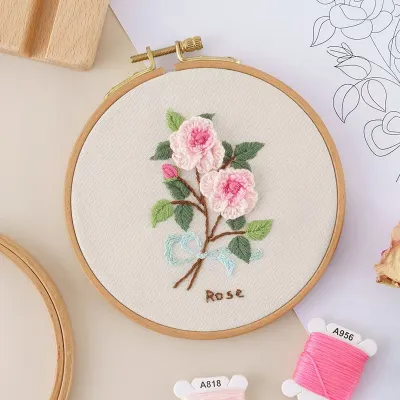
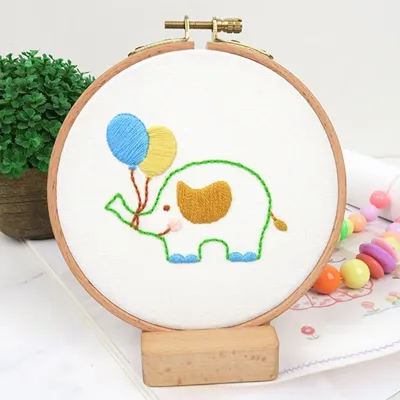
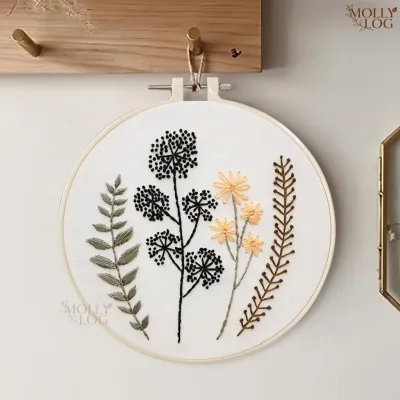
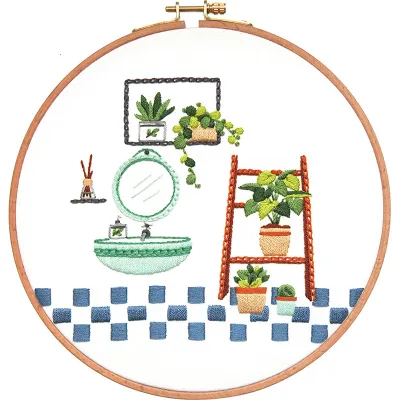

Prices are valid at publication and may change. Please refer to the product page for the latest price.
Needles are another critical component that must be verified. A beginner kit should include dedicated embroidery needles, which feature elongated eyes designed to accommodate multiple strands of embroidery floss. Standard sewing needles have very small, round eyes that make threading thick floss incredibly difficult and frustrating. Ensure the kit provides at least two needles of appropriate sizes for the fabric weight, giving you a backup in case one is misplaced.
The threads, often referred to as embroidery floss, should be pre-sorted and clearly labeled. High-quality kits organize the floss on a cardboard organizer, with each color-coded strand matching a specific symbol or number on the pattern key. This organization prevents the threads from tangling into an unusable knot and ensures you do not accidentally use the wrong shade for a specific section of the design.
The fabric and pattern form the canvas of your artwork. For beginners, the kit must include a piece of cotton or linen-blend fabric with the design already printed directly onto the surface. This design should ideally be printed with water-soluble ink, which disappears completely when washed, or be clearly marked so that your stitches can easily cover the lines. Avoid blank fabrics that require you to transfer the pattern yourself, as pattern transfer is a separate skill that can be challenging for a novice.
Finally, check for basic utility tools that make the stitching process much easier. A complete kit should include a pair of small, sharp embroidery scissors or thread snips for clean cuts, as dull household scissors will fray the floss. A simple metal needle threader is also highly beneficial, helping you pull thick strands through the needle eye with minimal effort.
How to Evaluate Material Quality for a Frustration-Free Experience
Not all embroidery kits are created equal, and low-quality materials can quickly turn a relaxing hobby into a frustrating chore. Understanding how to evaluate the quality of the components in a kit will help you select a product that is satisfying to work with and yields a beautiful finished piece.

The weave and weight of the fabric play a major role in how easy it is to stitch. Tightly woven, medium-weight natural fabrics like cotton, canvas, or linen are the gold standard for beginners. These materials hold their shape well under tension and support the weight of the stitches without sagging. In contrast, cheap synthetic fabrics or loosely woven materials tend to stretch out of shape, slip within the hoop, and allow the background threads to show through the front of your work.
Thread durability and colorfastness are equally important. Low-grade embroidery floss is prone to fraying, splitting prematurely, and snapping under normal tension, which can ruin your progress. When browsing online listings, look closely at user feedback for any mentions of thread breakage or color bleeding. Color bleeding occurs when the dye from dark threads runs into the surrounding light-colored fabric during the washing process, potentially ruining hours of hard work.
The pattern transfer method used on the fabric determines how clean your finished piece will look. Water-soluble ink is highly recommended for beginners because any lines that are not perfectly covered by your stitches will wash away completely in cool water. If the kit uses permanent print or heat-transfer lines, you must stitch with absolute precision to ensure every single line is fully covered, leaving no room for minor mistakes or adjustments.
A hoop’s ability to retain tension is vital for maintaining consistent stitch quality. Wooden hoops with solid brass or heavy-duty metal hardware generally hold fabric taut for much longer periods than thin, flexible plastic hoops. If a hoop loses tension constantly, you will find yourself stopping to pull and readjust the fabric every few minutes, which can distort your stitches and disrupt your rhythm.
Where to Shop in Singapore and How to Verify Seller Reliability
Finding a quality embroidery kit in Singapore involves exploring both physical retail spaces and online platforms, each offering distinct advantages for a beginner. Knowing what to look for in a seller ensures you receive a complete, high-quality product.
Visiting local craft and stationery stores in Singapore allows you to physically inspect the materials before buying. This hands-on approach lets you feel the weight of the fabric, check the sturdiness of the wooden hoop, and ensure the tension screw turns smoothly. Established art supply shops and specialty craft boutiques often stock curated kits that prioritize quality materials, making them a reliable starting point for beginners who prefer to see the product in person.
Online marketplaces and e-commerce platforms offer an extensive variety of designs and price points, but they require extra vigilance. When shopping online, always filter for highly-rated sellers and read the most recent customer reviews carefully. Look specifically for reviews that mention missing parts, warped hoops, or dry, brittle threads. Pay close attention to estimated shipping times to Singapore to ensure your kit arrives within a reasonable timeframe.
Independent local makers and craft studios in Singapore are excellent sources for premium, beginner-friendly kits. Many local textile artists curate their own kits, which often feature modern, localized designs and high-grade materials. Purchasing from a local maker sometimes includes access to online video tutorials or direct customer support, providing a valuable safety net if you encounter a difficult stitch or have questions about the process.
Before finalizing any purchase, run through a quick seller verification checklist. Confirm the seller’s return or exchange policy in case you receive a defective component, such as a warped wooden hoop that cannot hold fabric or threads that have suffered moisture damage during storage. A reliable seller will offer clear communication and a straightforward resolution process for any product defects.
Common Kit Selection Mistakes That Cause Beginner Frustration
Many beginners abandon embroidery early simply because they chose the wrong kit to start with. Avoiding a few common selection mistakes will keep your learning curve manageable and your stitching experience enjoyable.
Choosing an overly dense or complex pattern is the most common mistake beginners make. It is easy to be drawn to beautiful, intricate designs featuring heavy shading, realistic portraits, or advanced techniques like stumpwork. However, these patterns often require dozens of different stitch types and months of tedious work, which can quickly overwhelm a novice. Start with simple, minimalist designs that focus on basic stitches like the backstitch, satin stitch, and French knot.
A lack of clear instruction manuals is another major hurdle. Some budget kits only provide a printed pattern and a color key, assuming you already know how to execute the stitches. Ensure the kit you choose includes a detailed, step-by-step visual guide or a stitch dictionary with clear illustrations. Kits that provide QR codes linking to video tutorials are exceptionally helpful for visual learners who need to see the needle movement in real-time.
Beware of “fake” all-in-one kits that omit essential tools to lower the price. Read the product listing’s “package contents” section with extreme care. Some sellers display photos of a completed project inside a hoop, but the fine print reveals that the hoop, scissors, or needle threader must be purchased separately. A true beginner kit should require absolutely zero additional purchases to get started.
Finally, do not ignore the fabric size relative to the pattern. The fabric provided in the kit must have at least a 2-to-3-inch margin of blank space around the printed design. If the fabric is cut too close to the edge of the pattern, you will struggle to secure it tightly in the hoop, and you will not have enough excess material to finish or frame the back of your hoop once the embroidery is complete.
Frequently Asked Questions (FAQ)
Can I use regular sewing needles if the kit doesn't include embroidery needles?
While you can physically pierce fabric with a regular sewing needle, it is highly impractical for embroidery. Sewing needles are designed for thin, single-strand sewing threads and have very small eyes. Embroidery floss consists of multiple strands of thread twisted together, which will not fit through a standard sewing needle eye without fraying or breaking. Using the wrong needle creates excessive friction, damaging the floss and making the stitching process incredibly frustrating. It is always best to use dedicated embroidery needles with elongated eyes.
How do I remove the printed pattern from the fabric after finishing?
The removal method depends entirely on the type of ink used to print the pattern, so you should always consult the kit’s instruction manual first. Most beginner kits use water-soluble ink, which can be removed by soaking the finished embroidery in a bowl of cool or lukewarm water for about 10 to 15 minutes. Gently swish the fabric to help dissolve the ink, then rinse it thoroughly. Avoid using hot water or harsh detergents, as they can cause the thread colors to bleed. Always perform a quick spot test on a small, hidden area of the thread before soaking the entire piece.
Community discussion
Share your experience or ask a question. Comments are reviewed before publication.