
Selecting a texture paint beginner set in Singapore requires balancing your creative goals with the physical properties of different mediums. Mixed media art thrives on tactile variety, but not every starter kit is formulated to support the same techniques. Whether you want to build high-relief impasto peaks, embed collage elements, or create a gritty surface for dry media, the right combination of binder, grit, and tools is essential. By understanding how these materials behave, especially under local environmental conditions, you can avoid common pitfalls like cracking, warping, and premature drying. This guide outlines the key criteria, configurations, and verification steps to help you choose a starter kit that aligns with your artistic vision.
Understanding Texture Paint and Mixed Media Requirements
To choose the right texture paint set, you must first define your primary mixed media goals. Different artistic techniques demand distinct paste viscosities and structural properties. For instance, impasto painting relies on thick, expressive brushstrokes that hold their shape without slumping as they dry. If your goal is collage integration, you need a medium with strong adhesive properties that can securely bond paper, fabric, or found objects to your substrate. Sculptural textures, on the other hand, require highly dimensional pastes that can be built up into thick, three-dimensional forms without cracking.
The type of binder used in the texture paint significantly influences its performance and compatibility with other media. Acrylic-based binders are the most common and versatile choice for mixed media artists. They dry relatively quickly, remain flexible when cured, and accept a wide variety of topcoats, including acrylics, oils, and dry media. Oil-based texture mediums offer a much longer working time but require specialized, non-porous substrates and can take weeks or months to cure fully. Water-based, non-acrylic pastes are sometimes found in budget kits, but they can reactivate when wet, potentially ruining subsequent layers of paint or glaze.
Products mentioned in this guide
Prices are valid at publication and may change. Please refer to the product page for the latest price.
Before purchasing any beginner set, it is crucial to check the manufacturer’s labels for lightfastness and structural flexibility. Lightfastness ensures that the medium will not yellow or degrade when exposed to sunlight over time, preserving the visual integrity of your artwork. Structural flexibility is equally important, particularly for thick applications. High-quality modeling pastes are formulated to expand and contract slightly with changes in temperature and humidity, which helps prevent the surface from developing hairline fractures as it cures.
Another key decision is choosing between pre-tinted texture paints and neutral modeling pastes. Pre-tinted sets offer immediate convenience and color consistency, making them excellent for beginners who want to focus on application techniques without worrying about color mixing. However, neutral white or translucent modeling pastes provide greater long-term versatility. They allow you to mix in your own acrylic pigments to create custom shades, or paint directly over the dried texture, giving you complete control over your color palette.
Key Criteria for Evaluating Texture Paint Starter Kits
When evaluating texture paint starter kits, the ratio of texture paste to pigment is a primary consideration. Some beginner sets feature pre-mixed jars where the pigment is already fully integrated into the texturing agent. While convenient, this setup can limit your ability to adjust the intensity of the color or the thickness of the paste. Conversely, kits that provide a large jar of neutral medium alongside a selection of concentrated acrylic paints offer greater versatility. This configuration allows you to experiment with different mixing ratios, creating everything from subtle, tinted glazes to deeply saturated, heavy-bodied textures.

The variety of grit and granule sizes included in a starter kit determines the range of tactile effects you can achieve. A well-rounded beginner set should ideally offer a selection of structural profiles. Fine modeling pastes provide a smooth, plaster-like finish that is excellent for carving and detailed stenciling. Medium-grit pastes often contain fine sand or silica, offering a moderate tooth that catches the light beautifully. Coarse gels contain larger granules, such as pumice or glass beads, which create highly reflective, rugged surfaces that add dramatic contrast to mixed media pieces.
Essential application tools are another critical component of a high-value starter kit. Manipulating heavy, viscous pastes requires specialized tools that can handle the physical resistance of the medium. Look for kits that include at least one or two palette knives, which are indispensable for scooping, spreading, and sculpting the paste. Stiff bristle brushes are also highly useful for creating stippled textures or blending edges. If a kit does not include these tools, you will need to budget for them separately, which can increase your initial setup cost.
Safety certifications and non-toxic seals should never be overlooked, especially if you work in a home studio or a poorly ventilated space. Look for reputable safety seals, such as the AP (Approved Product) seal from the Art and Creative Materials Institute (ACMI). This certification indicates that the product has been toxicologically evaluated and contains no materials in sufficient quantities to be toxic or injurious to humans. Ensuring your materials are non-toxic is particularly important if you anticipate prolonged skin contact during hand-sculpting or if children will be participating in the creative process.
Common Configurations of Texture Paint Starter Kits
Understanding the common configurations of texture paint starter kits helps you manage your expectations and select the format that best matches your workflow. Pre-mixed texture paint sets are designed for immediate, out-of-the-box use. These kits typically contain several small jars of pre-colored, textured acrylic paint. They are highly convenient for quick projects or art journaling, as they eliminate the prep work of mixing colors. However, they offer limited flexibility if you decide you want a smoother finish or a different shade, and they can be more expensive on a per-ounce basis.
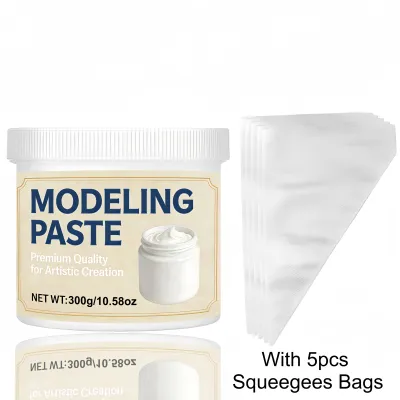
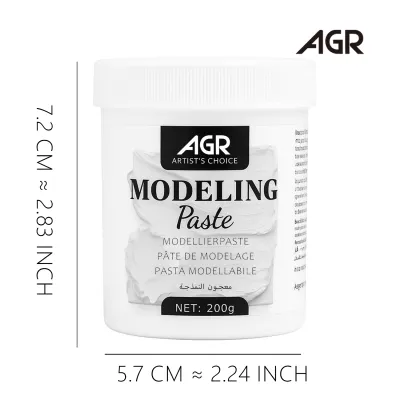
Modeling paste and gel medium kits are the industry standard for versatile mixed media work. These kits generally feature a large tub of white modeling paste, a jar of gloss or matte gel medium, and a basic set of acrylic paints. This setup is highly recommended for beginners because it teaches the fundamentals of medium manipulation. You learn how adding gel medium increases transparency and gloss, while modeling paste adds opacity and structural body. This foundational knowledge is invaluable as you progress to larger, more complex mixed media projects.
Coarse and fine pumice gel sets represent a more specialized configuration, focusing on creating a textured “tooth” on your substrate. Pumice gels dry to a hard, gritty finish that closely resembles fine sandpaper. This unique surface is specifically designed to grab and hold dry media, such as soft pastels, charcoal, colored pencils, and graphite. If your mixed media style involves layering dry drawing materials over painted backgrounds, a pumice gel starter kit provides a suitable foundation, ensuring your dry layers adhere securely without smudging or flaking off.
Regardless of the configuration you choose, always cross-reference the specific product label for exact volume, component lists, and drying characteristics before finalizing your purchase. Some kits may appear to offer a large number of items, but the individual jars may contain very little product, limiting you to small-scale practice pieces. Checking the total volume (usually listed in milliliters or fluid ounces) ensures you have sufficient material to complete your intended projects without interruption.
Essential Tools and Substrates to Pair with Your Kit
To get the most out of your texture paint starter kit, you must pair it with the appropriate tools and substrates. The choice of palette knife is particularly important when working with abrasive mediums. Metal palette knives, typically made of stainless steel, offer excellent flexibility and durability. They are ideal for smooth modeling pastes and detailed palette knife painting. However, if your kit includes highly abrasive coarse gels or pumice mediums, plastic palette knives are often preferred. Plastic knives are highly cost-effective and will not suffer from the micro-scratching and eventual degradation that abrasive granules can cause on metal surfaces.
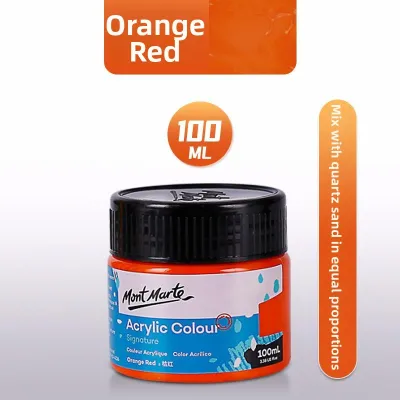
Tinting plain texture pastes requires the right type of paint to maintain the structural integrity of the binder. Heavy-body acrylics are the preferred choice because their thick, buttery consistency blends seamlessly with modeling paste without thinning it out. This allows the mixture to retain its ability to hold high peaks and sharp textures. Fluid acrylics, high-flow acrylics, or liquid inks can also be used, but they should be added sparingly. Excessive liquid can over-saturate the binder, leading to a runny consistency that slumps during drying and is more prone to cracking.
The substrate you choose is critical to the longevity of your textured artwork. Stretched canvas, while popular for traditional painting, is highly flexible and can sag under the heavy weight of thick texture paint. This sagging creates structural tension, which often results in deep cracks as the paste dries and contracts. To prevent this, always opt for a rigid substrate. Wood panels, medium-density fiberboard (MDF) boards, or heavily primed, rigid canvas boards provide the stable, non-flexing support necessary to carry heavy texture loads without warping or cracking.
Singapore’s warm and humid climate can significantly accelerate the drying time of acrylic-based texture pastes. While fast drying can be advantageous, it can also cause the paste to “skin over” too quickly, limiting your working time for blending, sculpting, or embedding collage elements. To counteract this, consider adding a small amount of acrylic retarder medium to your mixture. A retarder slows down the evaporation of water from the acrylic binder, extending the open time and allowing you to work at a more relaxed pace, even in warm environments.
Where to Verify and Purchase Art Supplies in Singapore
When purchasing texture paint starter kits in Singapore, verifying the physical condition and authenticity of the product is essential. Visiting specialized local art supply retailers, such as those located in the Bras Basah Complex or dedicated art boutiques in central districts, is highly recommended. These physical stores often display dried swatches and texture boards, allowing you to touch and inspect the final finish of different pastes before buying. Additionally, physically handling the jars lets you check for any signs of settling or separation, ensuring you receive a fresh, high-quality product.
For online shopping, it is safest to check official brand websites or authorized online art stores that serve Singapore. These platforms provide complete product specifications, safety data sheets (SDS), and accurate component lists. Buying from authorized channels guarantees that you are receiving genuine products that have been stored and transported under appropriate conditions. This is particularly important for heavy mediums, which can degrade if exposed to extreme temperatures during long transit periods.
Avoid purchasing texture paints from unverified third-party sellers on general e-commerce platforms or online marketplaces. Because texture paints contain water-based binders, they have a limited shelf life and can easily dry out, separate, or spoil if stored incorrectly in non-climate-controlled warehouses. Unverified sellers may offer lower prices, but they often sell older stock that has already begun to cure inside the jar, rendering the medium unusable. Investing in authentic products from reputable retailers ensures your materials perform exactly as intended.
When shopping in-store, do not hesitate to inquire with the staff about the specific storage conditions of their heavy pastes. Reputable art supply stores in Singapore understand the impact of local humidity and heat on art mediums and typically store their inventory in climate-controlled environments. Ensuring that the starter kit you purchase has been kept cool and dry guarantees that the binder remains stable, flexible, and ready for your mixed media creations.
Frequently Asked Questions (FAQ)
Can I mix regular acrylic paint directly into texture paste?
Yes, you can mix standard acrylic paint directly into neutral texture paste or modeling paste to create custom colors. Heavy-body acrylics are highly recommended for this purpose, as their thick consistency blends smoothly without compromising the paste’s ability to hold sharp peaks and structural details. However, you should avoid adding excessive amounts of fluid acrylics, inks, or water. Over-thinning the mixture dilutes the acrylic binder, which can cause the paste to become runny, shrink excessively as it dries, or develop deep cracks. Always refer to the manufacturer’s recommended mixing ratios on the product label to ensure the structural integrity of your textured layers.
How do I prevent texture paint from cracking on canvas?
Preventing texture paint from cracking requires careful application and the right substrate. First, apply the texture paint in multiple moderate layers, allowing each layer to dry completely before applying the next, rather than laying down one extremely thick coat. This ensures that the moisture evaporates evenly throughout the entire depth of the medium. Second, avoid using flexible stretched canvases for heavy, sculptural work, as they sag under the weight and cause the drying paste to crack. Instead, use a rigid substrate such as a wood panel, MDF board, or a sturdy, heavily primed canvas board that will not flex or warp.
What is the best way to clean palette knives after using texture paste?
The most effective way to clean your palette knives is to wipe off any excess texture paste immediately with a dry rag or paper towel before the medium has a chance to dry or skin over. Once the bulk of the paste is removed, wash the tools thoroughly with mild soap and warm water while the binder is still wet. Avoid letting the paste dry completely on your tools, as cured acrylic binders are highly water-resistant and difficult to remove without scraping, which can scratch or bend the flexible edges of your palette knives. Do not use harsh chemical solvents unless the manufacturer’s instructions explicitly require them for a specific oil-based medium.
Community discussion
Share your experience or ask a question. Comments are reviewed before publication.