
Selecting the ideal 16-inch writing or drawing pad for architectural drafting requires matching the paper’s physical properties to your specific design phase and drawing instruments. In professional architecture, a “16-inch” pad typically refers to large-format sheets—such as 16 by 20 inches or 16 by 24 inches—that provide ample space for scaling floor plans, elevations, and detailed structural sections. The right pad serves as a reliable foundation for conceptual overlays, precise technical line work, and client presentations. Rather than searching for a single universal winner, you must evaluate how different paper types, surface textures, and binding styles interact with your technical pens, graphite pencils, and workspace constraints.
In Singapore’s professional design environments, where space efficiency and material durability are paramount, selecting the correct drafting medium directly impacts the clarity of your technical communication. Whether you are working on a spacious drafting table in a studio or a compact desk in a home office, the physical format of your pad dictates your daily comfort and efficiency. By understanding the technical specifications of drafting papers and verifying their performance through simple observable checks, you can build a reliable toolkit that supports your creative and technical workflows without unexpected ink feathering, paper tearing, or line distortion.
Understanding Size Formats and Paper Types for Drafting
Large-format drafting pads measuring 16 inches along their shorter or longer edge offer a practical middle ground between standard desktop sizes and massive blueprint rolls. A 16×20-inch or 16×24-inch pad provides sufficient surface area to draw to common architectural scales, such as 1:50 or 1:100, without constantly running out of margin space. When planning your workspace, verify that your desk or drafting table can comfortably accommodate the full footprint of the pad along with your parallel rulers, T-squares, and reference materials. If your workspace is compact, a pad that fits precisely within your active drawing zone prevents the edges from overhang, which can lead to accidental creases and torn corners.
Products mentioned in this guide
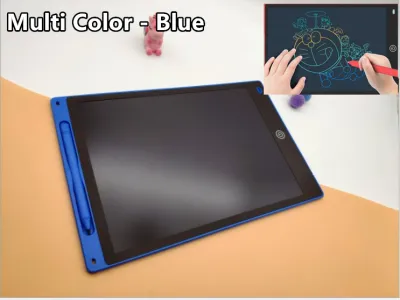

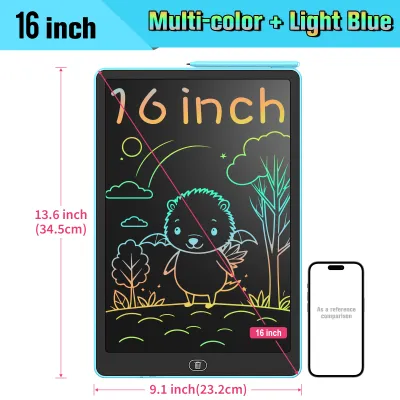
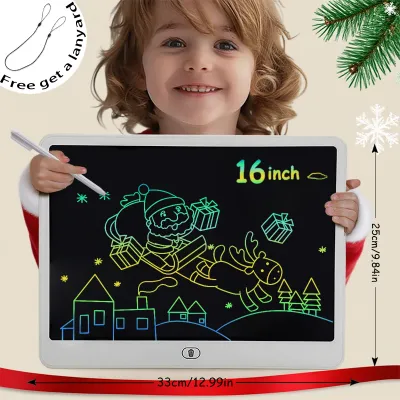
![[✅SG Ready Stock] 16Inch Colors LCD Writing Tablet Electronic Drawing Doodle Board Digital Colorful Handwriting Pad Gift for Kids USB Charging](https://img.lazcdn.com/g/p/3a64bf5129dbb3634660944717416c52.png_400x400q80.png_.webp)

Prices are valid at publication and may change. Please refer to the product page for the latest price.
The specific paper type you choose should align with your current project phase, as different materials serve distinct roles in the architectural workflow. Tracing paper, often referred to as detail paper or butter paper, is highly translucent and lightweight, making it indispensable for quick conceptual overlays, space planning, and iterative design revisions. Vellum, a heavier and more durable cotton-fiber paper, offers exceptional archival quality and a smooth, slightly toothy surface ideal for final technical drawings and high-precision ink work. Grid or graph paper pads featuring non-reproducible blue lines assist in rapid scaling and alignment during initial drafting stages, while plain bond paper provides a clean, opaque background suitable for standalone sketches and presentation layouts.
Sheet count and overall pad thickness are practical considerations that affect both storage and usability. High-sheet-count pads, containing 50 to 100 sheets, offer excellent value for high-volume conceptual sketching but can be heavy and cumbersome to transport to site visits or client meetings. Conversely, thinner pads with 20 to 30 sheets of premium vellum or heavy bond paper are easier to store flat, reducing the risk of paper warping in humid climates. When selecting a pad, consider your project duration and storage facilities; storing large-format pads horizontally in flat-file drawers is ideal for preventing the paper from curling or sagging over time.
Matching Paper Surface and Weight to Your Drafting Tools
The interaction between your drawing instruments and the paper surface determines the precision and legibility of your architectural lines. Paper texture, or “tooth,” plays a critical role in how graphite and ink adhere to the sheet. A paper with a moderate tooth is excellent for graphite pencils, as it shears the lead effectively to produce dark, consistent lines without requiring excessive hand pressure. For technical pens and fine-liners, a smoother surface is preferable to prevent ink feathering and to ensure that fine line weights, such as 0.1mm or 0.2mm, remain crisp and distinct. Before committing to a large project, perform a simple test line on a corner of the sheet to verify that your preferred pen tip glides smoothly without catching on the paper fibers.

Because smoothness, bleed resistance, drying speed, and erasability depend on the exact combination of paper fibers and ink formulas, you should perform a quick manual test before starting a major project. Draw a series of intersecting lines using your standard technical pens and markers on a small corner of the sheet. Observe the drying speed by gently tapping the ink after a few seconds, and check the reverse side of the paper to verify bleed resistance. To test erasability, apply your standard graphite pencil with normal drafting pressure, erase it completely with a vinyl eraser, and inspect the surface under a bright light to ensure there is no pilling, tearing, or persistent ghosting.
Architectural drafting is an iterative process that demands frequent revisions, making erasure tolerance a key performance metric for any drafting pad. High-quality drafting papers must withstand repeated erasing with both vinyl and electric erasers without pilling, thinning, or tearing. When testing a pad’s erasure tolerance, observe whether graphite lines leave permanent “ghost” marks or if the paper surface loses its texture after correction. Premium vellum is highly regarded for its exceptional erasability, allowing you to scrape away ink lines carefully with a drafting blade or erase heavy graphite repeatedly while maintaining a clean, smooth surface ready for redrawing.
Choosing the Right Binding and Backing for Your Workspace
The physical construction of a drafting pad influences how easily you can work across the entire sheet and how cleanly you can remove finished drawings. Tape-bound pads feature a sturdy adhesive strip along the top edge that holds the sheets securely while allowing them to lie completely flat, which is essential for maintaining scale accuracy with T-squares and drafting machines. Spiral-bound pads offer the convenience of 360-degree page rotation, making them highly portable and easy to use in tight spaces, though the spiral wire can sometimes interfere with drawing instruments near the margin. Glue-top pads allow for quick, effortless sheet removal, but you must verify that the adhesive is strong enough to prevent sheets from detaching prematurely during active drawing sessions.
A rigid backing board is a crucial component of any large-format writing or drafting pad, especially if you work away from a dedicated drafting table. A thick, heavy-duty cardboard backing provides the necessary structural support to use the pad on your lap, on site, or on uneven surfaces without the paper flexing or bending. If your pad lacks a rigid backing, you will need to secure it to a separate drawing board or portable drafting table using drafting tape or board clips. Inspect the backing board’s flatness before purchase, as warped backing can introduce subtle curves into your straight lines and compromise the accuracy of your scaled drawings.
Portability and environmental durability are particularly important for architects who split their time between a controlled studio environment and active construction sites. Singapore’s high humidity can cause lightweight papers to absorb moisture, leading to paper cockling, warping, or slow ink-drying times. To protect your work, look for pads with durable, water-resistant front covers and reinforced corners that prevent the sheets from fraying or bending during transport. If you frequently carry your 16-inch pad in a portfolio bag, a lightweight yet rigid pad design ensures that your drawings remain pristine and professional, regardless of the weather or transit conditions.
Building Your Shortlist: A Step-by-Step Selection Framework
To select the most suitable 16-inch drafting pad for your professional needs, begin by defining your primary use case and workflow requirements. If your daily tasks revolve around rapid spatial planning, concept generation, and layering ideas over existing floor plans, prioritize a lightweight, highly translucent tracing paper pad with a secure glue binding. For final technical drawings, detailed construction details, and archival-quality presentations, focus your search on heavy-weight cotton vellum pads with a rigid backing board that supports precise pen work. If you require a versatile pad for both freehand sketching and basic scaling, a plain bond pad with a moderate tooth and high opacity will serve as an excellent all-rounder.
Next, cross-reference your preferred drawing tools with the paper specifications to ensure optimal compatibility. If you rely heavily on technical ink pens, verify that the paper is rated for ink drafting and features a smooth, non-porous surface that prevents feathering. For those who prefer graphite or colored pencils, ensure the paper has sufficient tooth to hold the pigment without smudging easily. Additionally, consider how you prefer to work: if you frequently tear sheets out to scan, copy, or overlay on a light box, a tape-bound or micro-perforated pad is essential for clean, tear-free sheet removal.
Finally, verify the product labels and manufacturer specifications carefully before making a purchase from professional art supply stores or online marketplaces. While a premium pad might cost between S$30 and S$60 depending on the paper grade and sheet count, this investment pays off in the precision of your final drawings and the ease of making revisions. Look for clear indications of paper weight (such as gsm or lb), sheet dimensions, and material composition (such as 100% cotton fiber for vellum). Avoid generic writing pads that do not explicitly state their paper type or weight, as these often lack the surface consistency and erasure tolerance required for professional architectural work. By systematically matching your workflow, tools, and environmental conditions to the pad’s physical specifications, you can confidently invest in a drafting medium that enhances your precision and creative output.
Frequently Asked Questions (FAQ)
Can I use standard lined writing pads for architectural drafting?
Standard lined writing pads are not suitable for professional architectural drafting due to several functional limitations. The pre-printed horizontal lines create significant visual interference, making it difficult to read precise architectural grids, scales, and fine technical line work. Furthermore, standard office paper typically lacks the necessary paper weight, opacity, and surface strength required for drafting. It tends to feather technical ink, bleed through easily when using markers, and pill or tear under the friction of repeated erasing and scaling adjustments.
What is the difference between a drafting pad and a sketch pad?
The primary difference between a drafting pad and a sketch pad lies in their paper texture, weight, and structural design. Drafting pads are engineered for technical precision, featuring smooth, high-density papers like vellum or tracing paper that minimize ink feathering and allow for clean, ghost-free erasures. Sketch pads, on the other hand, often feature textured paper with a heavier tooth designed to grab dry media like charcoal, graphite, and pastels for expressive shading. Additionally, drafting pads often incorporate rigid backing boards and flat-lay bindings to support precise ruler work, whereas sketch pads may use flexible bindings optimized for varied drawing angles.

Community discussion
Share your experience or ask a question. Comments are reviewed before publication.