
To determine if a plastic laminate sheet is compatible with your laminating machine, you must match four critical specifications: the heating mechanism (hot vs. cold), the physical entry width of the machine, the thickness of the sheet (measured in mil or microns), and the format (pouch vs. roll). Mismatching any of these factors can lead to incomplete sealing, permanent machine damage, or ruined documents. Understanding these technical variables ensures your projects turn out smooth, clear, and professionally protected.
Quick Checklist: Is Your Laminate Sheet Compatible?
Before purchasing or using a new batch of laminating supplies, run through this quick checklist to ensure seamless operation:
- Lamination Mechanism: Confirm whether your machine uses thermal (hot) heat activation or pressure-sensitive (cold) adhesion.
- Physical Entry Width: Ensure the plastic laminate sheet's width is less than or equal to the maximum feed slot width of your laminator.
- Thickness Rating: Check that the sheet's thickness (in mil or microns) falls within the minimum and maximum limits supported by your machine's motor and rollers.
- Supply Format: Verify if your laminator is designed for pre-cut pouches or continuous film rolls.
Locating the manufacturer’s specification label—usually found on the underside or back of the device—or consulting the user manual is the most reliable way to find these parameters. Attempting to run incompatible supplies through your machine can cause immediate jams, adhesive leakage onto the internal rollers, or motor strain that voids your warranty.
Products mentioned in this guide
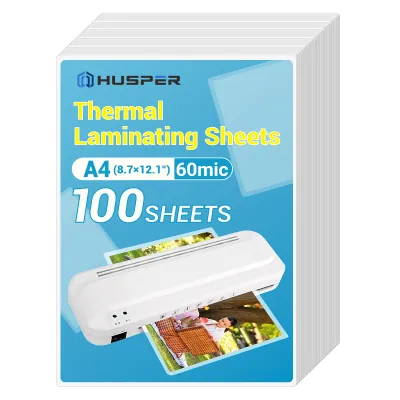
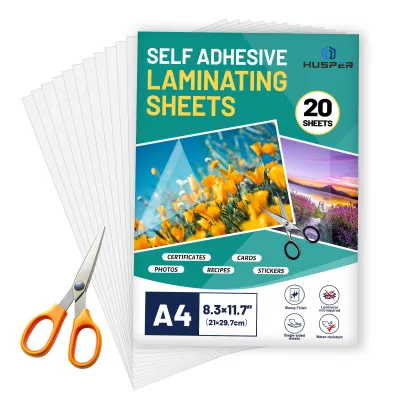
Prices are valid at publication and may change. Please refer to the product page for the latest price.
Match the Mechanism: Hot vs. Cold Laminating Sheets
Laminating machines use either heat or pressure to seal the protective plastic layers around your document. Matching the chemical properties of your plastic laminate sheet to your machine’s operating mechanism is vital for a successful seal.

Hot laminating sheets, often labeled as “thermal” sheets, feature an adhesive layer that remains dry and non-tacky at room temperature. When fed through a thermal laminator, the internal heating elements raise the temperature of the rollers or plates, melting this adhesive so it can bond securely with the paper fibers. Without sufficient heat, the adhesive will not activate.
Cold laminating sheets utilize a pressure-sensitive adhesive that is tacky to the touch even before entering the machine. The laminator’s rollers simply apply mechanical pressure to press the sheet firmly against the document, squeezing out air bubbles and activating the bond without any heat. This method is ideal for heat-sensitive materials like thermal paper receipts or glossy photographs.
To check your machine’s mechanism, inspect the control interface. Thermal laminators typically feature a power switch, a “Ready” indicator light (which illuminates once the heating element reaches operating temperature), and often a toggle switch to select different heat levels (such as 3 mil or 5 mil). Cold-only laminators lack these heating indicators and heating elements, featuring only a manual hand crank or a simple motor switch. Many modern office laminators are dual-mode, featuring distinct “Hot” and “Cold” settings.
Running a hot thermal pouch through a cold-only machine results in zero adhesion; the pouch will emerge completely unsealed because there is no heat to melt the glue. Conversely, feeding a cold pressure-sensitive sheet through a hot machine is highly destructive. The intense heat will liquefy the cold-sensitive adhesive, causing it to squeeze out of the edges, coat the heated rollers, and create a sticky, smoking jam that can permanently ruin the machine’s internal mechanics.
Compare Machine Width and Sheet Size to Prevent Jams
A common point of confusion is assuming a machine labeled as an “A4 laminator” can only accept A4-sized paper. In reality, the designation refers to the maximum entry width of the feed slot, not the paper itself.
An A4 laminator typically has an entry slot width of approximately 230 mm to 240 mm. This extra clearance is essential because a standard A4 plastic laminate sheet is designed to be slightly larger than A4 paper (which is 210 mm x 297 mm) to provide a protective border. A standard A4 laminating pouch usually measures 220 mm x 307 mm.
Before purchasing, check the product packaging for the exact outer dimensions of the sheet. Compare this measurement directly to the maximum entry width specified on your machine’s label. The sheet can be narrower than the slot, but never wider. You can safely run smaller pouches, such as ID card size (54 mm x 86 mm) or A5 size, through an A4 or A3 laminator. However, attempting to feed an A3 pouch (which is roughly 329 mm wide) into an A4 laminator is physically impossible and will cause the sheet to crumple, fold, and jam immediately at the entry mouth.
When placing your document inside a pouch, always ensure there is a margin of at least 3 mm to 5 mm of clear plastic around all edges of the paper. This margin allows the top and bottom plastic layers of the sheet to fuse directly to one another. Without this margin, the paper will prevent the edges from sealing, allowing moisture to seep in, or allowing liquefied adhesive to escape onto the rollers during the laminating process.
Verify Thickness Limits: Understanding Mil and Micron Specs
Laminate thickness is measured using two different systems depending on the region and manufacturer: mils (common in US-branded supplies) and microns or micrometers (abbreviated as mic, common in Singapore and international markets). One mil is equal to one-thousandth of an inch, which translates to approximately 25.4 microns.
To help visualize this, a standard 3 mil sheet is roughly equivalent to 75 or 80 microns, while a heavy-duty 5 mil sheet is approximately 125 microns. A very rigid 10 mil sheet is about 250 microns.
Some manufacturers list the thickness “per flap” (meaning one side of the pouch), while others list the “total thickness” of the folded pouch combined. For example, a pouch labeled “150 mic (2 x 75 mic)” consists of two 75-micron flaps. Ensure you know whether your machine’s specification limit refers to the single-flap thickness or the total combined thickness of the pouch plus the document inside.
Basic home or small-office laminators are often limited to a maximum thickness of 3 mil to 5 mil (75 to 125 microns per flap). Heavy-duty professional machines can handle up to 10 mil (250 microns). Running a sheet that is too thick for your machine can prevent the heat from penetrating to the core adhesive, resulting in a cloudy, unsealed document. Additionally, the excess thickness can strain the motor, separate the rollers, or cause a severe physical jam. Conversely, running a sheet that is too thin (such as a 75-micron sheet on a machine locked at a high-temperature setting designed for 125 microns) can cause the plastic to overheat, warp, bubble, or wrap itself around the rollers.
If your machine features adjustable temperature or speed settings, always configure them to match the exact thickness of the plastic laminate sheet you are using. High-quality machines often have dedicated buttons or dials labeled “75 mic / 3 mil” and “125 mic / 5 mil” to automate this adjustment.
Confirm the Format: Pouch vs. Roll Laminators
Laminators are built around two fundamentally different feeding systems: pouch systems and roll systems. Pouch laminators are the most common type found in homes, schools, and offices. They use individual, pre-cut plastic laminate sheets that are sealed along one edge, forming a pocket where the document is inserted before being fed through the machine.
Roll laminators, on the other hand, are typically larger, industrial-grade machines used for high-volume projects, banners, or posters. They utilize two continuous rolls of laminating film mounted on metal spindles or mandrels. The machine pulls the film from both rolls simultaneously, sandwiching the document between them as it passes through.
These formats are completely incompatible. You cannot use roll film in a pouch laminator, nor can you feed individual pouches through a roll laminator without specialized carriers or setups.
To identify your machine’s feed mechanism, look at the entry point. If your device has a simple, narrow slot on the front and a flat exit tray on the back, it is a pouch laminator. If it features exposed metal rods, spindles, or large exposed cylinders of plastic film, it is a roll laminator. Always buy supplies that explicitly match this structural design.
How to Safely Test a New Laminate Sheet
Before committing an important document—such as a certificate, a unique photograph, or an irreplaceable piece of artwork—to a new brand or thickness of plastic laminate sheet, perform a controlled test run.
Step 1: Prepare a dummy document. Cut a piece of scrap paper that matches the exact weight, texture, and thickness of your final project. Insert this scrap paper into the test laminating sheet, leaving the recommended 3 mm to 5 mm perimeter border.
Step 2: Configure the machine settings. Turn on your laminator and select the appropriate temperature or speed setting recommended on the sheet’s packaging. Wait until the “Ready” indicator light turns on, signaling that the rollers have reached a stable operating temperature.
Step 3: Feed the test sheet. Gently insert the sealed edge of the sheet straight into the machine’s entry slot. Do not force or push it; let the motorized rollers naturally grab and pull the sheet forward. Closely monitor the sheet as it enters and exits the machine.
Step 4: Inspect the results. Lay the finished test piece on a flat surface and let it cool for a few seconds. Check for clarity, complete edge sealing, and smoothness. If the sheet is perfectly transparent, stiff, and sealed completely around the paper, your settings are correct.
Safety Warning: If you hear any unusual grinding noises, if the motor sounds heavily strained, or if the sheet begins to skew or bunch up inside the machine, turn off the power switch immediately and unplug the device from the electrical outlet. Never attempt to pull a jammed sheet backward out of the machine while the motor is running, as this can permanently warp the silicone rollers.
Troubleshoot Common Signs of Incompatible Laminate
If your laminated documents are not coming out perfect, the issue is often a mismatch between the sheet specifications and the machine settings:
- Cloudy or Milky Appearance: If your laminated document emerges with a hazy, white, or cloudy finish, it usually indicates that the adhesive did not melt completely. This happens when the sheet is too thick for the machine's current heat output, or if the machine was not allowed to preheat fully. If your laminator has adjustable heat, increase the setting slightly. Alternatively, you can try running the cooled sheet through the machine a second time to apply additional heat.
- Bubbling, Wrinkling, or Curling: If the finished sheet is covered in small air bubbles, deep wrinkles, or is severely warped, the temperature is likely too high for the thinness of the plastic. The excess heat causes the plastic film to distort and the adhesive to boil. Switch to a lower temperature setting or allow the machine to cool down before trying again with a new sheet.
- Jamming or Non-Feeding: If the sheet enters the machine but stops moving or wraps around the internal rollers, it is often because the sheet was inserted open-side first, exceeded the maximum thickness limit, or was fed at an angle. Always feed laminating pouches sealed-edge first to prevent air pockets and adhesive leakage. If a jam occurs, use the machine's release lever (often labeled "ABS" or "Release") to manually disengage the rollers and gently extract the sheet.
If these troubleshooting steps do not resolve the issue, stop using those specific sheets and consult your machine’s manual.
Frequently Asked Questions (FAQ)
Can I use a thicker laminate sheet if I slow down the machine speed?
No, slowing down the feed speed does not alter the physical clearance between the machine’s internal rollers or increase the torque capacity of the drive motor. While some professional machines allow you to adjust speed to control heat transfer, forcing a sheet that exceeds the maximum thickness rating specified by the manufacturer will still likely cause a severe jam. The physical thickness of the paper and plastic combined must fit comfortably within the roller gap. Forcing an oversized sheet can compress the silicone rollers, strain the gear assembly, or burn out the motor. Always adhere to the maximum thickness limits of your specific machine.
What should I do if my laminator doesn't list a maximum thickness?
If your laminating machine is an older model or lacks visible specification labels, your first step should be to search online for a digital copy of the user manual using the exact brand and model number. If no documentation is available, it is safest to assume a conservative baseline. Start by using standard 3 mil (approximately 75 to 80 microns per flap) laminating pouches. This thickness is universally supported by almost all entry-level and basic thermal pouch laminators on the market. Run a few test sheets using scrap paper and closely observe the performance. If the machine handles 3 mil sheets easily without motor strain or cloudiness, you can proceed with confidence. Avoid using thicker 5 mil or 10 mil pouches unless you have verified that the machine is designed to handle them.
Community discussion
Share your experience or ask a question. Comments are reviewed before publication.