
Achieving a realistic chrome effect with Tamiya mirror paint relies on three core principles: an ultra-smooth gloss black base, extremely thin mist coats, and avoiding any post-paint polishing or thick clear coats. Unlike standard metallic paints that use coarse flakes to simulate metal, mirror paint uses highly aligned, microscopic metallic particles that mimic a solid sheet of polished chrome. This guide walks you through the step-by-step process to master this delicate technique and avoid the most common pitfalls.
Preparing Your Model and Workspace
To achieve a flawless finish, you must start with a pristine surface. Any microscopic scratch, speck of dust, or fingerprint on the bare plastic will be magnified tenfold once the reflective mirror paint is applied. Begin by washing all plastic parts thoroughly in warm, soapy water. This step removes residual mold release agents, grease, and oils from handling that can prevent paint from adhering correctly. Rinse the parts with clean water and let them air dry completely in a dust-free environment.
Once dry, inspect the parts under a bright light. Use progressive fine-grit sandpaper, starting around 1000-grit and working up to 3000-grit, to smooth out mold lines, sprue gates, and surface imperfections. After sanding, apply a high-quality primer. The primer serves two purposes: it reveals hidden surface flaws that require further sanding, and it provides a stable, uniform surface for the subsequent paint layers to grip.
Products mentioned in this guide
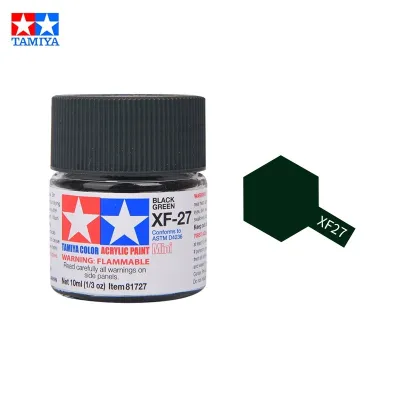
Prices are valid at publication and may change. Please refer to the product page for the latest price.
Your workspace environment is just as critical as the model itself. Set up your painting station in a clean, dust-free, and well-ventilated area. In humid climates like Singapore, high ambient moisture can cause paint to blush or dry unevenly. Working in an air-conditioned room or using a dedicated spray booth equipped with a moisture trap on your airbrush line is highly recommended. Always wear a protective organic vapor mask and ensure adequate ventilation when spraying solvent-based hobby paints.
Applying the Gloss Black Base Coat
The secret to a convincing chrome finish lies entirely beneath the mirror paint. A gloss black undercoat is mandatory because the metallic particles in mirror paint are incredibly thin and semi-translucent. They act like microscopic mirrors; they require a highly smooth, dark background to absorb stray light and reflect direct light back to the viewer. If you use a matte base or a lighter color, the light will scatter, resulting in a dull, standard silver finish rather than a reflective chrome.

Spraying a smooth gloss black base requires patience and control. Whether you are using an airbrush or a spray can, start with a very light mist coat to establish adhesion. Follow this with a medium wet coat. The goal is to apply enough paint so that the surface flows together into a smooth, glass-like sheet, but not so much that the paint runs, pools in recessed details, or develops an uneven “orange peel” texture. Keep your spraying motion steady and parallel to the surface.
After spraying, place the parts under a protective cover, such as a clean plastic tub, to prevent airborne dust from settling on the wet paint. Allow the gloss black base to cure completely. This curing process can take anywhere from 24 to 48 hours depending on the specific paint type used. Do not rush this step; any residual solvents escaping from an uncured base coat will disrupt the alignment of the mirror paint particles applied on top, ruining the reflective effect.
Spraying the Tamiya Mirror Paint
Once your gloss black base is fully cured and resembles a polished black piano finish, you are ready to apply the mirror paint. Before opening the container, shake it thoroughly for at least two minutes. The metallic pigments used in mirror paint are exceptionally heavy and settle quickly to the bottom of the bottle or can. Continue to shake the paint periodically throughout your painting session to maintain a consistent mixture.
If you are using an airbrush, set your air pressure to a relatively low setting, typically between 10 and 15 PSI. This low pressure prevents the paint from drying in the air before it hits the model, while still allowing for fine atomization. Hold the airbrush or spray can further back than you normally would—approximately 15 to 20 centimeters away from the surface.
The application technique for mirror paint is the exact opposite of the gloss black base. Instead of spraying a wet coat, you must apply extremely light, dry mist coats. The paint should dry almost instantly upon contact with the model. Move the airbrush quickly across the surface in sweeping, even passes. Do not allow the paint to pool or look wet at any point.
Allow a few minutes of flash-off time between each pass to let the solvents evaporate. As you build up the layers gradually, you will observe a fascinating visual transition. The surface will shift from a deep gloss black to a dark, smoky chrome, and finally to a bright, highly reflective mirror finish.
The most critical skill in this process is knowing when to stop. Watch the surface closely under a direct light source. The moment you achieve a bright, uniform reflection, stop spraying immediately. If you apply even one pass too many, the metallic particles will pile up randomly on top of each other rather than laying flat. This disrupts their alignment and instantly turns your brilliant chrome finish into a dull, standard silver paint job.
Handling, Masking, and Topcoating Limitations
A finished mirror paint layer is incredibly delicate and requires careful handling. The metallic particles sit on the very surface of the paint film and are not bound by a heavy resin. Because of this, you must never touch the painted parts with bare hands. Always wear clean, lint-free cotton gloves when handling or assembling the model. The natural oils and moisture from your skin can permanently tarnish and dull the reflective chrome effect.
Masking over a mirror finish carries a high risk of failure. Standard masking tapes, even those designed for modeling, possess adhesives that can easily pull the delicate metallic particles right off the gloss black base. If masking is absolutely necessary, use low-tack masking tape and reduce its tackiness further by pressing it against your clean skin or a cutting mat several times before applying it to the model. Alternatively, plan your build sequence so that the chrome parts are painted separately and attached at the very end of assembly using a non-fogging adhesive like white PVA glue.
Applying a standard clear topcoat is another common pitfall that can destroy your hard work. Traditional clear coats, whether acrylic, lacquer, or enamel, contain solvents that will re-wet the mirror paint layer. This causes the microscopic metallic particles to shift and lose their flat alignment, instantly dulling the chrome effect. For the absolute brightest and most realistic mirror finish, it is highly recommended to leave the paint completely bare and unsealed. If the model is a display piece that will not be handled, a topcoat is entirely unnecessary.
Troubleshooting Common Mirror Paint Issues
If your finished model looks like ordinary silver paint rather than reflective chrome, the most likely cause is applying the paint too heavily or holding the spray nozzle too close to the surface. This floods the gloss black base and prevents the metallic particles from aligning correctly. High humidity can also cause moisture to become trapped within the paint layers, resulting in a cloudy or blushed finish.
Dust contamination and pooling in panel lines are other frequent issues. Dust nibs will stand out prominently on a highly reflective surface, while pooling occurs when the paint is applied too wet, causing the metallic particles to accumulate in recessed details.
Because mirror paint relies on a microscopic, highly aligned layer of metallic particles, it cannot be sanded, buffed, or polished to correct mistakes. Any attempt to use polishing compounds or sandpaper will immediately cut through the thin metallic layer and expose the black undercoat. The only viable method for correction is to strip the paint entirely using a plastic-safe paint remover, re-prime the surface, and begin the process again from the preparation stage.
Frequently Asked Questions (FAQ)
Can I brush-paint Tamiya mirror paint?
No, brush painting is highly unsuitable for achieving a true mirror finish. The physical action of a brush leaves visible brush strokes and disrupts the delicate, flat alignment of the metallic particles. To achieve the necessary reflective effect, the paint must be atomized into an extremely fine mist using an airbrush or a high-quality spray can, allowing the particles to settle evenly across the surface.
How do I clean my airbrush after using mirror paint?
Clean your airbrush immediately after spraying to prevent the heavy metallic particles from settling and clogging the internal components. Flush the system thoroughly with a strong lacquer thinner or a dedicated airbrush cleaner. Disassemble the needle and nozzle cap, then use a fine brush or cotton swab soaked in thinner to wipe away any stubborn metallic residue from the fluid tip and nozzle. Ensure no metallic flakes remain in the cup before spraying other colors.

Community discussion
Share your experience or ask a question. Comments are reviewed before publication.