
Selecting your first set of spray paints can feel overwhelming given the vast array of colors, finishes, and chemical formulas lining hobby shop shelves. For a beginner, the key to a successful first build is restraint. You do not need a massive collection of aerosol cans to achieve a professional, clean finish on your model. Starting with just three essential categories of paint—a surface primer, a single primary base color, and a protective clear topcoat—is the most efficient way to complete your first project. This disciplined approach keeps your initial setup costs low, prevents unused cans from cluttering your workspace, and allows you to master basic spraying techniques before expanding your palette.
By focusing on how paint interacts with plastic and understanding the specific requirements of your model kit, you can avoid the common pitfall of buying specialized colors that you may never use. Developing a systematic selection process ensures that every can you purchase serves a direct purpose on your workbench, resulting in a cleaner finish and a more enjoyable building experience.
Identify Your Model Type and Painting Needs
Before purchasing any paint, you must analyze the specific genre of the model kit you plan to build. Different subject matters require entirely different paint characteristics and color palettes. For example, science fiction and mecha models, such as Gundam kits, are often molded in multi-colored plastic. If you are building one of these kits, you may not need to paint the entire model. Instead, your first project might only require a matte clear coat to eliminate the toy-like plastic sheen, or perhaps a single primary color to customize a few armor panels. Limiting your first mecha project to accent painting prevents you from becoming overwhelmed by complex masking and multi-color schemes.
Products mentioned in this guide
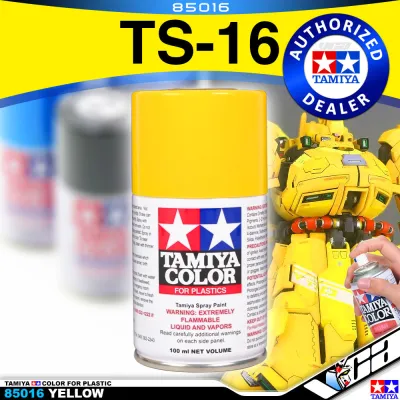
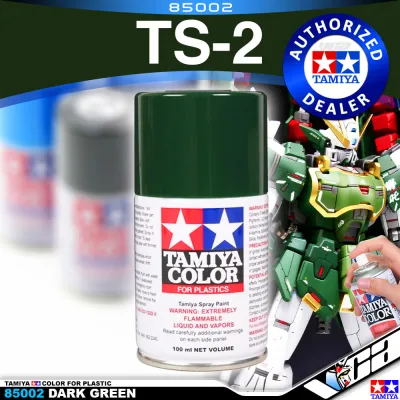
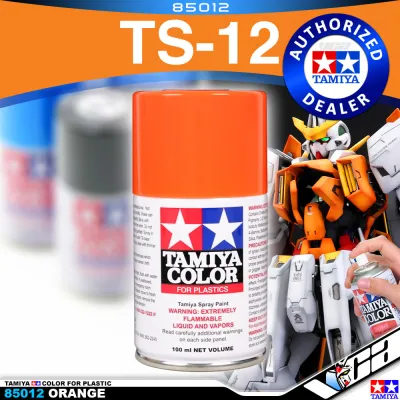
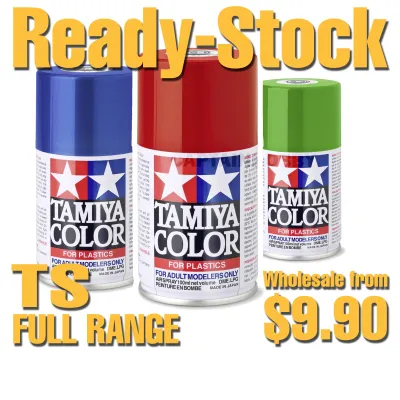
Prices are valid at publication and may change. Please refer to the product page for the latest price.
In contrast, military models, such as historical tanks, armored vehicles, or aircraft, are typically molded in a single, neutral plastic color like olive green or grey. These kits demand a full base coat to look realistic. For a military subject, your primary color choice should be a flat, non-reflective neutral tone that matches the historical subject. Beginners should stick to a single-color camouflage scheme for their first build. Attempting complex, multi-toned camouflage patterns with spray cans requires advanced masking skills that can easily lead to paint bleed and frustration.
Civilian vehicles, such as sports cars and motorcycles, present a different challenge. These models rely on a high-gloss, mirror-like finish to look authentic. Achieving this requires a dedicated gloss base color followed by a compatible gloss clear coat. Because gloss paint reveals every minor surface imperfection, these models demand meticulous preparation. If you choose a car for your first build, select a solid, non-metallic primary color. Metallic and pearlescent paints contain tiny flakes that require precise distance and flow control to distribute evenly; a solid color is much more forgiving for a beginner learning to control an aerosol nozzle.
Essential Base Color Categories for Beginners
To establish a reliable painting workflow, every beginner should start with three fundamental paint categories. The first and most critical category is surface primer. Plastic model parts are manufactured using injection molding, which leaves a incredibly smooth, non-porous surface that raw paint struggles to grip. A dedicated plastic primer contains micro-fillers and mild solvents that bite into the plastic, creating a micro-textured surface that ensures excellent paint adhesion. Furthermore, primer acts as a diagnostic tool, revealing hidden mold lines, sanding scratches, and gaps that need to be filled before you apply your color coats. For most projects, a neutral grey primer is the most versatile choice. If you plan to paint your model a bright color like yellow, red, or white, choose a white primer instead, as bright topcoats lack the opacity to cover dark grey plastic effectively.

The second category is your primary base coat. This is the main color that defines your model, such as olive drab for a military tank, medium grey for a fighter jet, or solid red for a sports car. When selecting this color, refer to the instruction manual of your kit, which usually lists the recommended paint codes. As a beginner, stick to one dominant color for the entire exterior. Avoid the temptation to buy separate spray cans for small interior parts, suspension components, or engine details. These minor areas are much better suited for hand-brushing, which saves your spray paint for the large, visible outer surfaces.
The third essential category is the clear topcoat. A topcoat serves two vital purposes: it seals and protects your paint job from scratches and skin oils, and it establishes the final, uniform sheen of the model. Clear coats are available in three finishes: gloss, semi-gloss, and flat (matte). A flat topcoat is indispensable for military and mecha models, as it instantly removes the artificial shine of plastic and blends decals seamlessly into the surface. A gloss topcoat is mandatory for civilian cars to protect the paint and allow for polishing. Semi-gloss is ideal for mechanical parts, rubber tires, or vinyl components where a subtle, satin luster is required.
How to Read and Select Tamiya Spray Paint Labels
When browsing Tamiya’s extensive paint lineup, you will notice distinct two-letter prefixes on the can labels. Understanding these codes is critical because they indicate the chemical composition of the paint and the specific surfaces they are designed to cover. Using the wrong type of paint can permanently damage your model kit.
The most common series for static plastic models is the TS series, which stands for Tamiya Synthetic Lacquer. These paints are formulated specifically for polystyrene, the rigid plastic used in almost all injection-molded model kits. TS sprays dry quickly to a hard, durable finish that resists handling. They flow out smoothly, helping to prevent the orange-peel texture that often plagues beginner paint jobs. Because they are lacquer-based, they should be applied in thin, misted coats to prevent the solvents from crazing the underlying plastic.
Another common series is the PS series, which stands for Polycarbonate Spray. These paints are formulated exclusively for flexible, clear polycarbonate (often referred to as Lexan) RC car bodies. PS paint is designed to remain highly flexible after curing so that it does not crack or flake off when the RC body flexes during crashes. To achieve this flexibility, PS paints utilize aggressive solvents that chemically bond with polycarbonate. If you spray a PS paint onto a standard polystyrene static model, the harsh solvents will chemically attack, melt, or severely distort the rigid plastic. Always double-check that you are purchasing a TS can rather than a PS can for your static model kits.
Additionally, Tamiya offers the AS series, which stands for Aircraft Spray. Like the TS series, AS paints are synthetic lacquers safe for polystyrene plastic. However, the AS line is specifically formulated to replicate the highly accurate, flat historical colors used on military aircraft from various eras. These paints feature extremely fine pigment grind to preserve the delicate panel lines and rivet details typical of aircraft models. If you are building a military plane, the AS series is your best choice for achieving an authentic, scale-accurate finish.
Practical Strategies to Avoid Overbuying
It is easy to get carried away in a hobby shop and purchase a dozen different spray cans for a single model. To keep your hobby affordable and manageable, adopt a strict “three-can rule” for your first project: buy exactly one can of primer, one can of your primary base color, and one can of clear topcoat. This simple constraint keeps your initial paint investment under S$40, allowing you to focus on mastering the physical mechanics of spraying—such as maintaining a consistent distance, managing your pass speed, and controlling overspray—without worrying about complex multi-stage paint schemes.
To paint the smaller details of your model without buying extra spray cans, combine your spray painting with hand-brushing. Use your aerosol cans only for the large, expansive surface areas like the main hull, fuselage, or car body. For small, intricate details—such as cockpit dials, seat cushions, tools, or exhaust pipes—purchase small, inexpensive bottles of water-based acrylic paint and apply them with a fine-tipped detail brush. Hand-brushing these details is far more precise than attempting to mask off tiny areas for spraying, and it drastically reduces paint waste.
Before committing to a specific color scheme, check the physical stock at your local hobby shops in Singapore. Because aerosol cans are classified as flammable liquids and pressurized goods, they cannot be easily shipped via standard international airmail. Relying on overseas online sellers often results in long shipping delays or high freight surcharges. Visiting a local hobby shop allows you to verify the exact color on the can lid, check stock availability in real-time, and ensure you have enough paint to complete your project without mid-build interruptions.
Safety and Preparation Checklist Before Spraying
Because Tamiya TS and AS spray paints are synthetic lacquers, they release strong volatile organic compounds (VOCs) and fine paint mist during application. Proper safety precautions are non-negotiable. In Singapore’s high-density housing environments, such as HDB flats or condominiums, spraying indoors without a professional, externally vented spray booth is highly hazardous to your health and will leave a fine layer of colorful dust on your furniture. Always spray outdoors on a well-ventilated balcony, corridor, or open yard. Additionally, wear a properly fitted respirator mask equipped with organic vapor cartridges to protect your lungs from inhaling harmful solvent fumes and airborne particulates.
Preparing your workspace is just as important as protecting yourself. Set up a large cardboard box on its side to act as a temporary spray booth; this catches overspray and prevents the wind from carrying paint mist onto surrounding surfaces. Ensure you have bright, clear lighting so you can observe how the paint wetness behaves on the model surface as you spray. Finally, prepare a clean, dust-free drying area. A simple plastic storage tub turned upside down with a small gap for air circulation makes an excellent drying dome, protecting your wet model from airborne dust, lint, and insects while the paint cures.
Before you shake your paint can, ensure your model parts are fully prepared to receive paint. During the manufacturing process, a greasy chemical called mold-release agent is sprayed onto the steel molds to help the plastic parts release easily. This residue often remains on the plastic and will cause your paint to bead up or peel. Wash all your model parts or sprues in warm, soapy water using a mild dishwashing liquid. Scrub them gently with an old toothbrush, rinse thoroughly with clean water, and let them air dry completely. Once dry, handle the parts only with clean gloves or by holding their mounting pegs to prevent transferring skin oils back onto the clean surfaces.
Frequently Asked Questions (FAQ)
Can I use Tamiya spray paint directly on the plastic without primer?
While it is physically possible to spray Tamiya TS paint directly onto clean polystyrene, skipping the primer stage is highly discouraged for beginners. Without a primer coat, the lacquer paint has a much weaker bond with the smooth plastic, making it highly susceptible to chipping, peeling, or lifting when you handle the model or apply masking tape. Furthermore, raw plastic often has subtle surface defects, such as sink marks or seam lines, that are invisible to the naked eye but become glaringly obvious once a color coat is applied. A primer coat highlights these flaws early, allowing you to fix them before committing your color coats. The only exception is when you are building quick-assembly kits molded in the exact color of the final model, where you only intend to apply a clear topcoat to adjust the sheen.
How do I combine spray paint with hand-painting for small details?
To successfully combine these two methods, always follow a strict sequence: spray your large base coats first, let them cure completely, and then hand-paint the fine details over the top. Because Tamiya spray paints are lacquer-based, they cure to a very hard, solvent-resistant barrier. Once this lacquer base has cured for at least 24 to 48 hours, you can safely hand-paint small details over it using water-based acrylic paints. If you make a mistake while hand-painting with acrylics, you can easily wipe the wet acrylic paint away with a damp cotton swab without damaging the tough lacquer base coat underneath. Never attempt to spray lacquer paint over hand-painted acrylics, as the strong solvents in the lacquer spray will instantly dissolve and ruin the acrylic paint underneath.
How much area does one standard can of Tamiya spray paint cover?
A standard 100ml can of Tamiya TS or AS spray paint generally provides enough coverage for two to three medium-sized models, such as 1/24 scale car bodies or 1/35 scale military tanks, assuming you apply the paint in thin, efficient coats. However, several factors can significantly reduce this coverage. Complex, open shapes with many thin structural parts—such as aircraft biplanes, open-frame chassis, or intricate sci-fi frames—result in high amounts of overspray, where much of the paint misses the model entirely. Additionally, spraying in windy outdoor conditions or applying excessively heavy coats will deplete the can much faster. To maximize your coverage, always perform a brief test spray on a piece of scrap plastic sprue first. This trial allows you to observe the spray pattern, verify the nozzle flow, and ensure the paint cures smoothly under your local humidity conditions before you begin painting your actual model.

Community discussion
Share your experience or ask a question. Comments are reviewed before publication.