
To paint your first radio-controlled (RC) car body successfully, you must select the right paint and colors to avoid common rookie mistakes. The ideal starter set of Tamiya PS (Polycarbonate Spray) paint consists of a few highly versatile, forgiving colors: PS-5 Black for backing and details, PS-1 White as a brightener and base coat, and a vibrant primary color like PS-2 Red or PS-4 Blue. This core selection allows you to achieve professional, durable results without overspending on specialized shades.
Selecting your first colors involves understanding how polycarbonate paint behaves on flexible plastics. Unlike traditional hard-plastic model kits, RC bodies require a paint that bonds at a molecular level and moves with the body during high-speed impacts. By focusing on a minimal, high-utility palette, you can master basic spraying techniques, ensure clean paint lines, and create a striking livery that stands up to track abuse.
Why You Must Use Tamiya PS Paint for RC Bodies
RC car bodies are vacuum-formed from polycarbonate, commonly known by the trade name Lexan. This material is incredibly tough, lightweight, and flexible, allowing it to withstand major crashes and rollovers. However, this flexibility presents a unique challenge for paint: standard acrylics or lacquers dry into a rigid shell and will immediately crack, flake, or peel off the moment the body flexes.
Products mentioned in this guide
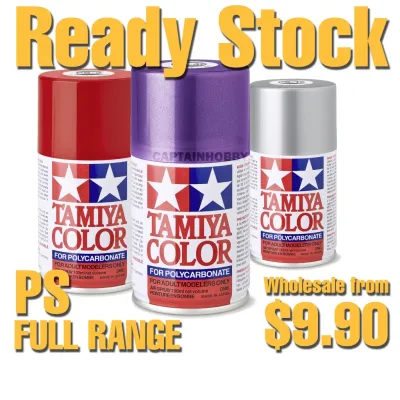
Prices are valid at publication and may change. Please refer to the product page for the latest price.
Tamiya PS paint is specifically formulated to solve this problem. It contains specialized solvents that chemically “bite” into the polycarbonate surface, creating a flexible, permanent bond. When the body bends, the paint bends with it, preventing any cracking or peeling.
This specialized formulation carries a significant material risk. The solvents in PS paint are chemically “hot” and highly aggressive. If you spray PS paint onto standard polystyrene plastic model kits, ABS plastic parts, or exposed electronic components, the solvents will chemically react with the plastic, causing it to melt, warp, or dissolve entirely.
Before you begin spraying, always verify the can’s label. Look explicitly for the “PS” designation on the front of the can. Never use Tamiya’s TS (Traction Spray/synthetic lacquer) or AS (Aircraft Spray) paints on flexible polycarbonate bodies, and never use PS paint on hard-plastic bodies or chassis parts.
Additionally, the propellants and solvents in these cans are highly volatile and flammable. Always wear a proper respirator mask rated for organic vapors, work in an area with excellent ventilation, and ensure there are no open flames, sparks, or running appliances nearby.
Criteria for Choosing Your First RC Paint Colors
When purchasing your first cans of paint, which typically cost between S$11 and S$15 each at local hobby shops, it is easy to get overwhelmed by the dozens of shades available. To build a practical starter kit, you must evaluate colors based on specific, beginner-friendly criteria.

Opacity and Coverage Some paint colors naturally contain denser pigments than others. High-opacity colors require fewer passes to cover the clear plastic completely, which saves paint and reduces the risk of runs. Beginners should prioritize colors that offer solid coverage in two to three light coats.
Forgiveness Solid, non-metallic colors are the most forgiving for novice painters. Metallic, pearl, and candy colors contain tiny flakes or translucent pigments that require precise, even spraying techniques. If applied unevenly, these specialized paints will pool, creating blotchy dark spots and metallic “tiger stripes” that are highly visible on the finished body.
Versatility Your first colors should be adaptable to different RC styles. Whether you are building an on-road touring car, a high-angle drift machine, or an off-road buggy, classic primary colors and neutral backing shades will always look appropriate and professional.
Cost Efficiency Avoid buying large multi-color sets or complex paint systems for your first build. A minimal, high-utility palette of three to four cans is more than enough to create a striking, multi-toned livery while keeping your initial investment low.
The Core Starter Palette: Must-Have Tamiya PS Colors
PS-5 Black: The Indispensable Backing and Detail Color
No RC paint kit is complete without a can of PS-5 Black. This is arguably the most critical color you will buy, serving multiple essential roles in almost every paint scheme.
The primary role of black is “backing.” Because polycarbonate bodies are painted from the inside, light colors can remain slightly translucent even after several coats. If you do not back them, light will shine through the body on the track, making the car look cheap and exposing the messy wiring and electronics underneath. Spraying a final coat of PS-5 Black behind your primary colors blocks all light transmission, making the exterior colors look incredibly deep, rich, and solid.
Beyond backing, PS-5 Black is the standard choice for painting realistic details. You will use it to define window frames, front grilles, air intakes, and rear diffusers. Because black pigment is naturally highly opaque, it requires very few coats to achieve complete coverage, making it one of the most economical and easy-to-use cans in the Tamiya lineup.
PS-2 Red and PS-4 Blue: High-Coverage Primary Colors
For your main body color, PS-2 Red and PS-4 Blue are the gold standards for beginners. Both colors offer outstanding opacity and smooth, self-leveling properties that minimize spraying errors.
These primary colors are highly forgiving because they flow evenly out of the nozzle and tolerate slight variations in spray distance. If you accidentally spray a section slightly too heavy, these pigments tend to settle smoothly without showing obvious color variations.
To achieve different visual effects, you can back these colors with different bases. Backing PS-2 Red or PS-4 Blue with white will make them look bright, vibrant, and track-ready. Backing them with silver will give them a subtle metallic undertone, while backing them with black will yield a deep, aggressive, dark tone.
These shades are incredibly popular in real-world motorsport and RC racing liveries, ensuring your car looks fast and professional even with a simple, single-color paint job.
PS-1 White: The Essential but Tricky Base Coat
While PS-1 White is an absolute necessity for any multi-color paint project, it is a color that requires careful handling.
White acts as the ultimate reflective base coat. If you plan to use bright colors like yellow, orange, green, or light blue, you must back them with PS-1 White first. Without a white backing layer, these bright colors will look dull, dark, and muddy once the body is mounted on the chassis.
The challenge with PS-1 White is its low opacity. White pigments are naturally thin, meaning it takes more coats to achieve a solid block of color. Because of this, beginners often make the mistake of spraying white too heavily in an attempt to get quick coverage, leading to unsightly runs, drips, and pooling along the body lines.
To apply PS-1 White successfully, you must practice patience. Apply three to four extremely light “mist” coats, holding the can slightly further away and moving quickly. Allow 10 to 15 minutes of drying time (flash-off) between each layer. Only apply a slightly heavier “wet” coat once you have established a uniform, semi-translucent foundation.
Versatile Accent Colors to Expand Your Kit
Once you are comfortable with the core palette, you can expand your styling options by adding a few versatile accent colors that allow for more creative designs.
PS-12 Orange and PS-46 Light Sand
PS-12 Orange is a highly visible, energetic color that is popular for off-road buggies, stadium trucks, and drift cars. Like yellow, orange has low natural opacity and must be backed with PS-1 White to prevent it from looking muddy or taking on a brownish tint from the dark chassis components underneath.
PS-46 Light Sand offers a completely different aesthetic, making it a fantastic choice for military-themed builds, scale trail trucks, or retro desert buggies. This color is incredibly forgiving to spray because its flat, earthy tone naturally hides minor surface imperfections, dust nibs, and uneven paint distribution.
PS-26 Purple and PS-3 Light Blue
PS-26 Purple is a rich, deep shade that has become a staple in the RC drift and tuner community. It reacts beautifully under various lighting conditions, making it an excellent choice for indoor carpet tracks or night running under streetlights.
PS-3 Light Blue provides a softer, pastel-like alternative to the bolder PS-4 Blue. It is highly suited for classic retro touring car liveries and clean, minimalist two-tone designs when paired with a PS-1 White roof or hood. Because it is a lighter shade, it must be backed with white to preserve its soft, clean appearance.
Essential Preparation and Spraying Tips for Beginners
Even the best paint colors will look poor or peel off if you do not follow proper preparation and application techniques. Polycarbonate painting is unique because you paint the inside of the body, meaning your prep work directly dictates the final finish.
Body Preparation Before you shake a single paint can, you must wash the inside of the polycarbonate body thoroughly. During the manufacturing process, factory molds are sprayed with silicone release agents to help the plastic release from the mold. If left on the body, these invisible oils will prevent the PS paint from bonding, causing it to peel off in large sheets at the first minor impact. Wash the entire inside surface with warm water and a few drops of mild dishwashing liquid, using a soft clean sponge. Rinse it completely and let it air dry or dry it with a clean, lint-free microfiber cloth. Avoid using paper towels, which can leave fine lint particles behind.
Masking To create clean lines and protect your windows, use high-quality masking tape designed specifically for polycarbonate, such as Tamiya’s masking tape. Standard household masking tape has adhesive that can bleed or leave a sticky residue that ruins the paint. After applying the tape, use a plastic burnishing tool or your fingernail to press down firmly along all edges, especially in recessed body lines and curves, to prevent paint from seeping underneath.
Spraying Technique Always shake the paint can vigorously for at least two minutes before spraying to ensure the heavy pigments and solvents are fully mixed. Maintain a consistent spraying distance of 10 to 15 centimeters from the body. Start your spray stroke off to the side of the body, sweep smoothly across the plastic, and stop spraying only after you have cleared the opposite side. Never start or stop spraying directly on the body, as this causes heavy paint build-up and runs.
Drying and Curing In tropical climates like Singapore, high humidity can significantly affect your paint job. High moisture levels in the air can trap water vapor under the paint, leading to a cloudy finish known as “blushing.” To prevent this, avoid painting on rainy days or in highly humid outdoor areas. If possible, spray in a well-ventilated, sheltered area on a dry day, and allow 15 to 20 minutes of drying time between light coats. Let the final coat cure for at least 24 hours before removing the window masks or mounting the body.
Clean-up To prevent the spray nozzle from clogging with dried paint between coats or during storage, you must clear the valve after every spraying session. Turn the can completely upside down and press the nozzle for two seconds until only clear propellant gas escapes. Wipe the nozzle tip clean with a cloth dipped in a small amount of rubbing alcohol if any residue remains.
Frequently Asked Questions (FAQ)
Can I use Tamiya PS paint on standard plastic model kits or RC parts?
No, you should never use Tamiya PS paint on standard polystyrene plastic model kits, ABS plastic parts, or hard-plastic RC components. The highly aggressive solvents in PS paint will melt, warp, and destroy these plastics. For hard-plastic models, scale accessories, or hard bodies, use Tamiya TS (synthetic lacquer) or AS series paints, which are formulated specifically for rigid plastics.
How many Tamiya PS cans do I need for one 1/10 scale RC body?
For a standard 1/10 scale RC body, you will typically need one to two cans of paint if you are applying a single, solid color. If you are planning a multi-color design that requires a main color, a white base coat, and a black backing coat, you will need three to four cans in total. Keep in mind that lighter colors like white, yellow, and orange have lower opacity and may require more paint than darker colors like black or blue.
Do I need to use a primer before spraying Tamiya PS paint?
No, standard hard-plastic primers should not be used on polycarbonate bodies because they lack flexibility and will crack and flake off when the body bends. Tamiya PS paints are self-priming and designed to bond directly to properly washed polycarbonate surfaces. Specialized polycarbonate-specific primers exist for custom effects, but they are generally unnecessary for a beginner’s first standard paint job.
Community discussion
Share your experience or ask a question. Comments are reviewed before publication.