
Preparing your child for a new school term involves managing a mountain of books, uniforms, and stationery. In the busy daily routine of school life, items frequently go missing, get swapped, or end up left behind on school benches. Building a comprehensive kit of stickers and labels is one of the most effective ways to prevent these frustrations, keep your child organized, and save money on replacement supplies.
By selecting the right stickers and labels, you can transform a chaotic school bag into an orderly, functional system. A complete labeling kit should address four primary needs: clear identification to prevent loss, visual organization for different school subjects, motivational tracking for home study, and personal creative expression. Choosing the correct label type depends heavily on the surface material of the item—whether it is plastic, fabric, or paper—and how much wear, tear, and washing the item will undergo throughout the academic year.
Name Labels to Prevent Lost School Items
Every school year, countless water bottles, lunchboxes, jackets, and high-value stationery items find their way to the school lost-and-found bin. In a crowded classroom or during physical education (PE) lessons, children often struggle to identify their own belongings, especially when many students use identical, popular brands of water bottles or standard-issue school files. Applying high-quality name labels to these items creates an immediate, unmistakable mark of ownership that helps teachers and classmates return misplaced items to your child.
Products mentioned in this guide
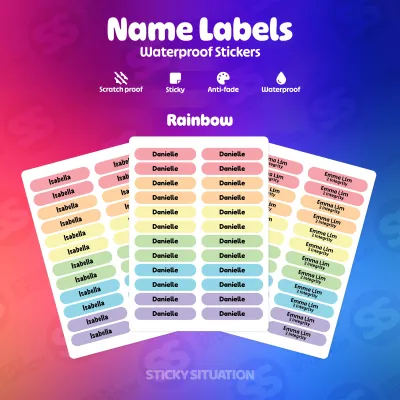
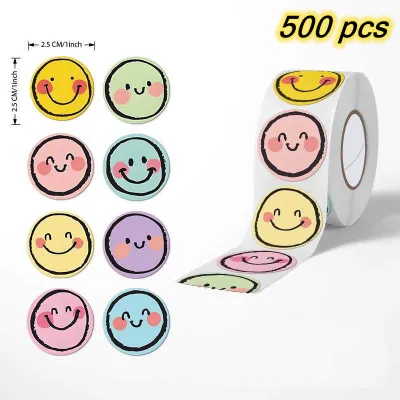
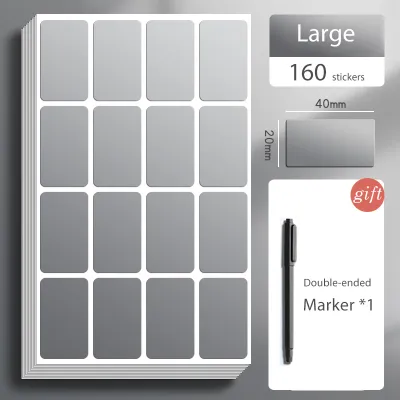
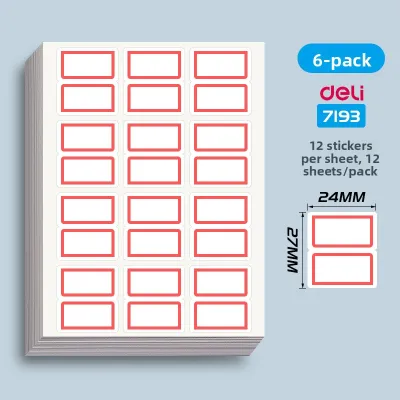
Prices are valid at publication and may change. Please refer to the product page for the latest price.
To ensure your labels remain intact and legible from day one until the final term, you must match the label material to the specific surface of the item. School gear is subjected to daily friction, moisture, and varying temperatures, meaning a one-size-fits-all paper label will quickly peel or disintegrate.
For hard, non-porous surfaces such as plastic food containers, metal insulated flasks, pencil cases, and scientific calculators, you need durable vinyl or polyester labels. These materials resist tearing, stretching, and fading. When labeling school uniforms, PE shorts, sweaters, and hats, traditional adhesive labels will not hold up to the mechanical action of a washing machine; instead, you must look to specialized textile labeling methods. For paper-based items like textbooks, notebooks, and folders, standard matte or semi-gloss labels offer a reliable, cost-effective solution that adheres firmly without adding unnecessary bulk.
Before purchasing any name labels, it is wise to run through a quick preparation checklist to guarantee successful application:
- Verify dimensions: Measure the flat surfaces of your child’s items to ensure the labels you order will fit without wrapping around sharp corners, which causes peeling.
- Check legibility: Ensure the font size and color contrast are sharp enough to be read easily from a standard reading distance of one meter.
- Prepare the surface: Plan to clean and dry every item thoroughly before applying a label, as any residual dust, finger oils, or manufacturing residue will ruin the adhesive bond.
Waterproof Labels for Drinkware and Lunchboxes
Drinkware and lunchboxes are exposed to water, dish soap, food oils, and condensation on a daily basis. Standard paper labels will quickly turn to pulp under these conditions. To protect these high-use items, look for labels made from premium vinyl or polyester bases that explicitly state they are waterproof and dishwasher-safe.
These specialized labels feature a strong, pressure-sensitive acrylic adhesive that cures over time to form a permanent bond with plastic and metal surfaces. Many high-quality options also include a clear, protective laminate overlay that shields the printed name from being rubbed off by abrasive sponges or faded by exposure to sunlight during outdoor activities.
Keep in mind that even the most durable waterproof labels have physical limits. Abrasive scrubbing directly over the edges of the label can eventually cause the adhesive to lift. To maximize their lifespan, apply the labels to the flattest, smoothest part of the bottle or container, avoiding highly textured rubber grips, embossed brand logos, or sharp curves.
Fabric Labels for School Uniforms and PE Kits
Labeling school clothing is essential, but textile surfaces present a unique challenge due to their flexibility and regular exposure to hot water and laundry detergents. Parents have three primary choices when it comes to marking garments: iron-on labels, stick-on clothing labels, and custom fabric ink stamps.
Iron-on labels utilize a heat-activated adhesive that melts into the fibers of the fabric, creating a highly durable bond that can withstand dozens of wash cycles. However, you must check the garment’s care label before applying heat; synthetic blends commonly used in school uniforms can melt or scorch under a hot iron. For heat-sensitive synthetics, stick-on clothing labels designed to adhere directly to the smooth nylon care tag are an excellent alternative. Custom fabric ink stamps offer a incredibly fast way to mark large batches of clothing, though the ink will naturally fade over several months and require re-stamping.
Safety is paramount when working with heat-activated adhesives. Always place a sheet of parchment paper or a thin pressing cloth between the iron and the label to prevent direct contact with the adhesive backing, and never apply iron-on labels directly to a garment while your child is wearing it.
Organizational Labels for Folders and Notebooks
As students transition between classes, they must quickly locate the correct materials for each subject. A disorganized school bag can lead to missed homework submissions, lost worksheets, and wasted class time. Implementing a clear, color-coded labeling system for folders, binders, and notebooks helps students categorize their materials at a single glance.

Using distinct colors for different subjects—such as red for Mathematics, blue for English, green for Science, and yellow for Mother Tongue languages—creates a visual shorthand. This makes packing the school bag in the evening and retrieving folders during short lesson transitions incredibly efficient.
Subject and Binder Spine Labels For large binders and multi-pocket folders, use rectangular matte paper labels on the spine or front cover. A matte finish is crucial because it allows your child or their teacher to write subject names, class details, and the academic year using standard ballpoint pens or gel pens without the ink smudging or running. Avoid glossy labels for this purpose, as many common school pens cannot dry properly on slick, coated surfaces.
Color-Coded Dot Stickers Small, circular dot stickers are highly versatile tools for rapid visual sorting. You can place these dots on the top-right corners of textbook covers, folder tabs, or assignment files. If your child has multiple notebooks for a single subject (such as one for spelling tests and another for creative writing), a specific colored dot can instantly tell them which book is which without needing to read the front cover.
Date and Priority Flags Removable adhesive flags or index tabs are excellent for marking active pages in shared textbooks, highlighting urgent homework assignments, or flagging sections of a syllabus that require revision. These flags can be written on and moved around easily as priorities change, ensuring that important deadlines are never overlooked.
Buying multi-packs that contain an assortment of colors is a highly practical strategy. This ensures you have a consistent color scheme to cover all core subjects throughout the school term, allowing your child to maintain their organizational habits without running out of matching stickers mid-year.
Reward and Motivational Stickers for Positive Reinforcement
While primary school teachers frequently distribute reward stickers in the classroom, maintaining a parallel motivation system at home can significantly boost your child’s engagement with homework, spelling practice, and daily chores. Using stickers as visual milestones on progress charts makes routine tasks feel rewarding and tangible for young learners.
Classic Recognition Stickers For daily spelling lists or reading logs, classic paper stickers featuring stars, smiley faces, and encouraging phrases like “Great Effort” or “Super Job” are highly effective. Because these stickers are applied to flat paper charts or journals, simple paper-based adhesives are perfectly adequate and cost-effective.
Interactive or Scratch-Off Stickers To keep older primary school students engaged, consider interactive or scratch-off stickers. You can write a custom reward on a chore chart, cover it with a metallic scratch-off sticker, and allow your child to scratch the surface with a coin once they complete their weekly tasks. This adds an element of anticipation and play to routine household responsibilities.
Thematic and Licensing Stickers For younger children, motivation is heavily driven by personal interests. Incorporating stickers featuring their favorite cartoon characters, animals, space themes, or sports can turn a challenging homework session into a much more positive experience.
When purchasing stickers for progress charts, a helpful buying tip is to avoid overly heavy, thick, or heavily glittered stickers. The added weight and rigid structure of these decorative stickers can cause them to peel off standard, lightweight printer paper over time, which can frustrate a child who wants to keep their earned rewards on display.
Decorative Stickers for Planners and Personalization
School is not just about structure and rules; it is also a place where children develop their personal identities and creative interests. Allowing your child to personalize their school planners, diary entries, and pencil cases with decorative stickers fosters a sense of ownership over their academic journey and can make them more eager to organize their weekly schedules.
Planner and Functional Stickers For students in upper primary and secondary school who use student planners to track their schedules, functional sticker sets are incredibly useful. These sets include small, colorful icons representing homework deadlines, exam dates, sports practices, music lessons, school holidays, and co-curricular activities (CCAs). By placing these icons on their weekly calendar pages, students can create a clear, engaging visual map of their upcoming commitments.
Washi Tape vs. Die-Cut Stickers When it comes to decorating borders and dividing pages, washi tape is an exceptional tool. Made from traditional Japanese paper, washi tape is lightweight, tears easily by hand without scissors, and features a low-tack adhesive that allows it to be repositioned without tearing the underlying paper. In contrast, die-cut vinyl or paper stickers are individual, contoured stickers that are ideal for creating bold focal points on notebook covers or neatly covering up minor writing mistakes.
Aesthetic and Scrapbooking Sets If your child enjoys journaling or keeping a detailed school diary, look for cohesive aesthetic sticker packs. These sets are curated around specific color palettes or artistic themes, allowing your child to express their creativity while keeping their stationery looking neat and coordinated.
Always check the adhesive type before letting your child apply decorative stickers to planner pages. Ensure the stickers are labeled as “removable” or “low-tack.” High-tack permanent adhesives can easily warp or tear delicate paper pages if your child decides to reposition a sticker later, potentially ruining weeks of carefully written notes.
What to Check Before Buying: Adhesives, Materials, and Safety
Before finalizing your back-to-school stationery shopping list, it is essential to evaluate the quality, safety, and physical properties of the stickers and labels you plan to purchase. Selecting the wrong adhesive or material can lead to peeling labels, damaged school property, or potential health concerns for younger children.
Adhesive Strength and Removability Understanding the distinction between permanent and temporary adhesives is critical. Permanent adhesives are designed to form a long-lasting bond that resists water, friction, and heat; these are ideal for personal water bottles, lunchboxes, and clothing tags. However, you must avoid using permanent labels on borrowed library books, rented textbooks, or school-issued electronic devices, such as tablets and laptops. For these items, always choose removable, low-tack labels that can be peeled away cleanly without leaving sticky residue or tearing the underlying surface.
Surface Compatibility Checklist To ensure your labels stay attached, match the label material to the surface of the item using this quick reference:
- Plastic and Metal: Use durable, waterproof vinyl or polyester labels with strong acrylic adhesives. Smooth surfaces work best.
- Paper and Cardboard: Standard matte paper or thin vinyl labels are ideal. Avoid heavy, glossy, or highly textured labels on thin paper, as they may peel at the corners.
- Fabric: Choose specialized iron-on labels for heat-tolerant fabrics, or stick-on clothing labels designed specifically to adhere to nylon care tags.
Safety and Compliance Because younger children frequently handle their school supplies and may occasionally put stationery items or water bottle caps near their mouths, safety is a major consideration. Ensure that any labels applied to food containers, drinkware, or items handled by young children are certified non-toxic, BPA-free, and free from harmful chemical plasticizers such as phthalates. Look for clear product labeling that confirms these safety standards before making a purchase.
Application Best Practices No matter how high the quality of the adhesive, a label will fail if it is applied incorrectly. For the best results, follow these universal application steps:
- Clean the surface: Wash the item with mild dish soap and warm water, or wipe hard plastics and metals with isopropyl alcohol to remove oil and dirt.
- Dry completely: Ensure there is no moisture left on the surface, as water will prevent the adhesive from bonding.
- Apply firm pressure: Press down firmly from the center of the label outward to the edges, smoothing out any air bubbles.
- Allow to cure: Let the adhesive cure undisturbed for at least 24 hours before exposing the labeled item to water, friction, or the washing machine.
Frequently Asked Questions (FAQ)
How do I safely remove sticker residue from borrowed textbooks?
Removing sticky residue from paper or cardboard textbook covers requires a gentle touch to avoid tearing or staining the material. Avoid using harsh chemical solvents, commercial adhesive removers, or cooking oils, as these will leave permanent greasy stains and ruin the paper.
Instead, use a clean, dry rubber eraser to gently rub the adhesive residue. The friction will roll the sticky glue into small, easy-to-sweep-away balls. Alternatively, take a piece of standard masking tape, wrap it around your finger with the sticky side facing out, and repeatedly dab the residue to lift it off the cover. If the textbook has a glossy, plastic-laminated cover, you can wipe the area very gently with a microfiber cloth that has been slightly dampened with water and a tiny drop of mild dish soap, making sure to dry the cover completely immediately afterward. Always test this on an inconspicuous inner corner first.
Can I use standard paper labels on plastic water bottles?
No, standard paper labels are highly unsuitable for water bottles, lunchboxes, or any other school items that require regular washing or are exposed to condensation. Paper is highly porous and will quickly absorb moisture from washing, spills, or humid environments.
Once wet, the paper fibers will disintegrate, causing the printed name to smudge and wash away. Additionally, the water-soluble adhesives typically used on paper labels will break down, leaving behind a messy, sticky, and difficult-to-clean pulpy residue on the bottle. To ensure your child’s drinkware remains clearly identified throughout the school term, always choose labels made from vinyl or polyester that are explicitly marked as waterproof and dishwasher-safe. Check the product packaging to verify that the adhesive is designed to withstand repeated exposure to water and dishwashing detergents.
Community discussion
Share your experience or ask a question. Comments are reviewed before publication.