
Starting your first quilting project is an exciting creative milestone, but stepping into a craft store or browsing online marketplaces can quickly become overwhelming. The sheer volume of specialized rulers, cutting gadgets, and advanced sewing accessories can make it seem like you need to spend hundreds of dollars just to get started. Fortunately, the barrier to entry is much lower than it appears.
To successfully piece together your first quilt, you only need a small, highly focused set of foundational tools. By prioritizing precision and safety over marketing hype, you can assemble a highly functional kit that ensures clean cuts and accurate seams without draining your budget. Investing in a few durable core items while utilizing household alternatives for non-essential tasks will set you up for a smooth, enjoyable crafting experience.
How to Build a Beginner Quilting Toolkit Without Overspending
Building a practical quilting toolkit requires distinguishing between foundational tools and specialty gadgets. Foundational tools are those that directly impact the accuracy of your cuts and the safety of your workspace. Specialty gadgets, on the other hand, are designed to speed up highly specific tasks—such as making bias binding or cutting complex geometric shapes—which you will not encounter in a standard beginner pattern.
Products mentioned in this guide
Prices are valid at publication and may change. Please refer to the product page for the latest price.
When allocating your budget, focus on high-quality, durable hardware. A premium rotary cutter, a thick self-healing mat, and a sturdy acrylic ruler are non-negotiable investments. These tools are responsible for the structural integrity of your quilt blocks; if your initial cuts are inaccurate by even a fraction of an inch, those errors will compound as you sew the pieces together, resulting in misaligned corners and warped borders. Conversely, you can easily save money on consumables like thread, basic pins, and fabric markers by opting for reliable, budget-friendly brands rather than premium designer labels.
Another critical factor to consider before purchasing is the measurement system of your tools. The global quilting community predominantly operates on the imperial system (inches and yards), and the vast majority of beginner-friendly patterns are written using these units. In Singapore, where metric measurements are standard in daily life, it is easy to accidentally purchase a metric cutting mat or ruler. Mixing a metric ruler with an imperial pattern requires tedious mathematical conversions that increase the risk of cutting errors. To keep your process simple and error-free, ensure your primary rulers and cutting mats are marked in inches.
The Must-Have Quilting Tools for Your First Project
Successful quilting relies on a three-step workflow: cutting fabric patches with absolute precision, piecing them together with consistent seam allowances, and pressing the seams flat to eliminate bulk. Each step requires a specific set of tools designed to handle fabric without stretching or distorting it.

Cutting Tools: Rotary Cutter, Mat, and Rulers
Rotary Cutter
A rotary cutter is essentially a circular razor blade mounted on a handle, and it is the single most important tool for achieving clean, straight fabric edges. For your first project, select a standard medium-sized cutter with a 45mm blade diameter. This size is highly versatile, allowing you to cut through multiple layers of fabric simultaneously while remaining easy to maneuver. Safety is paramount when handling these ultra-sharp tools, so look for a model featuring a secure, spring-loaded blade guard that automatically covers the edge when not in use. Additionally, check that replacement blades are readily available from local retailers, as a dull blade will skip threads and force you to apply dangerous amounts of downward pressure.
Cutting Mat
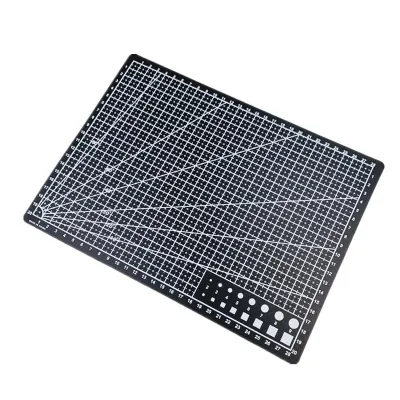
Never use a rotary cutter on a standard table or a generic plastic surface, as you will permanently damage both the blade and your furniture. A dedicated self-healing cutting mat is designed with a resilient surface layer that parts slightly when the blade passes through and closes back up afterward. Verify the manufacturer’s specifications to ensure the mat is rated for rotary cutter use and features a non-slip backing to prevent it from sliding across your table. Keep in mind that self-healing mats are sensitive to heat and direct sunlight; in Singapore’s warm climate, store your mat flat in a cool place, away from windows, to prevent warping.
Quilting Rulers
Unlike standard school rulers, quilting rulers are made of thick, heavy-duty clear acrylic, typically measuring 3mm (1/8 inch) in depth. This thickness is crucial because it acts as a physical barrier, preventing the rotary cutter blade from jumping over the edge of the ruler and cutting your fingers. For your first project, a single 6-inch by 24-inch rectangular ruler is the most versatile option. It is long enough to cut across the entire width of a folded yard of fabric and wide enough to measure common patch sizes. Look for rulers with clean, laser-cut edges and high-contrast grid lines that remain visible on both light and dark fabrics.
Piecing and Sewing Essentials
Pins and Clips
To keep your fabric patches perfectly aligned as they feed through your sewing machine, you will need reliable temporary fasteners. Fine glass-head pins are highly recommended for general piecing. Unlike plastic-headed pins, glass heads will not melt if you accidentally run over them with a hot iron during pressing. For securing thicker layers, such as when attaching quilt binding or holding bulky seam intersections together, small plastic binding clips are an excellent alternative that won’t distort or prick your fingers.
Needles and Thread
For general piecing, a high-quality 50-weight, two-ply or three-ply 100% cotton thread is the industry standard. Cotton thread is strong enough to hold seams securely but thin enough to prevent bulk from building up inside the seam allowance. Avoid cheap, generic polyester threads, which can shred easily and create excessive lint in your machine. Pair your thread with a fresh sewing machine needle. Check the packaging for “sharps” or “microtex” designations in size 80/12; these needles have a slender, acute point that pierces woven quilting cotton cleanly without pushing the threads aside.
Seam Ripper
A sharp, ergonomic seam ripper is a vital tool for every quilter, regardless of skill level. Correcting mistakes is a normal part of the learning process, and a dull seam ripper will snag and tear delicate fabric fibers. Look for a model with a comfortable, rubberized grip that reduces hand fatigue and a small red ball on the shorter tip to protect your fabric as you slide the blade along the stitches.
Pressing and Marking Tools
Iron and Pressing Surface
Quilting is as much about pressing as it is about sewing. A standard household steam iron with a clean, smooth soleplate is perfectly adequate for your first project. You do not need a specialized, expensive quilting iron, but you must ensure the iron has adjustable steam settings and a reliable heat range. Pair your iron with a flat, heat-resistant pressing surface. While a traditional ironing board works well, a dense wool pressing mat is a popular space-saving alternative for smaller workspaces, as it retains heat and effectively presses the fabric from both sides simultaneously.
Fabric Markers
To mark cutting lines, registration points, or quilting designs directly onto your fabric, you will need a temporary marking tool. Water-soluble blue pens and heat-erasable (friction-based) gel pens are popular options. Because fabric finishes and dyes can react differently to various inks, always test your marker on a small scrap of your project fabric first. Apply the mark, let it sit, and then verify that it removes completely with a damp cloth or the heat of your iron before marking your actual quilt blocks.
Nice-to-Have Tools You Can Skip for Now
When you are starting out, it is easy to fall into the trap of buying specialized accessories that promise to make quilting easier. However, most of these items are completely unnecessary for basic square- and rectangle-based beginner patterns, and buying them too early simply clutters your workspace.
- Specialty Acrylic Templates: Rulers shaped like hexagons, triangles, or Dresden plates are designed for advanced patterns. For your first project, a simple rectangular ruler is all you need to cut basic squares and rectangles.
- Bias Tape Makers: These metal funnels help fold fabric strips into binding. While useful for apparel, they are unnecessary for standard double-fold quilt binding, which is easily folded in half using just your iron.
- Dedicated Design Walls: Commercial design walls are large flannel-covered boards used to arrange quilt blocks. Instead of buying one, you can use a clean bed, a large dining table, or simply tape a cheap flannel flat sheet to a blank wall to arrange your blocks.
- Specialized Quarter-Inch Presser Feet: While a dedicated 1/4-inch sewing foot helps maintain consistent seams, you can achieve the same result by placing a strip of painter's tape or a stack of sticky notes on your machine's throat plate to act as a physical seam guide.
What to Check Before Buying Quilting Supplies
To ensure your tools are safe, compatible, and comfortable to use, follow this step-by-step checklist before making your purchases:
- Verify Measurement Alignment: Check that your cutting mat and acrylic rulers use the exact same measurement system. Mixing a metric mat with an imperial ruler makes measuring highly confusing and leads to cutting errors.
- Assess Rotary Cutter Ergonomics: If possible, visit a physical store to hold different rotary cutters. Ensure the handle shape feels comfortable in your hand and that you can easily engage and disengage the safety lock with one hand.
- Check Mat Thickness and Markings: Look for a cutting mat that is at least 1.5mm to 3mm thick. Thinner mats can warp easily and are prone to being sliced completely through by a sharp blade. Ensure the grid lines are crisp and easy to read under your home's lighting.
- Confirm Ruler Thickness: Ensure any acrylic ruler you buy is specifically labeled for rotary cutting (typically 3mm thick). Thin, flexible craft rulers intended for utility knives should never be used with a rotary cutter, as the blade can easily slip over the edge.
- Read Material Safety Labels: For tools that involve heat, such as pressing mats or iron soleplates, read the product labels to ensure they do not emit toxic fumes or chemical residues when heated.
- Review Retailer Return Policies: Because tools like rotary cutters and rulers are highly tactile, check the retailer's return policy. Ensure you can return or exchange items if you find the grip uncomfortable or the ruler markings difficult to read during actual use.
Frequently Asked Questions (FAQ)
Can I use regular sewing scissors instead of a rotary cutter?
While you can technically use high-quality fabric scissors to cut your fabric patches, it is highly discouraged for the main cutting phase of a quilt. When you cut with scissors, you must lift the fabric off the table, which causes the layers to shift and results in slightly distorted, uneven edges. A rotary cutter allows the fabric to remain completely flat on the cutting mat, ensuring perfectly straight lines and identical patches. You will still need a pair of small, sharp sewing scissors or thread snips at your sewing machine for trimming thread tails and clipping seam allowances, but a rotary cutter is essential for accurate piecing.
What size cutting mat is best for a beginner?
For a beginner, a medium-sized cutting mat measuring 18 inches by 24 inches (approximately A2 size) is the ideal starting point. This size is large enough to accommodate a standard fat quarter of fabric and allows you to cut folded yardage comfortably. At the same time, it is compact enough to fit on a typical dining table or study desk without taking up your entire workspace, and it can be easily stored flat under a bed or behind a wardrobe when not in use. Avoid small, letter-sized mats, as they will force you to constantly shift your fabric, leading to misalignment and cutting errors.
Community discussion
Share your experience or ask a question. Comments are reviewed before publication.