
Starting your pottery journey is an exciting, tactile experience, but walking into an art supply store can quickly feel overwhelming. With shelves lined with specialized carving loops, heavy-duty calipers, and high-tech extruders, it is easy to assume you need a massive inventory of equipment just to shape your first lump of clay. In reality, the most successful beginners start with a highly curated, minimalist toolkit. By focusing on a few versatile, multi-functional implements, you can master the foundational techniques of shaping, trimming, and finishing without overcomplicating your learning process or overspending. A basic set of seven to eight essential pottery tools is more than enough to carry you from your very first pinch pot to beautifully thrown wheel pieces.
The Core Pottery Tools Every Beginner Needs
To build a functional pottery kit, it helps to understand how tools are categorized by their primary function. Instead of viewing each item as a single-use gadget, think of them as extensions of your hands that interact with clay at different stages of its moisture cycle. Clay transitions from a highly plastic, wet state to a firm, leather-hard state, and finally to bone-dry before it ever enters the kiln. Your tools must adapt to these physical changes. For instance, soft, flexible tools are ideal for wet clay, while rigid, sharp tools are necessary for carving and refining leather-hard clay.
By grouping your starter kit into shaping, smoothing, cutting, and trimming categories, you can ensure you have the right physical interface for every stage of the making process. This functional approach prevents you from buying redundant items and helps you develop an intuitive feel for how different materials—like wood, metal, and sponge—affect the clay surface.
Products mentioned in this guide
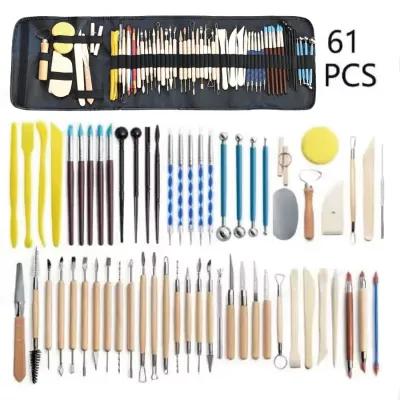
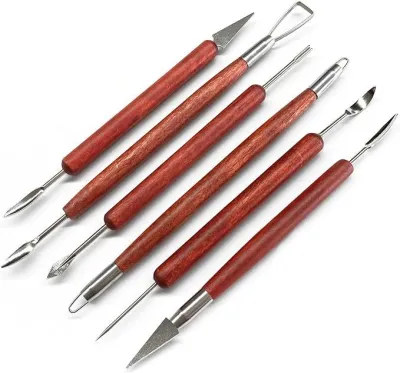
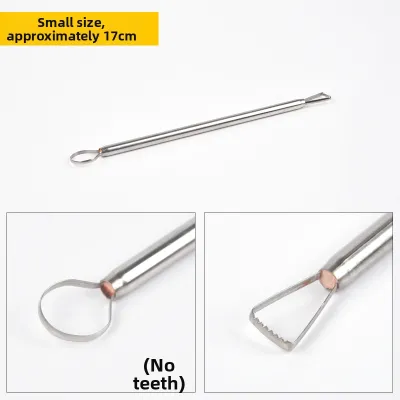
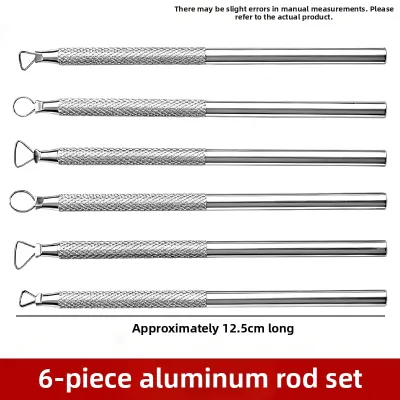
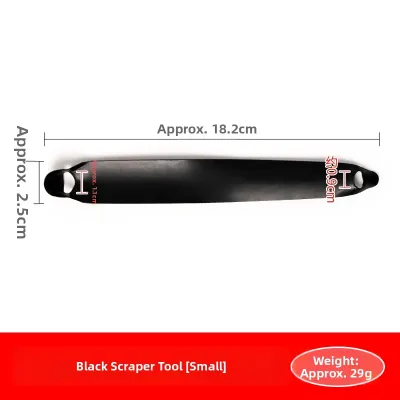
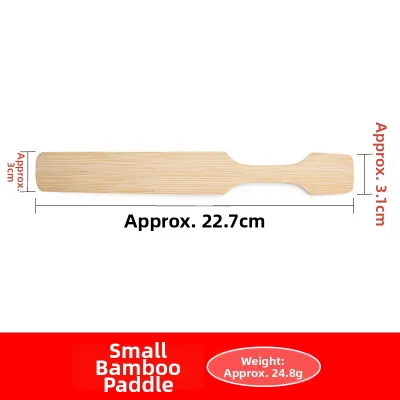
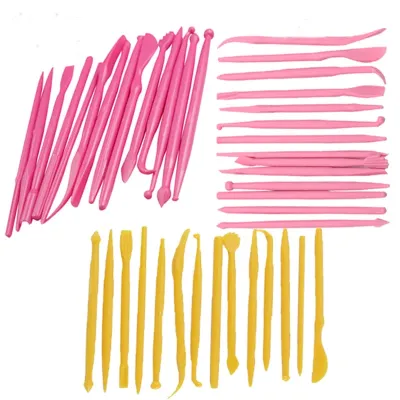
Prices are valid at publication and may change. Please refer to the product page for the latest price.
Shaping and Smoothing Essentials
Managing moisture is one of the most critical skills in pottery, making the humble sponge an indispensable tool. Beginners should understand the difference between natural and synthetic sponges. Synthetic sponges, often made of dense polyurethane, are excellent for absorbing excess water from the bottom of a wheel-thrown vessel or wiping down a work surface. However, natural silk sponges offer a much softer texture and excellent water retention, making them a highly suitable choice for gently smoothing the rims of delicate pieces without stripping away the fine clay particles.
Alongside sponges, wooden modeling tools and ribs serve as the primary instruments for structural shaping and compression. Wooden modeling tools, which typically feature a spatula-like curve on one end and a pointed tip on the other, allow you to trim excess clay from the base of a pot or create clean decorative lines. Ribs, which can be made of wood, rubber, or metal, are used to smooth and compress the clay walls. Compressing the clay is vital; failing to compress the bottom of a plate or bowl during the initial shaping phase often leads to cracks during the drying and firing stages. A smooth wooden rib provides a rigid flat edge to align the clay particles, ensuring structural integrity and a clean finish.
Cutting, Piercing, and Trimming Basics
Before you can shape clay, you must be able to manage its volume, which is where cutting and piercing tools become essential. A wire clay cutter is the primary tool used to slice manageable portions of clay from a large, dense block. It consists of a strong wire—often braided stainless steel or nylon—attached to two wooden toggles. Using a wire cutter ensures a clean, flat slice without compressing or distorting the remaining clay block. It is also used to cut finished vessels off the wheel head or plaster bat once throwing is complete.
The needle tool is perhaps the most versatile instrument in a beginner’s kit. Featuring a sharp, fine metal point set into a wooden or aluminum handle, it is used for measuring wall thickness, trimming uneven rims on the wheel, and piercing air bubbles trapped within the clay wall. It is also the primary tool for “scoring”—scratching the surface of two clay pieces before joining them with slip (liquid clay) to ensure a strong bond.
Finally, basic loop and ribbon tools are essential for the trimming phase, which occurs when the clay is leather-hard. These tools feature a sharpened loop of metal secured to a wooden handle. As the clay spins on the wheel or is held in your hand, the loop shaves away thin ribbons of excess clay, allowing you to hollow out foot rings, refine outer profiles, and reduce the overall weight of your pottery.
Hand-Building vs. Wheel Throwing: Adjusting Your Starter Kit
While the core tools form the foundation of any pottery practice, your specific technique will dictate how you customize your starter kit. Hand-building—which encompasses pinching, coiling, and slab construction—relies heavily on manual manipulation and structural assembly. If you focus on hand-building, your kit should prioritize tools that help maintain uniform thickness and clean joints. A sturdy rolling pin and wooden thickness guides (slats of wood placed on either side of the clay to control slab depth) are invaluable additions. You will also benefit from a canvas work mat, which prevents wet clay slabs from sticking to your table, and a soft rubber rib to smooth out the canvas texture from the clay surface.

In contrast, wheel throwing is a dynamic process that requires continuous moisture control and rapid shaping. If you are starting on the potter’s wheel, your technique-specific additions should include a “sponge on a stick” (a small sponge attached to a wooden dowel) to mop up water from the deep, hard-to-reach bottoms of tall vases or mugs. You will also need a flexible metal or rubber throwing rib to shape curved profiles and a chamois cloth—or a small strip of soft plastic—to drape over the spinning rim of your pot, compressing and rounding it to create a comfortable drinking edge.
Fortunately, many core tools transition seamlessly between both methods. The wire cutter, needle tool, wooden modeling tool, and basic sponge are equally useful whether you are building a coil pot by hand or throwing a bowl on the wheel. By identifying these shared tools, you can invest in a high-quality foundational set and only purchase technique-specific add-ons as your skills progress, keeping your initial studio expenses highly manageable.
What to Skip: Tools You Don't Need on Day One
When browsing art supply stores or online marketplaces, it is easy to fall into the trap of buying specialized tools before you have mastered the basics. One of the most common trap purchases for beginners is an extensive set of underglaze brushes. While beautiful surface decoration is a rewarding part of pottery, you will not need specialized, high-end lettering or mop brushes during your first few weeks of learning clay preparation and shaping. Similarly, complex clay extruders, which push clay through dies to create uniform coils or tubes, are highly specialized tools that limit your hands-on understanding of clay plasticity and are best avoided initially.
Advanced trimming tools, such as those featuring expensive tungsten carbide blades, are also unnecessary for beginners. While they hold their edge longer, they are costly and can easily chip if dropped on a concrete studio floor or if they strike a hard particle in the clay. Standard stainless steel loop tools are well-suited for learning the mechanics of trimming.
Instead of purchasing specialized tools, look around your home for safe, highly practical household alternatives. A standard, non-serrated butter knife can easily replace a specialized fettling knife for cutting slabs and trimming rough edges. An old plastic credit card or membership card can be cut into various shapes to serve as highly flexible rubber or plastic ribs. Wooden chopsticks make excellent scoring tools and can be carved at the tip to mimic wooden modeling tools. Using these household items not only saves money but also teaches you to be resourceful and adaptable in the studio.
How to Choose Quality Entry-Level Pottery Tools
When selecting your first set of pottery tools, prioritizing quality over sheer quantity will save you from frustration and premature replacements. The first factor to evaluate is material durability. Because pottery involves constant exposure to water and wet clay, metal tools are highly susceptible to corrosion. Look for tools made with stainless steel loops rather than carbon steel. Carbon steel tools may be slightly cheaper, but they will quickly rust in humid studio environments or if left damp, leaving orange stains on your pristine white clay bodies.
Next, consider the ergonomics and weight of the handles. Since you will be holding these tools for extended periods, they should feel comfortable and balanced in your hand. Wooden handles should be smooth, close-grained, and sealed with a water-resistant finish to prevent splintering and water absorption. Avoid tools with rough, unfinished wood that can harbor mold or cause blisters. Aluminum handles on needle tools offer excellent durability and are easy to clean, but ensure they have a textured grip to prevent slipping when your hands are covered in wet clay or slip.
Additionally, verify the physical dimensions and compatibility of the tools with your chosen clay body. For instance, larger loop tools are ideal for carving broad surfaces on coarse stoneware, while fine ribbon tools are better suited for delicate porcelain work. Keep in mind that the smoothness of your cuts, tool drag, and the final surface finish depend entirely on the exact combination of your tool’s material and the clay’s moisture level. Since manufacturers rarely provide precise friction specifications, you should perform an observable trial: drag the tool gently across a scrap piece of clay to check for clean slicing versus surface tearing or excessive clay buildup.
Finally, inspect the construction and attachment points of the tools. The metal loops of trimming tools and the steel tips of needle tools are typically inserted into wooden handles and secured with a metal ferrule. Before purchasing, check that these joints are tight and stable. If the metal loop wiggles even slightly inside the handle, the resistance of the clay will quickly cause it to pull out entirely during use. A well-constructed tool should feel like a single, solid piece, ensuring both safety and precision as you work.
Building Your First Pottery Tool Kit on a Budget
For most beginners, the most cost-effective way to start is by purchasing a pre-assembled beginner’s pottery tool kit. These kits, which typically contain eight essential tools—a wire cutter, needle tool, wooden rib, metal rib, loop tool, ribbon tool, wooden modeling tool, and synthetic sponge—are widely available and offer excellent value. When priced in S$ in local art supply stores or online craft marketplaces, these pre-assembled sets are significantly cheaper than purchasing each tool individually. They provide a balanced foundation, allowing you to experiment with different techniques before deciding where to invest more heavily.
When sourcing your tools, look for reputable local art supply stores or established online craft marketplaces that cater to ceramicists. While general discount platforms may offer incredibly cheap sets, these often suffer from poor construction, such as loose ferrules or rusting metal. It is always wise to verify the product specifications listed by the seller. Ensure the kit explicitly states the materials used, such as stainless steel and sealed hardwood.
Additionally, read user reviews to check for common complaints, such as handles snapping or sponges disintegrating after a few uses. If you are taking a class at a local community studio, consult your instructor or check the studio’s guidelines, as many local studios offer basic tool kits for purchase or have specific recommendations tailored to the clay bodies they use.
Frequently Asked Questions (FAQ)
How do I clean and maintain my pottery tools to prevent rust?
Proper maintenance is key to extending the lifespan of your pottery tools. After every studio session, wash off all clay residue immediately under running water. Allowing clay to dry and harden on your tools makes it much harder to remove later and traps moisture against the metal surfaces, accelerating rust. Use a soft brush or an old toothbrush to clean out the crevices of loop tools and the teeth of scoring tools. Once clean, dry each tool thoroughly with a towel. Never store wet wooden tools in airtight plastic containers, as this traps moisture, leading to wood warping, mold growth, and the degradation of adhesives holding the metal tips in place. Instead, store your clean, dry tools in a breathable canvas roll or an open container, such as a heavy mug or jar, with the tips pointing upward to protect the edges and allow air circulation.
Can I use regular kitchen utensils instead of buying pottery tools?
Yes, many common kitchen utensils make excellent, budget-friendly substitutes for specialized pottery tools, provided you follow basic safety guidelines. Wooden spoons are fantastic for paddling and shaping hand-built forms, while standard rolling pins work effectively for rolling out clay slabs. Metal forks can be used to score clay joints quickly, and small measuring cups or bowls can serve as molds for press-molding simple dishes. However, you must establish a strict boundary between your studio tools and your kitchen. Once a kitchen utensil has been used for pottery, it must never return to the kitchen for food preparation. Clay contains fine silica dust which can be harmful if ingested, and many glazes contain heavy metals or oxides that are toxic. Additionally, highly porous wooden utensils can absorb clay particles and chemical residues, making them impossible to sanitize fully for food use. Always dedicate your kitchen-sourced tools exclusively to your pottery practice.
Community discussion
Share your experience or ask a question. Comments are reviewed before publication.