
Embroidery is a deeply rewarding, tactile craft, but entering the world of hand stitching can feel overwhelming when confronted with hundreds of multi-piece starter sets online. To begin your embroidery journey successfully, you do not need a massive box filled with hundreds of low-grade components. Instead, a truly functional beginner embroidery kit requires only six core essentials: a sturdy embroidery hoop, a set of sharp crewel needles, high-quality stranded cotton floss, a stable base fabric, small sharp embroidery scissors, and a reliable pattern transfer tool.
When evaluating a sewing kit set for embroidery, your primary focus must be on the material quality and usability of these six fundamental items. Many mass-produced kits inflate their piece counts with low-quality fillers that frustrate beginners and lead to poor results. By learning how to inspect the specifications of these core tools, you can avoid kits that cause thread breakage, fabric puckering, or hand strain, ensuring your first stitching experience is smooth, relaxing, and successful.
Must-Have Tools and Materials to Check in an Embroidery Kit
Embroidery Hoops and Frames
The embroidery hoop is the foundation of your work, holding the fabric taut so your stitches remain even and unpuckered. When looking at a sewing kit set, you will typically encounter hoops made of bamboo, wood, or plastic.
Products mentioned in this guide
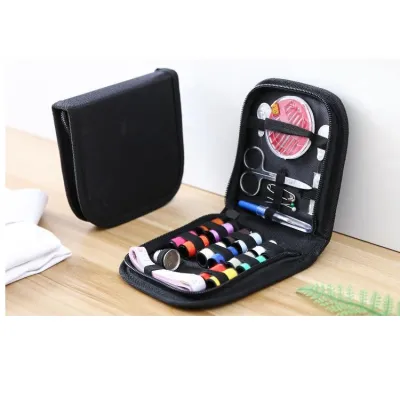
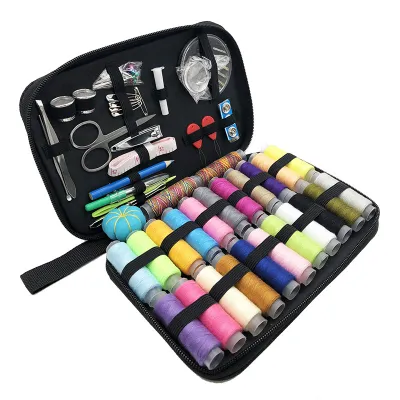
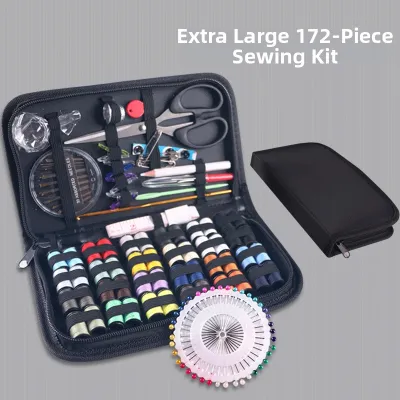
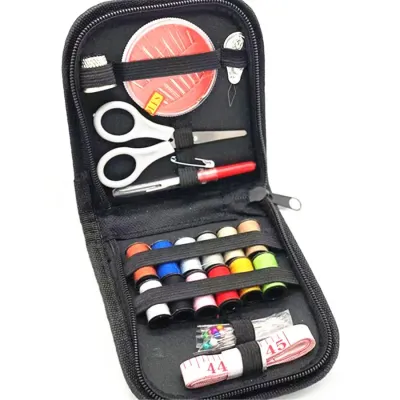
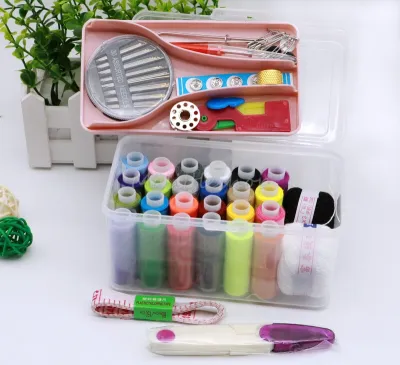
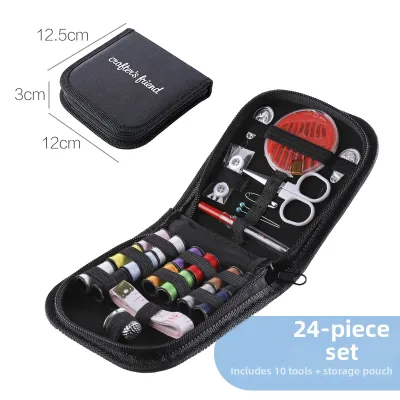
Prices are valid at publication and may change. Please refer to the product page for the latest price.
For beginners, bamboo or polished wooden hoops are generally superior to plastic alternatives. Natural wood fibers have a subtle texture that naturally grips fabric, preventing it from slipping and losing tension as you stitch. Smooth plastic hoops, especially cheap molded ones, often lack this natural friction, requiring you to constantly pull and retighten your fabric, which can distort your design. If you do end up with a slightly slippery hoop, a classic crafter’s trick is to wind cotton twill tape around the inner ring to increase grip.
Size is another critical factor. Look for kits that include hoops measuring between 4 inches and 8 inches (approximately 10 cm to 20 cm) in diameter. A 6-inch (15 cm) hoop is widely considered the ideal size for beginners. Anything smaller than 4 inches limits your design area too much, while hoops larger than 8 inches can be physically awkward to hold, leading to hand fatigue and uneven tension control.
Before purchasing, closely inspect the tension mechanism. A high-quality hoop features a sturdy metal adjustment screw, preferably made of brass or stainless steel, with clean threads and a slotted head that allows you to use a screwdriver for extra tightening if needed. Avoid kits where reviews mention stripped screws, loose brackets, or hoops that warp under pressure, as these defects make it impossible to maintain the drum-like tension required for neat stitches.
Embroidery Needles
A common mistake among beginners is assuming that any sewing needle will work for embroidery. Standard hand-sewing needles are designed for thin sewing thread and have small, rounded eyes and tapered shafts. In contrast, embroidery needles—often referred to as crewel needles—feature sharp tips to pierce woven fabrics cleanly and elongated, larger eyes designed to accommodate multiple strands of embroidery floss.
When evaluating a sewing kit set, check the product description to ensure it specifies “embroidery” or “crewel” needles rather than just listing “assorted needles.” A good beginner kit should provide a range of needle sizes, typically from size 3 to size 9. In needle sizing, a higher number indicates a finer, thinner needle. Having a variety allows you to match your needle to the number of thread strands you are using; for instance, a larger size 3 or 5 needle is perfect for thick 6-strand stitches, while a finer size 8 or 9 needle is ideal for delicate 1- or 2-strand detail work. Using a needle that is too small for your thread will shred the floss, while a needle that is too large will leave permanent, unsightly holes in your fabric.
Because Singapore’s tropical, humid climate can accelerate metal oxidation, it is highly recommended to verify that the needles are made of rust-resistant materials, such as nickel-plated or gold-plated carbon steel. Additionally, ensure the kit includes a dedicated storage container, such as a compact wooden needle case, a plastic storage tube, or a felt needle book. Loose needles packed in simple paper packets are easily lost, prone to bending, and can rust quickly when exposed to ambient humidity.
Embroidery Floss and Threads
The quality of the thread, or embroidery floss, directly impacts both the stitching process and the final appearance of your piece. Standard embroidery floss is a 6-ply stranded cotton thread, meaning it consists of six individual threads lightly twisted together. This structure is essential because hand embroidery rarely uses all six strands at once; instead, you will routinely separate the floss into two, three, or four strands depending on the desired thickness of your lines.
When choosing a sewing kit set, look for explicit confirmation that the kit contains 100% long-staple cotton floss. High-quality cotton floss is mercerized—a chemical treatment that increases luster, strength, and dye affinity. This results in a smooth, slightly shiny thread that glides through fabric without snagging.
Be cautious of kits that describe their threads using vague terms like “polyester blend,” “craft thread,” or “soft sewing thread.” Polyester and low-grade synthetic threads are highly elastic and slippery, which makes them prone to knotting, tangling, and fraying as you pull them through the fabric. They also lack the soft, matte texture of genuine cotton, resulting in stiff, artificial-looking stitches.
Furthermore, prioritize kits that offer a curated palette of 20 to 50 clearly labeled, colorfast colors over massive assortments of 100 to 200 unbranded skeins. Low-quality dyes can bleed when the finished piece is washed or exposed to moisture, ruining hours of hard work. A smaller collection of high-quality, colorfast threads is infinitely more valuable than a mountain of cheap, bleeding threads.
Base Fabrics and Transfer Tools
The fabric included in your kit acts as the canvas for your stitches. For beginners, the ideal fabric is a non-stretch, medium-weight woven material. Cotton calico, linen, and cotton-linen blends are the gold standards. These fabrics have a stable, visible weave that supports the weight of embroidery stitches without puckering, stretching, or warping.
Avoid kits that include stretchy fabrics like jersey, knits, or synthetic polyesters. Stretchy materials are incredibly frustrating for beginners because they distort when stretched in a hoop, causing the embroidery to pucker and sag once removed from the frame. Very loosely woven fabrics, such as coarse burlap, are also unsuitable as they do not provide enough structural support for detailed stitches. To check the suitability of a fabric, hold it up to the light; if you can see right through the weave, it is likely too loose and will not hold stitches well.
Equally important is how you will transfer your design onto the fabric. Beginner kits generally use one of three methods: pre-printed patterns on the fabric, water-soluble transfer pens, or carbon transfer paper.
Pre-printed kits are highly convenient for absolute beginners, but you must verify that the ink used is water-soluble. This allows you to wash away the printed guidelines completely once your stitching is finished, leaving only your beautiful threadwork. Look for product descriptions that explicitly state “washable print” or “water-soluble ink.” If you choose a kit with a blank fabric and a transfer pen, ensure the pen is a reliable water-soluble marking pen. Test the transfer method on a small corner of the fabric before starting your project to ensure the ink washes out fully in cool water without leaving permanent blue or brown stains.
Small Scissors and Accessories
Clean cuts are essential in embroidery to prevent thread ends from fraying, which makes threading needles incredibly difficult. Standard household scissors or bulky office scissors are completely unsuitable for this task because their thick blades cannot cut close to the fabric surface or snip tiny threads cleanly.
A proper sewing kit set for embroidery must include a pair of small, sharp embroidery scissors. These are typically 3 to 4 inches long with fine, pointed blades that taper to a sharp tip. Classic stork-shaped scissors or modern spring-action thread snips are excellent examples.
When evaluating a kit, check reviews specifically for comments on the scissors. High-quality embroidery scissors should have tight, well-aligned joints and blades made of stainless steel that cut cleanly all the way to the very tip. If a kit includes blunt, plastic-handled, or loose-jointed scissors, it is a major red flag; dull blades will crush and fray your cotton floss rather than cutting it, leading to constant frustration. To maintain their sharpness, never use your embroidery scissors on paper, plastic, or cardboard, and keep them stored with a protective tip cover.
While other accessories like needle threaders, plastic thread bobbins (for organizing leftover floss), and thimbles are helpful additions, they are relatively inexpensive to purchase separately. Never let a high piece count of plastic bobbins or cheap needle threaders distract you from the poor quality of the primary cutting tools in a kit.
Nice-to-Have Extras vs. Filler Items: How to Spot the Difference
Many manufacturers design sewing kit sets with marketing in mind, inflating the total piece count to make the kit appear to be an incredible bargain. A “150-piece embroidery kit” might sound impressive, but if 120 of those pieces are tiny plastic safety pins, cheap sewing needles, and paper thread organizers, the kit offers very little actual value to an embroiderer. To make an informed purchase, you must learn to distinguish between genuine, useful extras and cheap filler items.

Useful extras that genuinely aid the embroidery process include:
- Needle Threaders: Especially those with sturdy wire loops or flexible metal tabs, which assist in pulling multi-stranded floss through narrow needle eyes.
- Thread Bobbins: Plastic or sturdy cardboard cards used to wind and organize loose floss skeins, keeping your workspace tidy.
- Thread Organizers or Project Cards: Pre-punched cards that hold active threads for a specific project, preventing tangles.
- Fabric Marking Pens: Water-soluble or heat-erasable pens that allow you to draw your own designs directly onto the fabric.
- Thimbles or Leather Finger Protectors: Helpful for pushing needles through thick fabric layers without hurting your fingertips.
- Needle Minders: Small magnetic charms that hold your needle securely on your fabric when you need to take a break.
Common filler items used to inflate piece counts include:
- Standard Sewing Needles: Kits often pack cheap wheels of 30 standard sewing needles that are completely useless for multi-stranded embroidery floss.
- Thin Plastic Tape Measures: Low-grade, stretchy tape measures that warp easily and are rarely needed for basic embroidery projects.
- Cheap Dressmaker Pins: Dozens of thin, easily bent pins with rough plastic heads that can snag delicate embroidery fabric.
- Large Spools of Basic Sewing Thread: Thin polyester sewing thread on plastic spools, which cannot be used for traditional hand embroidery.
- Unusable Fabric Scraps: Tiny, unhemmed pieces of synthetic fabric that are too small to fit into the provided hoop or too flimsy to stitch on.
To protect yourself from these marketing tactics, calculate the “usable item ratio” of any kit you consider. Count only the core tools—the hoop, the correct crewel needles, the cotton thread skeins, the base fabric, the scissors, and the transfer tool. If a 150-piece kit contains only 15 items that are actually usable for embroidery, you are paying a premium for plastic waste. Read the detailed product description carefully, looking past the bold headline numbers to find the exact breakdown of what is inside the box.
How to Evaluate the True Value of an Embroidery Sewing Kit Set
When shopping for an embroidery sewing kit set in Singapore, finding the right balance between price and quality requires a systematic evaluation. Rather than choosing the cheapest option on an ecommerce platform, use the following framework to determine if a kit is truly worth your investment.
First, demand Material Transparency. High-quality kits are proud of their components and will explicitly state their materials. Look for clear descriptions such as “100% natural bamboo hoop,” “mercerized 100% cotton floss,” and “medium-weight linen fabric.” If a product listing uses vague, evasive language like “natural material hoop,” “soft craft thread,” or “mixed fiber fabric,” it is highly likely the manufacturer is using cheap synthetic substitutes that will make learning difficult and frustrating.
Second, evaluate the Instructional Support provided. For a beginner, a kit is only as good as its instructions. A high-value kit should include a clearly written, illustrated guide that explains how to set up your hoop, separate your floss, and execute basic embroidery stitches (such as the backstitch, satin stitch, French knot, and stem stitch). Some premium kits even provide QR codes linking to step-by-step video tutorials. A kit that costs S$25 with excellent, clear instructions offers vastly better value than a S$10 kit that contains no guidance or poorly translated, confusing diagrams.
Third, consider the Local Context and Pricing in Singapore. Standard beginner embroidery kits typically range from S$15 to S$40. When shopping online, always factor in shipping costs and delivery times to Singapore. It is also worth comparing the cost of a pre-made kit against building your own starter set by visiting local craft and haberdashery shops. In Singapore, you can find high-quality individual components at established craft stores in areas like Chinatown (such as Golden Dragon) or major shopping malls (such as Spotlight).
Let’s look at a quick cost comparison: a premium branded 6-inch wooden hoop costs around S$5 to S$8, a pack of high-quality crewel needles costs S$3 to S$5, and individual skeins of premium, colorfast cotton floss cost roughly S$1.20 to S$1.50 each. If you only need 5 or 6 colors for your first project, you can assemble an incredibly high-quality custom kit yourself for around S$20 to S$25. If a pre-packaged online kit costs S$30 but contains low-grade, nameless threads and a splintered bamboo hoop, building your own custom kit locally is clearly the smarter, higher-quality choice.
Finally, watch out for critical Red Flags. Avoid any kit that has multiple reviews complaining about thread breakage, hoop slippage, or colors bleeding when washed. In Singapore’s warm, humid environment, cheap metal needles will rust rapidly if they lack proper plating, and low-quality dyes are more prone to bleeding if exposed to moisture. If a manufacturer cannot guarantee colorfastness or specify needle sizes, it is best to steer clear.
Frequently Asked Questions (FAQ)
Can I use a regular sewing kit for embroidery?
While a standard sewing kit contains basic tools like scissors and measuring tapes, it is not suitable for hand embroidery. Regular sewing kits are designed for garment construction and repairs, meaning they contain thin, single-ply polyester sewing threads and standard sewing needles with very small eyes. These needles cannot accommodate the thicker, multi-stranded cotton floss used in embroidery, and attempting to force embroidery thread through them will shred the fibers. Furthermore, standard sewing kits lack the essential embroidery hoop required to keep your fabric taut, and they do not include the medium-weight, non-stretch fabrics or specialized transfer tools needed to execute embroidery patterns successfully.
How many colors of floss should a beginner kit include?
For a beginner, a kit containing 20 to 50 colors of embroidery floss is more than sufficient. This range provides a beautiful, diverse palette that allows you to complete multiple starter projects and experiment with different color combinations without feeling overwhelmed. Be highly skeptical of kits that advertise 100, 200, or more colors at an incredibly low price point. To offer such high quantities cheaply, manufacturers almost always compromise on quality, providing thin, unevenly spun threads made of cheap polyester blends that tangle easily, fray during stitching, and bleed their dyes when washed.
What is the best fabric for a beginner embroidery kit?
The best fabric for a beginner embroidery kit is a non-stretch, medium-weight woven fabric made from natural fibers, such as 100% cotton calico, linen, or a cotton-linen blend. These fabrics have a stable, balanced weave that easily supports the weight of various embroidery stitches without puckering or distorting. Beginners should strictly avoid stretchy fabrics, such as jersey, knits, or highly synthetic activewear materials, as well as extremely loose weaves like burlap. Stretchy fabrics pucker easily under stitch tension, making it incredibly difficult for a beginner to maintain even, professional-looking stitches.
Community discussion
Share your experience or ask a question. Comments are reviewed before publication.