
Embroidery is a remarkably accessible craft that does not require a massive financial investment or a dedicated studio space. By focusing on a few high-quality, essential items, you can begin stitching beautiful designs immediately without cluttering your home with unnecessary gadgets. This guide outlines the absolute minimum gear you need to start your needlework journey, helping you avoid common marketing traps while ensuring your very first projects are successful and enjoyable.
The Minimum Viable Embroidery Kit
To begin needlework, you only need five core items: a needle, thread, fabric, a hoop, and scissors.
When selecting your first embroidery needle (sometimes labeled or searched under the term needih), look for a crewel needle. Crewel needles feature a medium-to-long eye that easily accommodates multiple strands of thread, paired with a sharp point that cleanly pierces woven fabrics. This sharp tip is crucial for surface embroidery, distinguishing it from blunt tapestry needles.
Products mentioned in this guide
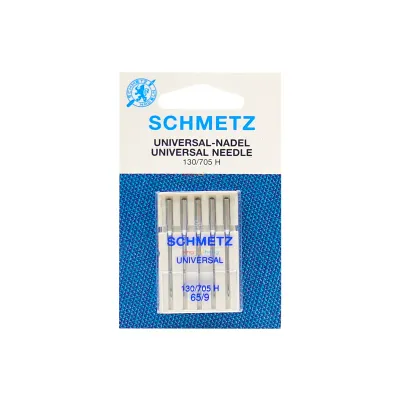
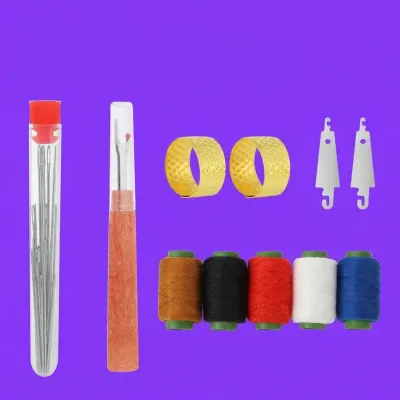
Prices are valid at publication and may change. Please refer to the product page for the latest price.
Embroidery thread, or floss, is typically sold as a six-strand cotton skein. This clever design allows you to pull apart individual strands to customize the thickness of your lines, offering versatility from a single skein. For most beginner projects, using two or three strands provides a clean, readable line without bulk.
For your canvas, choose a stable, non-stretchy woven fabric with a clearly visible weave, such as medium-weight linen or cotton calico. Avoid stretchy knits, polyester blends, or tightly woven synthetic fabrics, which can frustrate beginners by puckering, slipping, or resisting the needle entirely.
An embroidery hoop holds your fabric taut while you work, preventing uneven tension and puckered stitches. A basic wooden or plastic hoop with a reliable adjustment screw is perfectly adequate for your first projects, keeping your working area flat and stable.
Finally, a small, sharp pair of scissors is essential for clean cuts. Dull household scissors will fray your thread, making it incredibly difficult to thread your needle and leaving messy tails on the back of your work.
Self-Check: Do You Really Need These "Extra" Tools?
As you browse craft stores or online marketplaces, you will encounter dozens of accessories marketed as beginner essentials. Many of these items are convenient but entirely optional for someone just starting out, and skipping them initially keeps your startup costs low.

Thread organizers and plastic bobbins are popular for storing leftover floss, but they are not necessary for your first few skeins. You can easily keep your thread organized by leaving it in its original skein, using the paper bands to keep it tidy, or wrapping it around simple cardboard scraps cut from household packaging.
Specialty needles, such as blunt tapestry needles, long beading needles, or thick chenille needles, serve specific purposes in advanced textile arts. For standard surface embroidery, a basic pack of crewel needles is all you need, saving you from buying multi-packs of tools you will not use for months.
Light pads and magnifying lamps are excellent for intricate, professional-grade work or crafters with vision strain. However, for practicing basic stitches, sitting near a bright window during the day or using a standard adjustable desk lamp provides more than enough illumination.
Transfer pens, water-soluble markers, and tracing wheels are often recommended for moving designs onto fabric. Before investing in these, try holding your fabric against a bright window over a printed paper template and tracing the lines lightly with a standard soft pencil, which washes out easily or is completely covered by your stitches.
How to Select the Right Specifications for Your Basics
Buying the correct specifications ensures your tools work in harmony rather than causing frustration during your practice sessions.
Needle sizes are numbered, with larger numbers indicating finer needles. For beginners using two to three strands of standard cotton floss on medium-weight fabric, a size 7 or 8 crewel needle is highly recommended. If you plan to use all six strands for thick, textured lines, step down to a larger size 3 or 4 needle to accommodate the bulk without shredding the thread.
When choosing a hoop, look for a diameter between 4 and 6 inches (approximately 10 to 15 centimeters). This size fits comfortably in one hand, does not require you to stretch your fingers too far to reach the center, and easily accommodates most beginner patterns. In humid climates like Singapore, wooden hoops can sometimes swell or warp slightly over time; a high-quality plastic hoop with a molded lip offers a highly stable alternative that prevents fabric slippage.
Fabric preparation is a critical step that prevents ruined projects later. Always check if your fabric is colorfast by dampening a small corner and pressing it against a white paper towel; if color transfers, wash the fabric before you begin stitching. Pre-washing also preshrinks cotton or linen, ensuring your finished piece does not warp or pucker if it ever needs to be cleaned or ironed.
To maintain your scissors, reserve them strictly for thread. Cutting paper, cardboard, or even heavy plastic packaging will quickly dull the blades and misalign the pivot screw, ruining their ability to snip delicate embroidery floss cleanly.
Workspace Setup and Safe Handling Practices
Creating a dedicated, safe workspace helps protect your tools, keeps your materials clean, and prevents accidents in your home.
Always store your needles in a secure pincushion or a magnetic needle minder when not actively stitching. Leaving needles loose on a table, stuck into the arm of a sofa, or resting on your fabric is a common hazard that can lead to painful accidents for you, your family, or pets.
Position your primary light source so it shines directly onto your fabric from the side opposite your dominant hand. This setup prevents your hand from casting shadows over your working area, reducing eye strain and helping you maintain consistent stitch length and placement.
Keep your embroidery scissors in a protective sheath or a designated tray away from general household use. Clearly label them or explain to others in your household that these shears are reserved solely for thread to preserve their sharp edges and ensure they are always ready when you sit down to stitch.
Frequently Asked Questions (FAQ)
Can I use regular sewing thread instead of embroidery floss?
You can use regular sewing thread for practice, but it behaves differently than embroidery floss. Sewing thread is much thinner, has less sheen, and is designed to blend into fabric rather than stand out. To achieve the same visual impact as a single strand of embroidery floss, you may need to double or triple your sewing thread, which can lead to tangling and uneven tension.
How do I know if my embroidery hoop is tight enough?
Your fabric is sufficiently tight when it sounds like a drum when you gently tap it with your fingernail. The fabric should be completely flat across the hoop without any visible wrinkles, sagging, or distortion of the weave. If the fabric yields or sinks under the light pressure of your needle, loosen the screw, pull the edges taut evenly, and tighten the screw again.
Community discussion
Share your experience or ask a question. Comments are reviewed before publication.