
Starting cross-stitch does not require a massive financial investment or specialized crafting gear. To begin this relaxing needlework hobby, you only need five core items: open-weave fabric, a blunt tapestry needle, stranded embroidery floss, small scissors, and a simple embroidery hoop. Together, these tools allow you to master the basic cross-shaped stitches that form beautiful designs.
Focusing on these essentials helps you avoid the common beginner trap of buying expensive accessories before you know if you enjoy the craft. Whether you purchase a pre-assembled starter kit or select your supplies individually, understanding the role of each tool ensures a smooth, frustration-free introduction to needlework.
The Absolute Minimum Cross-Stitch Starter Kit
When browsing a craft store or online marketplace, the volume of needlework supplies can feel overwhelming. However, the absolute minimum setup for cross-stitch consists of just five non-negotiable items that work in harmony.
Products mentioned in this guide
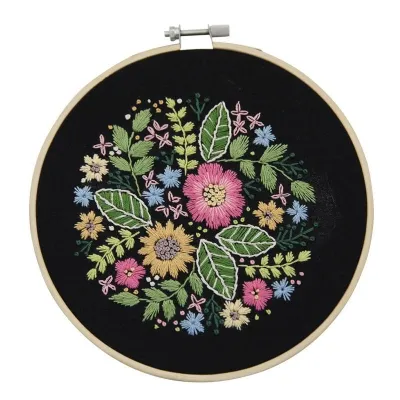
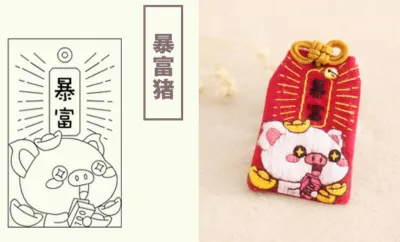
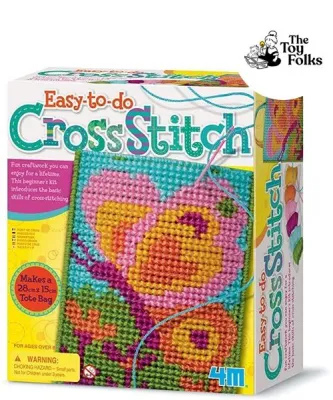
Prices are valid at publication and may change. Please refer to the product page for the latest price.
- The Fabric: Serves as your canvas, featuring a distinct grid of holes that guides your needle to create highly even stitches.
- The Needle: Carries the thread through the fabric without piercing the woven fibers.
- The Embroidery Floss: Provides the color and texture of your finished piece.
- The Scissors: A small, sharp cutting tool is necessary for cleanly snipping thread without fraying.
- The Hoop: Holds your fabric taut, which is essential for maintaining consistent stitch tension.
As a beginner, you must decide whether to buy a pre-packaged starter kit or purchase items individually. Pre-packaged kits are highly convenient because they bundle a printed pattern, pre-sorted threads, a needle, and the exact size of fabric you need. When evaluating a kit, check the product label to ensure it includes cotton floss rather than synthetic polyester, which can be slippery and prone to knotting. If you choose to buy items individually, you gain the freedom to select your own colors and higher-quality materials, though it requires matching your fabric and needle sizes. A basic individual setup or a beginner kit typically costs between S$10 and S$25, making it an accessible hobby to explore.
How to Choose Your First Cross-Stitch Fabric
The foundation of any cross-stitch project is the fabric, and selecting the right type is crucial for your initial success. Unlike standard sewing fabrics, cross-stitch fabrics feature a highly visible, open-weave grid structure. For beginners, Aida fabric is the standard because its stiff, woven blocks create clear, easily identifiable holes at every corner. Advanced stitchers often use evenweave or linen, but these materials lack rigid grids and require you to count individual threads, which can strain a beginner’s eyes and lead to alignment mistakes.

When shopping for fabric, you will notice a “fabric count” on the label, such as 11-count, 14-count, or 16-count. This number indicates how many squares or stitches fit into one linear inch of fabric. A lower count means larger squares and larger stitches, while a higher count results in smaller, more delicate stitches. For your first project, 14-count Aida is highly recommended because it strikes an ideal balance: the holes are easy to see without magnification, yet the finished design retains a clean, detailed appearance. Always check your pattern instructions to see which fabric count the designer recommends, as changing the count will alter the final dimensions of your finished piece.
Before you make your first stitch, inspect and prepare the edges of your fabric. Because Aida is loosely woven, the cut edges will naturally begin to fray as you handle the material. To prevent your fabric from unraveling, apply a thin line of fabric glue along the raw edges, run a quick zigzag stitch with a sewing machine, or wrap the edges with low-tack masking tape.
Selecting the Right Needle and Embroidery Floss
Using the wrong needle can quickly turn a relaxing hobby into a frustrating struggle. For cross-stitch, you must use a tapestry needle rather than a standard sharp sewing needle. Tapestry needles feature a blunt tip and an elongated eye. The blunt tip is designed to slide smoothly through the existing holes in your fabric grid without piercing or splitting the fabric threads. The large eye accommodates multiple strands of thick embroidery floss without causing friction that can wear down the thread.
Matching your needle size to your fabric count is essential for maintaining clean stitches. Tapestry needles are sized by numbers, where a larger number indicates a smaller, thinner needle. For 14-count Aida fabric, a size 24 tapestry needle is generally the ideal match. If your needle is too large, it will stretch out the holes in your fabric, leaving unsightly gaps around your stitches. If the needle is too small, the thread will rub against the fabric edges, leading to premature fraying.
Standard embroidery floss is made of six individual strands of cotton lightly twisted together. You should almost never stitch with all six strands at once, as this will create a bulky, messy texture that distorts the fabric. Instead, separate the strands according to your pattern instructions—most 14-count Aida projects require exactly two strands. To separate them cleanly without tangling, pull one single strand upward and out from the bundle while holding the remaining strands loosely in your other hand, repeating the process for the second strand before merging them back together.
When purchasing floss individually, look for reputable brands that print clear color codes and dye lot numbers on their paper sleeves. Checking the label for colorfastness is critical, especially if you plan to wash your finished piece later, as cheap, unbranded threads may bleed dye and ruin your fabric. Additionally, try to purchase all the thread of a single color at the same time; subtle variations in dye lots can cause noticeable color shifts in your finished design if you have to buy a replacement skein later.
Essential Accessories vs. Nice-to-Have Upgrades
As you explore the world of needlework, you will encounter dozens of specialized accessories designed to make stitching easier. To keep your initial costs low, it is helpful to divide these tools into immediate necessities and optional upgrades that you can purchase later as your skills grow.
Your immediate accessory needs are limited to an embroidery hoop and a pair of small, sharp scissors. An embroidery hoop keeps your fabric taut, which prevents your stitches from puckering and distorting the fabric grid. Wooden hoops are inexpensive and classic, while plastic tension hoops offer a firmer grip that rarely needs adjusting. When choosing a hoop, look for one that fits comfortably in your hand—a 6-inch or 8-inch hoop is ideal for beginners. For scissors, you do not need expensive embroidery shears immediately; any small, sharp pair of household scissors, such as clean nail scissors or sewing thread snips, will work exceptionally well as long as they can cut thread cleanly in a single snip.
Once you decide to commit to the hobby, several optional upgrades can significantly improve your stitching comfort:
- Needle Minders: These small magnetic charms attach to your fabric, giving you a safe place to park your needle when you need to pause, preventing lost needles.
- Thread Organizers: Plastic bobbins or cardboard organizer cards help keep your leftover floss sorted by color code, preventing a tangled mess.
- Specialized Lighting: A bright, adjustable desk lamp or a neck light helps reduce eye strain, especially when working on dark-colored materials.
To save money, you can easily substitute these optional upgrades with common household items. Instead of buying plastic bobbins, wind your thread around pieces of clean, stiff cardboard cut from cereal boxes. A simple refrigerator magnet can serve as a temporary needle minder on the corner of your hoop, and a standard reading lamp provides excellent, cost-free illumination.
Steps to Prepare and Start Your First Project
Setting up your workspace and materials correctly before you make your first stitch will save you hours of correction later. The first step is to find the exact center of your fabric, which ensures your design is accurately centered and leaves an even border for framing. To find the center, fold your fabric in half horizontally, then fold it in half vertically. The point where the two folded creases intersect is the absolute center of your fabric. Mark this spot lightly with a water-soluble fabric pen or insert a straight pin to hold the place.
Next, secure your fabric in the embroidery hoop. Loosen the outer ring of your hoop by turning the screw, then separate the inner and outer rings. Place your fabric flat over the inner ring, centering your marked middle point. Press the outer ring down over the fabric and the inner ring, then gently pull the fabric edges outward to smooth out any wrinkles. Tighten the screw while maintaining even tension across the fabric surface. The fabric should be taut, sounding like a drum when you lightly tap it with your finger, but not stretched so tightly that it distorts the square shape of the grid holes.
Once your fabric is secured, prepare your thread. Cut a length of embroidery floss about 18 inches long—roughly the distance from your fingertips to your elbow. Cutting thread longer than this increases the risk of knots, tangles, and friction wear as you pull it through the fabric. Separate your required number of strands, thread them through the eye of your tapestry needle, and let a short tail hang loose.
To start stitching, avoid using knots to secure your thread on the back of the fabric, as knots create lumps that make framing difficult and can easily pull through the holes over time. Instead, use the “loop method” if you are using an even number of strands, or simply leave a 1-inch tail of thread on the back of your fabric as you make your first few stitches. As you work, guide your needle so that your active stitches pass over and trap this tail against the back of the fabric. This secures the thread permanently and keeps the back of your work neat, flat, and professional.
Frequently Asked Questions (FAQ)
Can I use regular sewing thread instead of embroidery floss?
Regular sewing thread is not a suitable substitute for stranded embroidery floss in cross-stitch projects. Sewing thread is much thinner, has a different sheen, and is designed to slide through tight seams rather than fill out open fabric grids. If you attempt to use standard sewing thread on Aida fabric, the thin strands will fail to cover the fabric grid, leaving your design looking sparse, uneven, and structurally weak. Stranded cotton embroidery floss is specifically manufactured to bloom and fill the grid squares, providing the rich, solid color coverage that defines classic cross-stitch.
Do I need to wash my cross-stitch fabric before starting?
For most standard, light-colored cotton Aida fabrics, pre-washing is not necessary and can actually strip away the stiffening starch that makes the fabric easy to handle. However, if you are working with dark-colored fabrics, hand-dyed threads, or linen, pre-washing is highly recommended to check for colorfastness and prevent dark dyes from bleeding into lighter areas later. If you must wash your materials, hand-wash them gently in cool water with a mild, dye-free soap, rinse thoroughly, and lay them flat on a clean towel to air dry away from direct sunlight.
What size embroidery hoop should I buy for my first project?
When selecting your first embroidery hoop, choose a size that is slightly larger than the active design area of your pattern, but small enough to hold comfortably in one hand. A 6-inch or 8-inch hoop is the ideal starting size for beginners. A smaller hoop is lightweight and easy to maneuver, but it requires you to frequently reposition the fabric if your design is large, which can temporarily crush your completed stitches. A larger hoop allows you to see more of your workspace at once, but it can be heavy to hold for long periods and may make it difficult to maintain consistent fabric tension.
Community discussion
Share your experience or ask a question. Comments are reviewed before publication.