
Starting pottery at home is an exciting creative venture, but it often begins with a common mistake: purchasing massive, expensive tool kits filled with specialized items you may never use. The reality of working with clay is that you do not need a professional studio setup or a vast array of complex instruments to begin. Clay is a highly responsive, tactile medium that primarily requires your hands and a few fundamental tools to cut, shape, smooth, and detail. By focusing on a small, high-quality selection of essential items, you can master the basics of hand-building or wheel-throwing without cluttering your workspace or overspending.
To establish a successful home pottery practice, your initial toolkit should focus on versatility and durability. Whether you are working on a kitchen table or a dedicated crafting bench, having the right basic implements ensures that your clay preparation is consistent, your joins are secure, and your surfaces are refined. This guide breaks down the essential clay tool categories you actually need, helps you evaluate whether to buy a pre-packaged set or individual pieces, and identifies everyday household alternatives to keep your initial investment low while maintaining a safe and clean home environment.
The Core Clay Tools You Actually Need
When you begin working with clay, your tasks generally fall into four main stages: preparing the clay, shaping the form, detailing or hollowing the piece, and joining components together. Having one reliable tool for each of these stages will cover almost all beginner projects, from simple pinch pots to structured slab vases.
Products mentioned in this guide
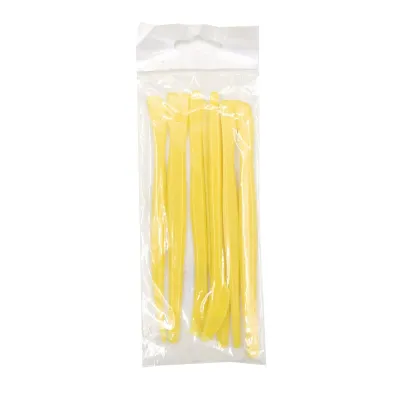
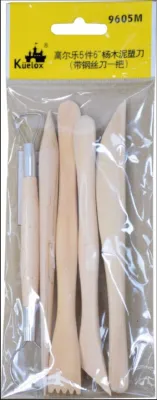
![[SG Stocks *Courier Delivery*] Artist 5pc Clay Tool Set / Clay Wax Pottery Tool / Moulding Create Smooth Texture / Cut and Carve Clay / Suitable for Use with Polymer / 5 Piece Set For Earthenware and Air Dry Clay / 1 ART PLACE](https://img.lazcdn.com/g/p/mdc/20481448ada59a0c6b61fda5378119e2.jpg_400x400q80.jpg_.webp)
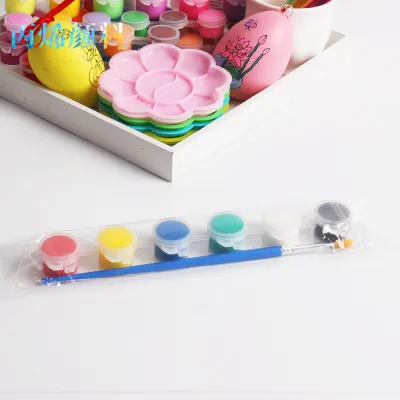
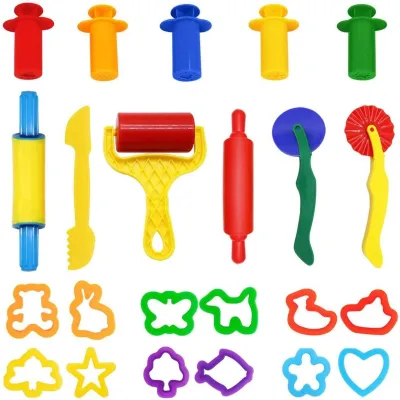
![🇸🇬 [New Product Sale] 56 Piece Set of Soft Clay Auxiliary Tools Cut Round Mould DIY Clay Tools](https://img.lazcdn.com/g/p/06c1ff11cb7a319c15e10d5f3ea50519.jpg_400x400q80.jpg_.webp)

Prices are valid at publication and may change. Please refer to the product page for the latest price.
For cutting and wedging, a wire clay cutter is indispensable. This tool typically consists of a strong, thin wire—often made of stainless steel or braided nylon—attached to two comfortable, easy-grip wooden or plastic toggle handles. You will use it to slice large blocks of clay from your bulk supply, check for internal air pockets during the wedging process, and cleanly slice finished pieces off your work surface or pottery wheel. When selecting a wire cutter, check that the wire is securely anchored to the handles and does not slip when pulled taut.
Shaping and smoothing require tools that can compress the clay walls and manage moisture levels. Ribs are flat, handheld tools shaped like a human rib bone, featuring curved and straight edges. They are available in wood, metal, or plastic, each offering a different level of flexibility. A stiff wooden rib is excellent for smoothing flat slabs and compressing the bottom of a vessel, while a flexible rubber or plastic rib helps shape gentle curves. Alongside ribs, a sponge is your primary tool for controlling water. A natural silk sponge or a dense synthetic pottery sponge holds just the right amount of water to lubricate the clay during shaping without oversaturating it, which can cause the clay to collapse.
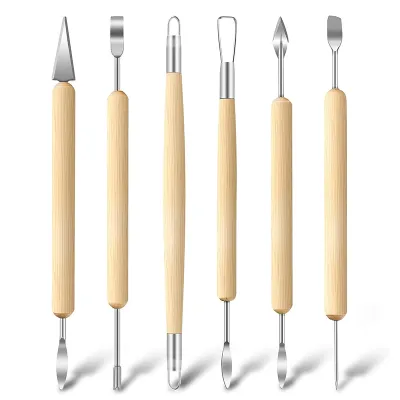
Detailing and hollowing require tools that can pierce, score, and carve. A needle tool, which features a sharp metal needle set into a sturdy handle, is essential for measuring wall thickness, trimming uneven rims, and scoring surfaces before joining pieces of clay together. For carving away excess material, trimming the base of a pot, or hollowing out solid sculptural forms, you will need loop or ribbon tools. These tools feature a loop of sharpened metal secured to a wooden handle, allowing you to shave off thin ribbons of clay with precision.
Finally, modeling and joining require wooden modeling tools. These double-ended wooden implements come in various shapes, such as spatula, wedge, or thumb-like tips. They act as extensions of your fingers, allowing you to reach into tight corners, blend seams smoothly, compress joints, and add decorative textures. When working with these tools, look for close-grained hardwoods like boxwood, which resist water absorption and remain smooth over repeated uses.
How to Choose Between Tool Sets and Individual Pieces
As a beginner, you will quickly notice that online marketplaces and local craft shops offer pre-packaged beginner pottery kits containing anywhere from 8 to 50 pieces. While these sets can seem like an economical way to get started, it is important to weigh their overall value against purchasing individual, high-quality tools.

Assessing the value of a pre-packaged set requires looking closely at the utility of each included item. Many large, low-cost kits are padded with redundant or overly specialized tools, such as multiple variations of the same wooden modeling shape or flimsy double-ended loop tools that bend easily under pressure. A kit that costs very little may save you money initially, but if the metal loops detach from their handles during your first project, you will end up spending more to replace them. If you choose a set, look for a basic 8-piece starter kit that contains only the core essentials: a wire cutter, a sponge, a wooden rib, a metal rib, a needle tool, a wood modeling tool, and two basic loop tools.
Material considerations play a significant role in how tools interact with clay at different moisture levels. Wood tools are highly compatible with wet clay because the natural grain absorbs a tiny amount of moisture, preventing the tool from sticking or dragging. However, cheap wood tools can splinter or warp if left soaking in water. Metal tools, such as stainless steel ribs or scrapers, provide clean, crisp edges and are highly durable, but they require immediate drying to prevent rust. Plastic and rubber tools offer excellent flexibility for curved surfaces and are completely waterproof, making them easy to clean, though they may lack the rigidity needed for heavy scraping.
Ergonomics and grip are critical factors that are often overlooked in cheap, mass-produced sets. Trimming and carving require a steady hand and consistent pressure. Tools with extremely thin, round metal handles or rough, unpolished wood can cause hand fatigue and blisters during extended sessions. Prioritize tools with contoured wooden handles or textured grips that fit comfortably in your hand.
If you have a limited budget, strategic budget allocation is the smartest approach. Instead of buying a massive, low-quality set, consider spending a few extra S$ on a single, high-quality trimming loop tool and a durable wire cutter, then using household items to fill in the gaps for ribs and modeling tools. A well-made trimming tool with a secure, crimped brass ferrule and a hardened steel blade will last for years, providing a much better working experience than a handful of cheap, bendable alternatives.
Tools to Skip to Avoid Overspending
When setting up a home pottery space, it is easy to get carried away by the beautiful, specialized tools used by professional ceramicists. To keep your initial investment low and avoid cluttering your home, there are several categories of equipment you should skip entirely during your first few months.
Advanced trimming tools, such as heavy-duty tungsten carbide carving blades, complex multi-angled loop shapes, or specialized fluting tools, are unnecessary for beginners. These tools are designed for high-volume production or highly intricate decorative techniques that require a deep understanding of clay dryness and consistency. Standard steel loop tools are more than adequate for learning how to trim foot rings and refine shapes.
You should also skip wheel-specific accessories if you are starting exclusively with hand-building techniques like pinch pots, coiling, or slab construction. Items such as bat pins, plastic wheel bats, splash pans, and specialized throwing sticks are only useful if you own or have regular access to a motorized pottery wheel. Hand-building is an incredibly rich and accessible way to learn the behavior of clay, and it requires none of these mechanical accessories.
Finally, avoid purchasing glazing and firing equipment for your home. High-temperature kilns, pyrometers, kiln shelves, heavy-duty ventilation systems, and advanced glaze spray guns represent a massive financial investment and require specialized electrical and safety installations. Instead of setting up a home firing station immediately, look for local community studios, schools, or maker spaces in Singapore that offer kiln-firing services for hobbyists. This allows you to focus on the joy of making and shaping clay at home while leaving the complex firing process to established facilities.
Smart Household Alternatives for Your First Projects
One of the best ways to start pottery at home without overspending is to look around your house for everyday items that can substitute for professional tools. Many household objects perform just as well as their commercial counterparts, allowing you to test your interest in the craft before buying dedicated equipment.
For rolling and flattening clay into uniform slabs, you do not need an expensive slab roller. A standard wooden rolling pin from your kitchen works beautifully. To ensure your slabs are perfectly even, pair the rolling pin with two uniform guide sticks, such as wooden paint stirrers or thick wooden dowels placed on either side of your clay. By resting the edges of the rolling pin on these guides as you roll, you will achieve a consistent thickness across the entire slab, preventing warping during drying and firing.
For smoothing and scraping, look no further than your wallet or kitchen drawer. An expired credit card, a stiff plastic gift card, or a flexible plastic scraper makes an excellent alternative to a commercial plastic rib. You can easily cut these cards into custom shapes with household scissors to match the specific curves of your project. For basic cutting and scraping tasks, a dull butter knife or a small metal spatula can easily stand in for a metal scraper or a wooden modeling tool.
For detailing and scoring, simple pantry items are highly effective. Toothpicks, wooden skewers, and blunt sewing needles are perfect for fine detail work, drawing designs on the clay surface, and scoring joints before joining pieces together. A bundle of toothpicks bound together with a rubber band makes an excellent multi-pronged scoring tool that prepares clay surfaces for slip attachment in a single swipe.
While using household items is highly recommended, you must establish a strict safety boundary. Any kitchen utensil, rolling pin, or container that you use for pottery must be permanently retired from food preparation. Clay contains fine silica particles, and commercial clays or glazes may contain metal oxides and other minerals that are unsafe for ingestion. Keep your pottery tools completely separate from your kitchenware, and never use the same tools for cooking and crafting.
Basic Tool Care and Home Workspace Safety
Taking care of your tools and maintaining a clean workspace is essential not only for the longevity of your equipment but also for your health and the safety of your home infrastructure. Clay is a wonderful material, but it requires specific handling practices when brought into a residential environment.
Rust prevention and proper storage are key to keeping your tools in working order. After each pottery session, wash your tools thoroughly to remove all clay residue. Avoid leaving metal tools soaking in water, as this accelerates rust and can cause wooden handles to swell, crack, and loosen from their metal ferrules. Once clean, dry your tools thoroughly with an old towel and store them in an organized, well-ventilated container, such as a plastic pencil box or a tool caddy, to keep the blades sharp and the handles dry.
Plumbing protection is perhaps the most critical aspect of running a home pottery workspace. Never wash clay-covered hands, tools, or sponges directly down your household sink. Clay particles are heavy and do not dissolve in water; instead, they settle in the U-bend of your pipes, eventually solidifying into a concrete-like clog that requires expensive professional plumbing repairs. To prevent this, set up a simple three-bucket washing system. Use the first bucket to rinse the bulk of the clay off your hands and tools, the second bucket for a cleaner secondary rinse, and the third for a final wipe-down. Allow the water in the buckets to settle overnight; the clay will sink to the bottom, allowing you to pour off the clear water on top and scoop out the settled clay sludge for disposal in the trash.
Dust management is vital for protecting your respiratory health. When clay dries, it breaks down into extremely fine dust containing crystalline silica. Inhaling this dust over time can cause serious respiratory issues. To keep your home safe, never dry-sweep or dust your workspace, as this kicks the fine particles back into the air where they can remain suspended for hours. Instead, always use wet-cleaning methods. Wipe down your work surfaces, tools, and floor with a damp sponge, cloth, or mop. This traps the dust in the moisture, allowing you to clean it up safely without releasing harmful particles into your living space.
Frequently Asked Questions (FAQ)
Do I need a pottery wheel to use these clay tools?
No, you do not need a pottery wheel to make excellent use of these basic clay tools. The core tools described in this guide—including the wire cutter, sponge, needle tool, ribs, and wooden modeling tools—are highly versatile and universally applicable to both hand-building and wheel-throwing techniques. Hand-building methods such as pinch pots, coil building, and slab construction are ideal for beginners working at home, as they require minimal space and no heavy machinery. You can create intricate, beautiful, and functional ceramic pieces using only these basic hand tools and your hands, allowing you to delay purchasing a pottery wheel until you are ready to commit to the craft long-term.
How do I know if a beginner tool set is good quality?
You can assess the quality of a beginner tool set through a few simple, observable physical checks before or immediately after purchase. First, inspect the connections where the metal loops or needles meet the wooden handles; look for secure, tight fits with clean metal ferrules and no visible gaps, loose glue, or wobbling. Second, run your fingers along the wooden handles to ensure they have a smooth, sealed finish free of splinters, rough grain, or cracks that could absorb water and weaken the tool. Finally, test the rigidity of the metal loops and wire cutters by applying light pressure; high-quality tools will feel firm and resilient, whereas low-quality sets will bend easily under minimal force, indicating they may deform when carving firmer, leather-hard clay.
Community discussion
Share your experience or ask a question. Comments are reviewed before publication.