
Replacing or inserting elastic bands is one of the most common garment care and sewing tasks, yet it can quickly become frustrating without the proper tools. In Singapore’s warm, humid climate, the elastic in waistbands, activewear, and fitted sheets tends to degrade, lose its stretch, or snap over time. Instead of discarding these garments, a dedicated elastic band threader allows you to easily restore them to working order. Choosing the right threader involves understanding the mechanical differences between various designs and matching them to your specific fabric and elastic dimensions.
While many home sewists default to using a standard safety pin, this makeshift solution often leads to snagged fabric, open pins inside the casing, or lost elastic mid-channel. A purpose-built threader provides a secure grip and a smooth, blunt tip designed to glide effortlessly through fabric channels. By investing in a reliable tool, you can complete repairs and sewing projects in a fraction of the time while protecting delicate textiles from damage.
Understanding the Main Types of Elastic Band Threaders
To select the most effective tool for your sewing kit, it is essential to understand the structural differences among the primary types of threaders available on the market. Each design utilizes a distinct mechanical function to secure the elastic and guide it through a fabric casing.
Products mentioned in this guide
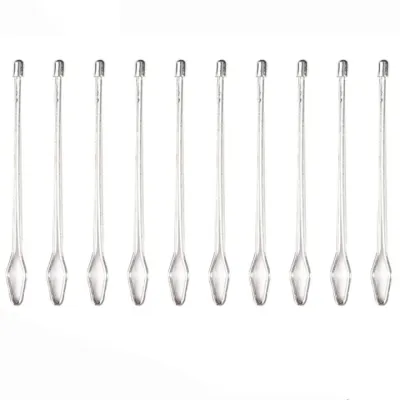
Prices are valid at publication and may change. Please refer to the product page for the latest price.
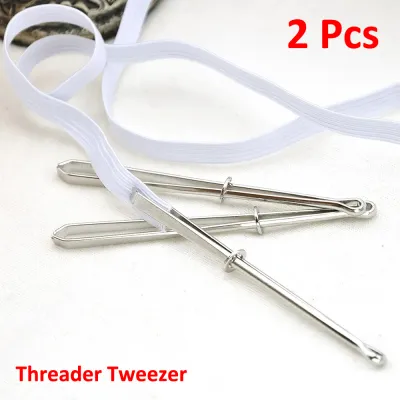
The bodkin style is one of the most popular and versatile designs. It typically resembles a pair of long, blunt tweezers with a sliding ring or collar. To use a bodkin, you insert the end of the elastic between the tweezer jaws and slide the ring down toward the tip to lock the jaws tightly in place. This mechanical clamp provides a highly secure grip, making it ideal for flat, medium-to-wide elastic bands. The rigid metal construction of most bodkins allows you to push the tool firmly through dense fabrics without bending.
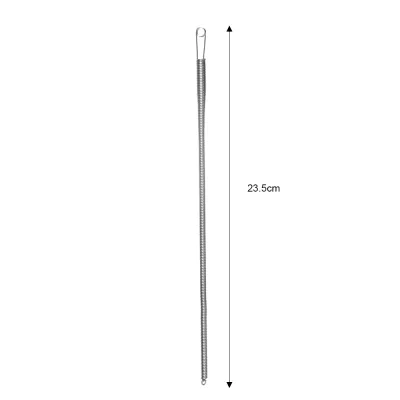
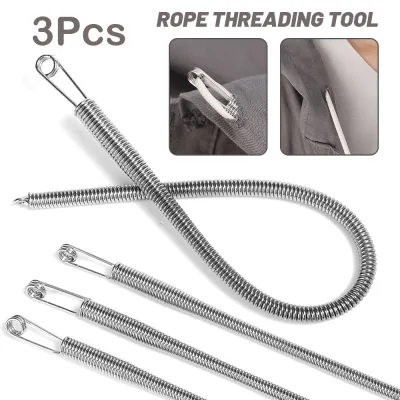
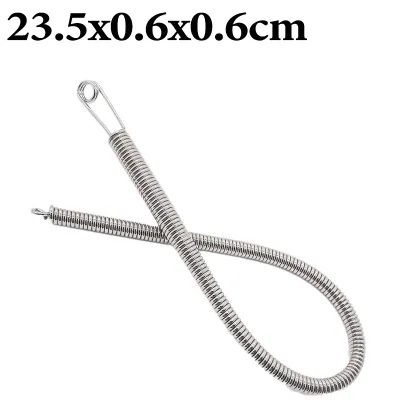
Tube or wire loop style threaders are designed specifically for narrow, delicate, or highly flexible casings. A wire loop threader features a long, flexible wire shaft with a loop at one end. You feed the flexible wire through the casing first, thread the elastic through the loop, and then pull the tool back through the channel. Alternatively, some tube-style threaders consist of a rigid metal tube with a small hook at the end, allowing you to pull the elastic through. These styles minimize bulk, making them excellent for delicate projects like baby clothes, sleeve cuffs, or lingerie.
Hook or crochet-style threaders are engineered for heavier, high-tension elastics. These tools feature a sturdy, rigid metal shaft with a hook at the tip, often accompanied by a latch mechanism similar to a latch hook used in yarn crafts. The latch closes over the hook once the elastic is engaged, preventing the band from slipping off as you pull it through heavy-duty casings. This style is particularly useful for thick waistbands on outerwear, sportswear, or upholstery projects where the elastic must be pulled under significant tension.
Mechanical or automatic threading tools are designed for high-volume sewing or frequent crafting tasks. These often consist of long, flexible plastic tapes or rods with multiple eyelets of varying sizes at one end. You weave the elastic through the eyelets to secure it by friction alone, without any moving metal parts. The flexibility of the plastic allows the tool to navigate curved casings and tight corners smoothly, making it a favorite for complex garment patterns.
Key Specifications and Features to Evaluate
When browsing online marketplaces or local craft shops in Singapore, evaluating specific physical attributes and manufacturing details on product labels will help you avoid low-quality tools that fail during use.

First, verify the maximum and minimum elastic width capacity of the threader. Many product descriptions claim a universal fit, but a tool that is too wide will stretch or tear a narrow casing, while a tool that is too small cannot securely hold a wide elastic band. Check the manufacturer’s specifications for exact millimeter or inch capacities. A well-rounded sewing kit should ideally include a variety of threader sizes to accommodate everything from 3mm drawstrings to 50mm waistbands.
Material composition is another critical factor, especially considering Singapore’s high humidity. Low-grade metals can rust over time if stored in non-air-conditioned sewing baskets, leading to rust stains on your fabrics during use. Look for rust-resistant metals such as stainless steel, nickel-plated brass, or high-quality anodized aluminum. If choosing plastic threaders, inspect the material for flexibility and strength. The plastic should bend easily without showing white stress marks or cracking at the joints, which indicates brittle, low-grade manufacturing.
The security of the grip mechanism must be carefully examined. For bodkin-style threaders, the sliding ring should fit snugly against the tapered jaws. If the ring slides too easily, it may slip backward under tension inside the casing, releasing the elastic and forcing you to restart the process. For hook and latch styles, ensure the latch moves freely but snaps shut securely without any loose play at the hinge.
Finally, pay close attention to the tip design. The tip of any threader must be completely blunt and rounded. Any sharp edges, burrs, or rough metal seams from the manufacturing process can snag on the internal fibers of your fabric channel, pierce the casing, or damage delicate weaves like silk, satin, or lightweight cotton. Run your finger over the tip of the tool before purchasing to ensure it is perfectly smooth.
Matching the Threader to Your Specific Sewing Tasks
Selecting the right tool depends heavily on the specific requirements of your sewing project and the characteristics of the fabric you are using. Matching the threader’s design to the task ensures a smooth workflow and prevents damage to your garments.
For narrow casings, such as those found on lightweight sleeve cuffs, doll clothes, or delicate lingerie, a rigid metal bodkin is often too bulky and inflexible. Instead, opt for a flexible wire loop threader or a thin, flexible plastic threading tape. These tools can easily navigate tight curves and narrow channels without stretching the fabric or distorting the shape of the garment.
When working with wide waistbands or heavy outerwear, the primary challenge is overcoming the resistance of thick, high-tension elastic. A sturdy metal bodkin with a locking ring or a heavy-duty hook threader is the best choice for these projects. The rigid shaft allows you to apply the necessary force to push or pull the elastic through dense fabrics like denim, canvas, or fleece without the tool bending or collapsing under pressure.
Navigating long, complex channels with multiple intersecting seams requires a tool that can bypass internal obstructions. In garments like trousers or jackets, the internal casing often crosses over bulky side seams or pocket bags. A completely rigid tool may get caught on these seam allowances. In such cases, a semi-flexible plastic threader or a dual-ended flexible wire tool is highly effective, as it can bend slightly to slide over the internal bulk without getting stuck.
If you encounter high friction inside a casing—common when threading elastic through rubberized waterproof fabrics, synthetic activewear, or tight cotton weaves—adjusting your technique is key. Ensure the casing is completely clean and free of loose threads. Using a smooth, low-friction plastic threader can help reduce resistance, allowing the tool to slide through the channel with minimal effort.
Sourcing and Verifying Sewing Notions in Singapore
Finding reliable sewing notions in Singapore requires a strategic approach to ensure you purchase high-quality tools that will last. Both physical retail shops and online platforms offer distinct advantages for sourcing these items.
Visiting local haberdashery shops and specialized craft stores in neighborhoods like Chinatown or central shopping districts allows for a hands-on inspection of the tools. Physically handling a threader is the best way to verify its build quality. You can test the tension of a bodkin’s sliding ring, check the smoothness of the metal finish, and assess the flexibility of plastic options. Local shop owners can also provide valuable advice on which tools are most popular for specific fabric types.
If you prefer the convenience of online shopping, e-commerce platforms and online marketplaces offer a wide selection of elastic band threaders. When shopping online, compare specifications carefully rather than relying on generic or machine-translated product titles. Look for listings that provide detailed measurements of the tool’s length, width, and elastic capacity.
Pay close attention to verified buyer feedback on these platforms. Look for reviews that mention the tool’s performance under tension, specifically checking for reports of grip failure, bending, or breakage. A high volume of positive reviews highlighting the durability of the metal or the security of the clamp is a strong indicator of a reliable product.
Additionally, evaluate the seller’s return policies and responsiveness before making a purchase, especially if you are buying a specialized or multi-piece sewing tool set. A reputable seller who answers questions promptly and offers a clear return policy provides peace of mind, ensuring you receive a tool that meets your expectations. Multi-piece sets, which often include a mix of metal bodkins, flexible plastic threaders, and loop turners, are highly cost-effective, typically ranging from S$5 to S$15, and provide excellent versatility for various household sewing tasks.
Frequently Asked Questions (FAQ)
How do I prevent the elastic from slipping off the threader inside the casing?
To prevent the elastic from slipping off inside the casing, perform a mechanical check before inserting the tool. If using a bodkin-style threader, ensure the sliding ring is pushed down as tightly as possible over the jaws to clamp the elastic firmly. For extra security, you can tie a small, tight knot at the very end of the elastic before clamping it, which prevents it from sliding through the jaws. If using a loop or eyelet-style threader, thread the elastic through the eyelet and secure the tail end with a small safety pin, or sew a quick, temporary basting stitch through the elastic and the tool’s eyelet to lock them together. Additionally, always pin the trailing end of the elastic to the fabric at the entry point of the casing so you do not accidentally pull the entire band into the channel.
Can I use a standard safety pin instead of a dedicated elastic band threader?
While a standard safety pin can work in an emergency, it has several functional limitations compared to a dedicated elastic band threader. Safety pins lack rigidity, making them much slower and more difficult to push through long or tight casings. The clasp of a safety pin can easily open under tension inside the channel, exposing the sharp point. This can pierce the fabric, snag the internal fibers, or cause painful finger pricks as you try to guide it. Furthermore, safety pins do not distribute the pulling force evenly, which can cause thin or delicate elastics to tear at the attachment point. A dedicated threader provides a smooth, blunt tip and a secure grip that eliminates these risks, saving time and protecting your garments.
What should I do if the threader gets stuck inside the fabric channel?
If your threader gets stuck inside the fabric channel, do not pull or push it with force, as this can tear the fabric or snap the elastic. Instead, use a gentle, reversible troubleshooting method. Locate the stuck tip of the tool with your fingers through the fabric. Usually, the tool is caught on an internal seam allowance or a fold of fabric. Gently massage the fabric backward, away from the tip of the tool, to release the snag. Lift the fabric of the casing slightly to guide the blunt tip of the threader over the obstruction. If the tool remains firmly stuck, slowly back it out of the entry point of the casing, inspect the channel for loose threads or tight spots, and try threading it again with a more flexible tool or a slightly different angle.
Community discussion
Share your experience or ask a question. Comments are reviewed before publication.