
Deciding between a basic sewing kit and a specialized embroidery sewing box depends entirely on the scale of your project and your long-term creative goals. For absolute beginners who simply want to test their interest by stitching a basic outline on a sturdy canvas tote bag, a general-purpose sewing kit is usually sufficient. A basic kit contains the essential tools needed to pull a thread through fabric, making it a low-risk way to experiment with hand-stitching without an upfront financial commitment.
However, a basic kit quickly reveals its limitations when you move beyond simple mending. Standard sewing kits lack the specialized tension tools, specific needle geometries, and organized storage systems required for intricate surface embroidery. If you plan to work with delicate fabrics, follow structured patterns with variable line weights, or manage multiple colors of divisible cotton floss, a dedicated embroidery sewing box becomes necessary. As a rule of thumb, stick to your basic kit for casual, heavy-fabric mending, but transition to a specialized embroidery setup if you intend to work on detailed patterns or lightweight woven textiles.
Tool Breakdown: Basic Sewing Kit vs. Embroidery Sewing Box
To make an informed decision, it is essential to understand how the physical tools in a general-purpose sewing kit differ from those found in a specialized embroidery sewing box. While both kits are designed for needlework, they are optimized for entirely different mechanical tasks.
Products mentioned in this guide
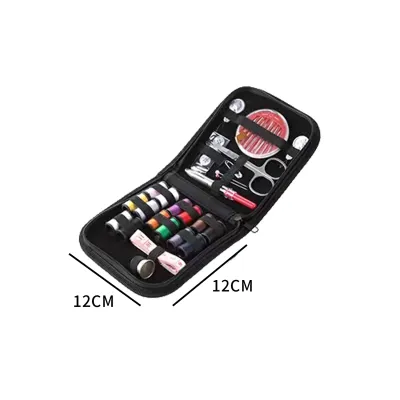
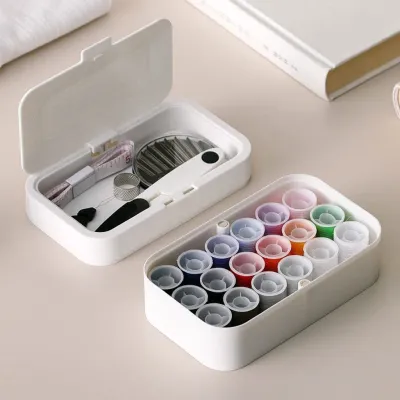
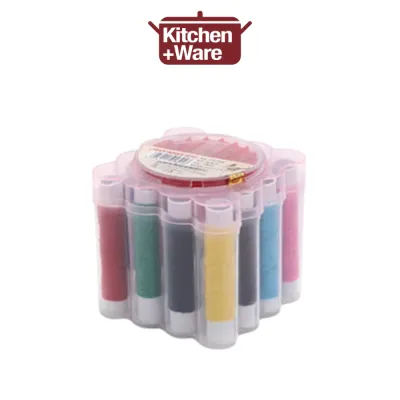
![🧵[3-In-1 Portable]Magnetic Needle Thread Box DIY Portable Magnetic Sewing Box Set Anti-Lost Home Sewing Accessories Sewing Hand Embroidery Tool](https://img.lazcdn.com/g/p/1f2b06022c55593ffad1fd254c41db89.jpg_400x400q80.jpg_.webp)
Prices are valid at publication and may change. Please refer to the product page for the latest price.
What a Basic Sewing Kit Typically Includes
A standard sewing kit is engineered primarily for garment construction, alteration, and structural mending. The contents are selected to join pieces of fabric securely or repair torn seams:
- Sharps Needles: These are universal hand-sewing needles featuring a small, round eye and a medium-length shaft. They are designed to carry fine, single-ply sewing thread cleanly through woven fabrics without leaving large holes.
- Polyester or Cotton Sewing Thread: Standard kits include small spools of tightly spun, high-tensile-strength thread. This thread is engineered to withstand the friction of machine or hand-sewing and hold seams together under physical stress, but it is thin and lacks decorative volume.
- Straight Pins: Used to hold fabric layers together temporarily before stitching.
- Measuring Tape: A flexible tape used for body measurements, hemming, and pattern alignment.
- Standard Fabric Scissors: Medium-sized shears designed to cut cleanly through woven garment fabrics.
These tools are highly functional for structural repairs but are not designed for decorative surface embellishment where thread thickness, color blending, and fabric tension are critical.
What a Specialized Embroidery Sewing Box Adds
An embroidery sewing box shifts the focus from structural utility to artistic precision. It contains tools specifically designed to manage the unique physical properties of decorative threads and delicate ground fabrics:
- Embroidery Hoops or Frames: These tools hold the ground fabric taut like a drum skin. This constant tension is vital for preventing the fabric from puckering as you execute dense, decorative stitches.
- Crewel and Chenille Needles: Unlike sharps, embroidery needles feature an elongated eye designed to accommodate multiple strands of divisible cotton floss without crushing or fraying the fibers. They maintain a sharp point to pierce woven fabrics cleanly.
- Water-Soluble Fabric Markers: Essential for drawing or transferring intricate patterns directly onto the fabric. The lines disappear completely when misted with water or laundered, leaving only your clean stitches.
- Thread Organizers and Bobbins: Embroidery involves managing dozens of different thread colors. Specialized boxes include plastic or cardboard bobbins and dedicated slots to keep active floss skeins from tangling.
- Divisible Cotton Embroidery Floss: Instead of single-ply sewing thread, these kits feature six-strand cotton floss. This allows the stitcher to split the thread to achieve different line weights and textures.
Signs Your Basic Sewing Kit Is Enough for Beginner Projects
Before spending money on a new embroidery sewing box, evaluate your immediate project plans. You do not need specialized equipment if your current goals align with simple, low-tension hand-stitching.

Your basic sewing kit is entirely adequate if you are working on sturdy, heavy-weight fabrics that naturally resist distortion. For example, stitching a simple monogram or a basic outline onto a stiff canvas tote bag, heavy denim jacket, or thick wool felt does not require an embroidery hoop. These fabrics possess enough inherent structural integrity to stay flat under normal hand tension, meaning you can achieve clean stitches without a hoop.
Additionally, a basic kit is sufficient if you are exploring decorative mending techniques like Sashiko or visible mending. These styles traditionally use running stitches to reinforce worn areas on denim or heavy cotton. Because the focus is on structural reinforcement using single-strand threads, standard sewing needles and basic cotton threads work exceptionally well.
The Friction and Puckering Test
To verify if your current tools are up to the task, perform this simple diagnostic test on a scrap piece of your project fabric:
- Thread the Needle: Take a standard sharps needle from your basic kit and thread it with two strands of your standard sewing thread.
- Stitch a Test Line: Execute five consecutive backstitches in a straight line on your fabric scrap.
- Check for Eye Friction: Observe if the thread resists or drags heavily as you pull the needle eye through the fabric. If you have to tug hard, the needle eye is too small for the thread thickness, which will damage your project fabric.
- Inspect for Puckering: Lay the stitched fabric flat on a table. If the fabric puckers, gathers, or distorts around the stitches, your hand tension alone is too high for the fabric, indicating that you need an embroidery hoop to keep the material flat.
When to Invest in a Specialized Embroidery Sewing Box
As your skills progress, you will inevitably encounter project requirements that a basic sewing kit cannot satisfy. Investing in a dedicated embroidery sewing box becomes necessary when your tools begin to hinder your creative results or damage your materials.
Fabric Tension Needs
If you plan to work on lightweight, loose-weave, or slightly stretchy fabrics—such as linen, cotton lawn, or bamboo blends—maintaining even tension by hand is virtually impossible. Every stitch you pull will draw the fabric fibers inward, creating permanent puckering and distorting your design. An embroidery hoop, which is a staple of specialized boxes, holds these delicate fabrics perfectly flat, ensuring your stitches remain uniform and your fabric undamaged.
Thread Management and Organization
Unlike sewing thread, embroidery floss is designed to be split into individual strands (usually one to three strands for fine detail, and four to six for bold lines). Once a skein of floss is cut and split, the remaining strands easily turn into a tangled, knotted mess if left loose. A specialized embroidery sewing box features dedicated compartments, bobbin storage, and organizing cards. This keeps your color palette clean, organized, and free from the dust and lint that accumulate in general sewing kits.
Needle Compatibility and Fabric Protection
Forcing thick embroidery floss through the tiny eye of a standard sewing needle crushes the cotton fibers. This friction causes the floss to fray, lose its sheen, and snap mid-stitch. Conversely, using a thick darning needle to accommodate the floss can leave permanent, unsightly holes in delicate fabrics. Specialized embroidery needles (crewel needles) solve this problem with their elongated eyes and slender shafts, allowing thick floss to pass through the fabric smoothly without causing structural damage.
Storage and Portability for Delicate Supplies
Embroidery tools are highly delicate and sensitive to environmental conditions. Fine embroidery scissors feature razor-sharp, needle-thin tips that can easily bend or dull if tossed into a cluttered box with heavy metal snaps and zippers. Additionally, water-soluble transfer pens must be stored flat to prevent drying, and cotton embroidery floss is highly susceptible to humidity and dust. In humid climates like Singapore, storing cotton floss in a dedicated, well-sealed embroidery box protects your threads from moisture absorption and color degradation, keeping your supplies pristine for long-term use.
The Middle Path: Supplementing a Basic Kit on a Budget
If your basic sewing kit is falling short but you are not ready to commit to a premium, all-in-one embroidery sewing box, you can take a highly cost-effective middle path. By purchasing just a few targeted, inexpensive items individually, you can upgrade your existing kit into a functional embroidery setup without a large financial outlay.
To bridge the gap, focus on acquiring three essential, low-cost tools:
- A Single Embroidery Hoop: A basic 5-inch or 6-inch wooden or plastic hoop typically costs between S$2 and S$5 at local craft shops. This single tool immediately solves your fabric tension issues.
- An Embroidery Needle Multi-Pack: A small assortment pack of crewel needles (sizes 5 to 10) costs around S$3 to S$6 and provides the correct eye sizes for various thread thicknesses.
- Starter Cotton Floss: Instead of buying a massive multi-color pack, purchase three or four individual skeins of six-strand cotton floss in the specific colors required for your first project. High-quality individual skeins generally cost between S$1.50 and S$2.50 each.
You can safely repurpose several items from your basic sewing kit to keep costs low. Use your standard sewing scissors or thread snips for cutting floss—just ensure the blades are wiped clean of any residual sewing machine oil. Basic straight pins from your kit can also be used to temporarily pin paper patterns or templates directly onto your fabric, eliminating the immediate need for expensive transfer papers or specialized marking pens.
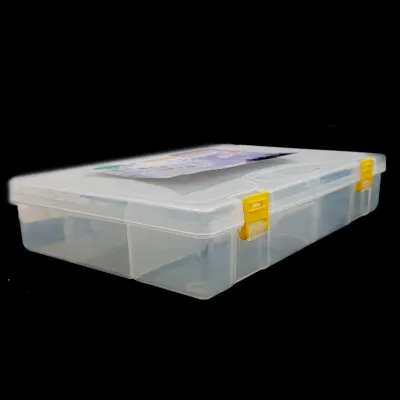
For storage, avoid expensive wooden boxes. Instead, protect your new tools from Singapore’s humid climate by using a simple zippered canvas pouch or a clear plastic craft organizer with adjustable dividers, which can be found in local home goods stores for S$3 to S$8. Placing a small silica gel packet inside your storage container will absorb excess moisture, protecting your metal needles from rust and your cotton floss from mold.
Frequently Asked Questions (FAQ)
Can I use regular sewing thread for embroidery?
While you can use regular sewing thread for very simple, single-strand outline stitches, it is not recommended for standard embroidery patterns. Regular sewing thread is typically made of tightly spun polyester or cotton designed to lie flat and bind seams securely. It lacks the soft sheen, thickness, and divisible strand structure of embroidery floss. Attempting to fill shapes or create textured stitches with regular sewing thread results in flat, sparse designs, requires significantly more stitches to cover the same area, and increases the risk of thread breakage under tension.
Do I absolutely need an embroidery hoop for beginner projects?
An embroidery hoop is not strictly mandatory if you are working on exceptionally stiff, heavy-weight fabrics like thick wool felt, heavy canvas, or pre-stiffened fabrics that do not distort under hand pressure. However, for almost all standard embroidery fabrics like linen, light cotton, or blended weaves, an embroidery hoop is highly recommended. The hoop acts as a vital tension regulator, keeping the fabric warp and weft perfectly straight so that your stitches do not pull the fabric inward and cause permanent puckering.
What size embroidery hoop should I buy first?
For your first purchase, a medium-sized hoop measuring 4 to 6 inches (approximately 10 to 15 centimeters) in diameter is the ideal choice. This size is compact enough to hold comfortably in one hand for extended periods without causing wrist fatigue, making it highly beginner-friendly. Additionally, a 4-to-6-inch hoop fits easily into a small travel bag or storage pouch and accommodates the vast majority of standard beginner-level patterns, which are typically designed for small, manageable surface areas.
Community discussion
Share your experience or ask a question. Comments are reviewed before publication.