
To select the right metal button snap for your sewing or crafting project, you must match the snap’s structural type and size to both your fabric weight and your installation tools. Choosing the wrong size can cause the fastener to pull through the fabric, while using incompatible setting tools will crush the metal hardware. By understanding how to measure cap diameters and differentiate between prong and eyelet attachments, you can ensure a secure, professional closure every time.
In this guide, you will learn how to read standard snap sizing conventions, identify the components of a four-part snap set, and choose the correct hardware for materials ranging from delicate silk to heavy-duty canvas.
Understanding the Four-Part Snap Configuration
A standard utility or fashion metal button snap is not a single piece of hardware; it is a mechanical system made of four distinct parts. To install a snap successfully, you must have two matching pairs: the top half (which sits on the overlapping fabric) and the bottom half (which sits on the underlapping fabric).
Products mentioned in this guide
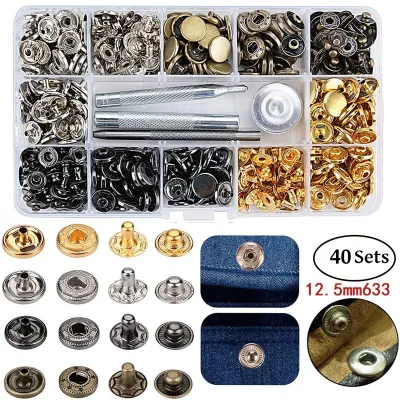
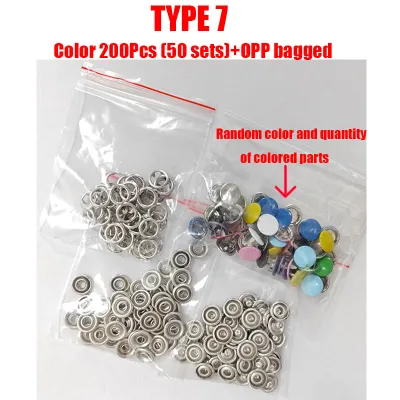
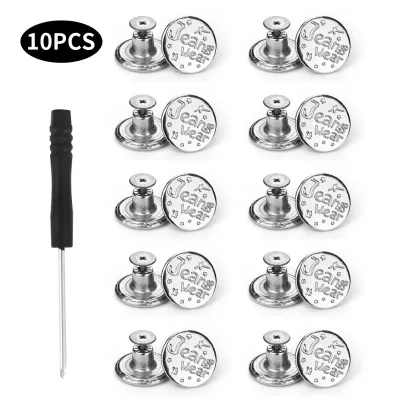
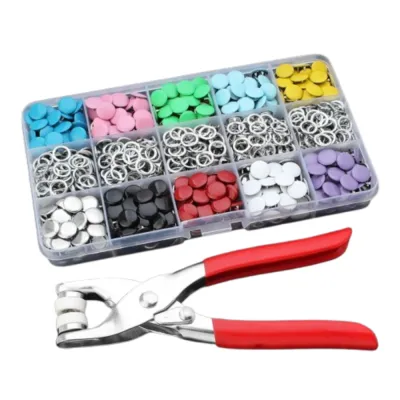
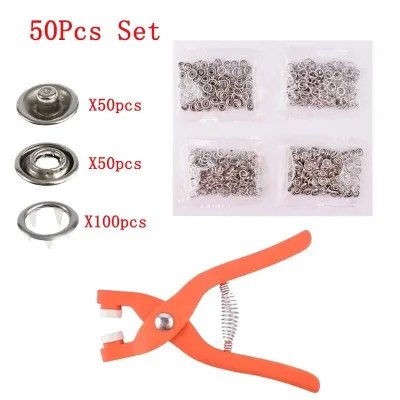
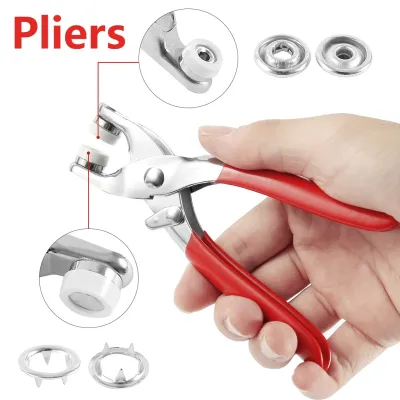
Prices are valid at publication and may change. Please refer to the product page for the latest price.
The top half consists of the cap (the visible decorative face on the outside of the garment) and the socket (the female component with a spring-loaded inner ring). The bottom half consists of the stud (the male component that projects outward) and the post or back cap (which secures the stud from the underside of the fabric).
When you press the completed fastener shut, the stud squeezes into the socket, where the internal spring or metal rim grips it tightly to form a secure lock. Because these sets are engineered to precise tolerances, “metal button snap” packages are sold as complete four-part configurations. You cannot safely mix components from different sets or swap a socket from one manufacturer with a stud from another, as even a fraction of a millimeter of variance will prevent the parts from interlocking securely.
Prong vs. Eyelet (Ring) Types: Choosing the Right Attachment
Metal snaps are categorized by how they anchor themselves to your fabric. The two primary styles are prong snaps and eyelet (or ring) snaps, and each requires a different installation approach.

Prong snaps, often called no-sew or press snaps, feature a ring of sharp teeth on the underside of the cap and post. When applied with pressure, these prongs pierce directly through the weave of the fabric and bend inward against the socket or stud to lock the hardware in place. Because they do not require pre-punched holes, prong snaps are highly efficient and ideal for lightweight to medium-weight woven fabrics. They require compatible snap pliers or a specialized hand-press machine equipped with the correct prong dies.
Eyelet or ring snaps, on the other hand, feature a hollow center post (the eyelet) instead of individual prongs. Installing these snaps requires punching a clean hole through the fabric first. The hollow post is then inserted through the hole and flared outward using a heavy-duty eyelet setter, a hammer-and-anvil tool, or a professional press. This style is also available in sew-on configurations, which feature pre-drilled holes around the perimeter of the metal rim for hand-stitching directly to the material.
To choose the right style for your project, consider this quick decision guide:
- Prong Snaps: Best for standard garments, baby clothes, lightweight shirts, and delicate craft projects where fabric fibers can easily part to accommodate the teeth.
- Eyelet or Ring Snaps: Best for heavy-duty materials such as leather, thick canvas, denim, upholstery, or multi-layered straps where prongs are too short to penetrate and clinch securely.
- Sew-On Metal Snaps: Ideal when you want to avoid punching holes entirely, or when working with delicate vintage fabrics that cannot withstand mechanical pressing tools.
How to Read and Measure Metal Button Snap Sizes
Navigating haberdashery sizing can be confusing because manufacturers use different measurement systems. The most direct and universal measurement is the physical outer diameter of the snap cap, which is measured in millimeters (mm). However, you will also encounter traditional numbered sizes (such as Size 14, Size 16, Size 20, and Size 22) or Ligne (L) measurements.
Ligne is a historic French unit of measurement used widely in button manufacturing, where 1 Ligne is equivalent to 0.635 millimeters. For example, a standard Size 20 snap corresponds to 20 Ligne, which translates to approximately 12.4mm to 12.7mm (or roughly half an inch) in diameter. When purchasing snaps, always check the product specifications for a millimeter equivalent to ensure you know the exact physical footprint of the hardware.
To measure an existing snap for replacement or matching purposes, use a digital caliper or a high-precision ruler. Measure the widest outer edge of the cap. If you are replacing only a portion of an installed snap, you must also measure the outer diameter of the stud and the inner opening of the socket to ensure a matching fit.
Tool compatibility is the most critical factor when reading these sizes. The physical diameter of your snap cap must match the die or attachment on your snap pliers or hand press exactly. If you attempt to press a 15mm (Size 22) snap using a 12mm (Size 20) die, the tool will crush the decorative cap, warp the internal spring of the socket, or fail to fold the prongs flat, leaving you with a loose and ruined fastener.
Matching Snap Sizes and Types to Fabric Weight
To prevent your metal snaps from tearing out of your project or failing to stay closed, you must align the hardware size and attachment type with the weight of your fabric.
For lightweight fabrics like cotton lawn, linen, silk, or thin synthetics, select smaller sizes ranging from 7mm to 10mm (Size 14 to Size 16) paired with open-ring prong configurations. Because thin fabrics lack the structural density to support metal hardware, you should always apply a layer of fusible interfacing to the wrong side of the fabric at the attachment point. This reinforcement distributes the stress of opening and closing the snap, preventing the metal from tearing the delicate fibers.
For medium-weight fabrics such as denim, twill, linen-cotton blends, and standard craft felt, opt for standard utility sizes ranging from 12mm to 15mm (Size 20). These sizes offer the ideal balance of holding power and aesthetic proportion for everyday apparel, tote bags, and home decor items. You can use either heavy-duty prong snaps or medium-weight eyelet snaps depending on the number of fabric layers at the seam.
For heavyweight fabrics like thick leather, canvas, wool coatings, or multi-layered webbing, use larger sizes of 15mm and above (Size 22 or larger) paired with heavy-duty eyelet or post-style snaps. These robust fasteners require a pre-punched hole and a hammer-and-anvil setter or press to handle the high tension required for thick materials.
Installation Tools and Compatibility Checks
Before applying any metal hardware to your finished project, verify that your tools are fully compatible with your chosen snap size and style. Standard snap pliers often come with interchangeable plastic or metal dies designed for specific sizes, such as Size 16 or Size 20. Check that the die matches your snap cap perfectly; the cap should sit snugly inside the curved well of the die without shifting or spilling over the edges.
Always perform a test installation on a scrap piece of your project’s exact fabric. Be sure to replicate the exact conditions of your final piece, including the same number of fabric layers, interfacing, and any linings. This test allows you to calibrate your setting pressure and ensure the post length is appropriate for the fabric thickness.
Once pressed, inspect the test snap for the visual cues of a successful installation:
- The prongs or eyelet post must be folded completely flat and flush against the inner rim of the socket or stud.
- There should be no sharp edges protruding that could snag skin or threads.
- The cap and post should not spin, wobble, or pull away from the fabric when you tug them gently.
- The snap should open and close with a crisp, audible click without straining the surrounding fabric.
Frequently Asked Questions (FAQ)
Can I mix and match different brands of metal snap buttons?
While standard sizes like Size 20 (12.4mm) are nominally the same across the sewing industry, you should avoid mixing and matching different brands of metal snap buttons within a single project. Minor manufacturing variations in prong length, stud height, or socket spring tension can prevent parts from different brands from interlocking correctly. To ensure consistent tension and a reliable closure, stick to a single brand and product line for all four components of your snap sets.
Why do my metal snap buttons keep popping open or falling off?
If your metal snaps are falling off, the most common cause is a mismatch between the snap’s post length and the total thickness of your fabric layers. If the fabric is too thick, the prongs or eyelet post cannot reach far enough to bend and clinch securely. Conversely, if the fabric is too thin and you did not use fusible interfacing, the metal will quickly tear through the loose weave. Snaps that pop open too easily often suffer from warped sockets or studs, which happens when mismatched setting tools or uneven pressure are applied during installation.
How do I remove a metal snap button without ruining the fabric?
To remove a faulty metal snap without ruining your fabric, avoid pulling the hardware forcefully with standard pliers, as this will tear a large hole in the material. Instead, use a pair of small side-cutting pliers or a specialized snap removal tool to gently snip the crimped center post or prongs on the underside of the snap. If you do not have specialized cutters, you can carefully slide a small flathead screwdriver under the edge of the socket or stud to pry the metal open slightly, then use needle-nose pliers to bend the prongs back out. Keep in mind that the small holes pierced by the original installation will remain visible, so you may need to patch the area or place the replacement snap slightly adjacent to the original spot.
Community discussion
Share your experience or ask a question. Comments are reviewed before publication.