
To start cross stitching successfully, your starter kit must contain six non-negotiable items: Aida cloth (specifically 14-count), divisible six-strand cotton embroidery floss, a blunt-tipped tapestry needle, an adjustable embroidery hoop, small sharp embroidery scissors, and a clear pattern with a symbol key. While commercial kits often bundle these materials together, the quality of individual components varies significantly. Understanding how to evaluate each item ensures your first project is a satisfying, frustration-free experience rather than a struggle with tangling threads and fraying fabric.
In humid climates like Singapore, selecting the right materials is especially important. High humidity can soften fabric starches, tarnish cheap metal needles, and even cause low-quality thread dyes to bleed. By learning what makes a high-quality starter tool, you can confidently choose a pre-made kit or curate your own custom set from local craft shops or online marketplaces.
Quick Checklist: The Non-Negotiable Cross Stitch Essentials
Before purchasing any starter set, verify that it contains the absolute minimum components required to complete a project. Missing even one of these items will halt your progress before you can make your first stitch.
Products mentioned in this guide
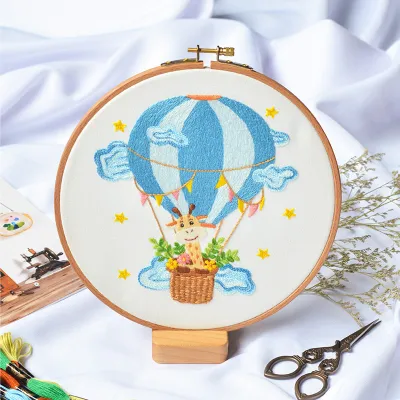
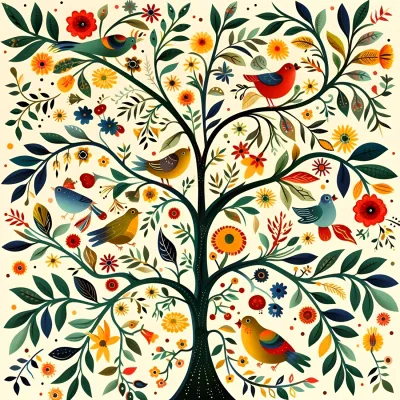

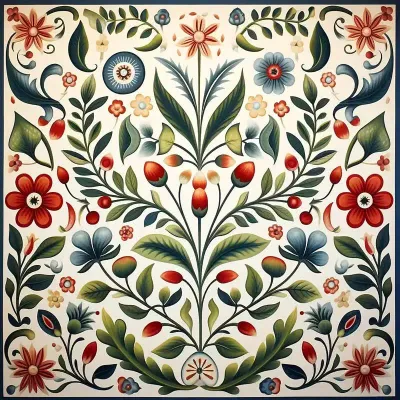

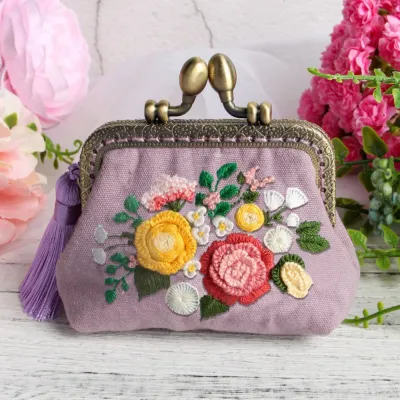
Prices are valid at publication and may change. Please refer to the product page for the latest price.
- Aida Cloth: This is a specially woven cotton fabric with a distinct grid of square holes. It acts as the canvas for your stitches, allowing you to keep your work neat and even.
- Embroidery Floss: This is the colored thread used to create the design. High-quality floss is made of six individual strands that can be separated depending on the thickness required for your fabric.
- Tapestry Needle: Unlike standard sewing needles, a tapestry needle has a blunt round tip and a large eye. The blunt tip prevents you from piercing the fabric threads, while the large eye easily accommodates multiple strands of floss.
- Embroidery Hoop: This tool consists of two nesting rings that hold your fabric taut while you stitch. Proper tension prevents puckering and ensures your stitches remain uniform.
- Small Sharp Scissors: You will need these to snip threads cleanly close to the fabric face. Large household scissors are too bulky and can easily damage your work.
- Pattern and Symbol Key: This is your visual guide. It shows a grid corresponding to your fabric, with unique symbols representing different thread colors.
While pre-packaged kits are highly convenient because they curate these items for a specific design, checking the specifications of each bundled tool will save you from common beginner pitfalls.
Fabric and Thread: Selecting Beginner-Friendly Materials
The foundation of any cross stitch project lies in the textile elements. The weave of your fabric and the composition of your thread directly impact how easy it is to count your stitches and how long your finished piece will last.

Aida Cloth vs. Evenweave: Fabric Count and Material
For beginners, 100% cotton Aida cloth is the absolute standard. Aida is woven with clear, block-like squares that create highly visible holes at each corner. The size of these squares is determined by the “count,” which refers to the number of holes per linear inch. A 14-count Aida cloth is highly recommended for beginners because the holes are large enough to see clearly without eye strain, yet small enough to produce a detailed finished image.
In contrast, evenweave and linen fabrics have a much softer drape and a less pronounced grid. Linen is woven with irregular thread thicknesses, and stitching on it usually requires counting “over two” threads horizontally and vertically. This added complexity makes evenweave better suited for intermediate crafters.
When evaluating Aida cloth in a kit, check the fabric’s stiffness. High-quality Aida is treated with a temporary starch sizing that makes it feel stiff, almost like cardstock. This stiffness is highly beneficial because it keeps the fabric flat and stable, making it much easier to maintain even stitch tension. Avoid kits containing limp, flimsy fabric, as the edges will fray rapidly and the grid squares will distort under the slightest pressure.
Embroidery Floss: Strands, Material, and Colorfastness
Standard embroidery floss is made of 100% long-staple cotton and consists of six loosely twisted strands. This structural design allows you to separate the thread into individual strands. For a standard 14-count Aida cloth, the industry standard is to stitch with two strands. Using too many strands will crowd the holes and make pulling the needle difficult, while using too few will reveal the white fabric underneath the stitches.
Before starting, verify the colorfastness of your floss. Colorfastness means the dyes will not bleed or run when the fabric is exposed to water. This is critical because cross stitch projects accumulate natural hand oils during the many hours they are held, requiring a gentle wash upon completion. Premium brands guarantee colorfastness, whereas unbranded, ultra-cheap floss bundles often bleed dark reds, blues, and blacks, permanently staining your white fabric.
Unbranded floss is also prone to severe tangling, knotting, and fraying. High-quality cotton floss undergoes a process called mercerization, which strengthens the fibers and gives them a smooth, subtle sheen. This smooth finish allows the thread to glide effortlessly through the holes of the Aida cloth without friction-induced shredding.
Needles, Hoops, and Hardware: Tools for a Frustration-Free Start
While fabric and thread make up the physical piece, the hardware tools you use determine your physical comfort and the precision of your work. High-quality hardware prevents hand fatigue and keeps your materials in optimal condition.
Tapestry Needles: Sizing and Blunt Tips
Never use a standard sharp sewing needle for cross stitch. Sewing needles are designed to pierce through fabric fibers, which will split the threads of your Aida cloth and ruin the grid structure. Instead, look for tapestry needles. The blunt round tip of a tapestry needle naturally slides into the open holes of the Aida cloth, guiding your hand to the correct placement.
Needle sizes are represented by numbers; counterintuitively, the larger the number, the smaller the needle. For 14-count Aida cloth, a size 24 tapestry needle is the ideal match. If the needle is too large (such as a size 18), it will stretch the holes of your fabric, leaving unsightly gaps around your stitches. If it is too small (such as a size 28), the eye will be too narrow to thread easily, and the thread will suffer excessive friction as it passes through the fabric.
In humid regions, standard steel needles can rust or tarnish quickly due to moisture in the air and acidic oils from your fingers. This tarnish creates resistance, making it harder to pull the needle through the fabric. To prevent this, look for nickel-plated or gold-plated tapestry needles. These coatings resist corrosion, ensuring the needle remains slick and smooth over long stitching sessions.
Embroidery Hoops: Wood vs. Plastic and Sizing
An embroidery hoop is essential for keeping your Aida cloth taut. Consistent tension is the secret to achieving neat, uniform stitches. When choosing a hoop, you will generally decide between wood and plastic materials.
- Wooden Hoops: Traditional wooden hoops are lightweight and aesthetically pleasing, making them popular for framing finished projects. However, inexpensive wooden hoops can have rough inner surfaces that snag delicate floss, or uneven gaps that allow fabric to slip. If you use a wooden hoop, check that the inner ring is smooth and fits tightly against the outer ring.
- Plastic Hoops: Modern plastic hoops are highly practical for the actual stitching process. Many feature a molded lip or groove system along the interlocking rings that locks the fabric securely in place, preventing it from slipping even under heavy use. They are also easy to clean and highly durable.
For a beginner, a hoop size between 6 inches and 8 inches in diameter is ideal. A 6-inch hoop is small enough to hold comfortably in one hand without causing wrist fatigue, yet large enough to encompass a standard beginner pattern without requiring you to move the hoop constantly. To verify a hoop’s quality before buying, tighten the adjustment screw completely and check for any warping or visible gaps between the inner and outer rings; the two circles must meet uniformly to hold tension.
Patterns, Scissors, and Accessories: Completing Your Workflow
Once you have your basic fabric, thread, and hardware, a few additional tools will organize your workspace and make your stitching process significantly smoother.
Reading and Selecting Patterns
A beginner-friendly pattern should be highly legible. Look for charts that feature a clear grid with bold 10×10 block lines, which make counting squares much easier. The pattern must include a comprehensive color key listing the symbols alongside their corresponding thread brand and color code (such as DMC numbers).
Physical printed patterns are highly convenient because you can mark off completed stitches with a highlighter. Digital PDF patterns are also popular because you can zoom in on your tablet or phone screen. Whichever you choose, ensure the design does not feature complex specialty stitches (like French knots or fractional stitches) for your very first project; stick to whole cross stitches and simple backstitching.
Precision Scissors
Do not use standard office scissors for your threadwork. You need small, sharp embroidery scissors or thread snips with fine, pointed tips. These allow you to cut your floss cleanly right at the base of the fabric without fraying the thread ends or accidentally snipping adjacent stitches. Classic stork scissors or modern stainless steel snips are excellent choices that fit easily into a small travel craft pouch.
Recommended Workflow Accessories
While not strictly mandatory, these three affordable accessories will greatly improve your crafting experience:
- Needle Threader: A simple wire-loop needle threader is a lifesaver for beginners. It pulls thick cotton floss through the narrow eye of a tapestry needle in seconds, saving you from frustrating, repetitive threading attempts.
- Thread Organizer or Bobbins: To prevent your floss from turning into a tangled nest, use plastic or cardboard bobbins. You can wind your thread onto these cards and write the color number on the corner. Alternatively, a flat cardboard thread organizer with punched holes keeps your active threads separated and labeled.
- Water-Soluble Fabric Pen: You can use this pen to mark the center lines or draw a 10×10 grid directly onto your Aida cloth. This matches the grid on your pattern, reducing counting errors. Always test the pen on a small scrap of fabric first to verify that the ink washes out completely in cool water before marking your main project.
Evaluating Pre-Packaged Kits: How to Avoid Missing Items and Poor Quality
When shopping for a pre-packaged cross stitch starter kit, do not rely solely on the cover photo. Many low-cost kits look appealing online but contain substandard materials that make the crafting process difficult.
Reading Kit Descriptions: Counted vs. Stamped
First, verify whether the kit is “stamped” or “counted.” Stamped cross stitch kits have the pattern printed directly onto the Aida cloth in washable ink. You simply stitch over the printed colors, and wash the ink away when finished. Counted cross stitch kits provide blank Aida cloth and a separate printed paper chart; you must count the holes to place your stitches. Counted cross stitch is the traditional method and yields a cleaner, more professional final look, but stamped kits offer immediate, low-effort guidance.
Next, look at the thread specifications. Ensure the kit explicitly states that it includes “sufficient floss” or “130% of required thread” to account for beginner mistakes or loose stitching.
Red Flags to Avoid
Watch out for these common warning signs in cheap commercial kits:
- Missing Hoops: Many kits do not include an embroidery hoop, assuming you already own one. If you do not have a hoop, you will need to buy one separately.
- Unbranded Floss: If the listing does not mention a reputable thread manufacturer or color-coding system, the floss is likely low-grade polyester that will tangle, fray, and bleed dye when washed.
- Blurry or Low-Resolution Charts: Some low-quality kits include poorly photocopied patterns where the symbols are difficult to distinguish from one another.
- Flimsy Plastic Hoops: Avoid hoops made of thin, flexible plastic that warps when you tighten the screw, as they cannot hold the necessary tension.
Pre-Packaged vs. Sourcing Individually
Buying a pre-packaged kit is highly convenient because it provides the exact colors and fabric size you need for a specific design, saving you from buying full skeins of thread for a small project. However, sourcing your tools individually allows you to invest in premium, durable hardware—like a high-quality German wooden hoop, specialized gold-plated needles, and professional-grade scissors—that will last for dozens of future projects.
For your first project, a well-reviewed pre-packaged kit from a reputable brand is often the most cost-effective path. Just use the following mental checklist before checking out to ensure you have everything you need:
- Does the kit include a hoop, or do I need to add one to my cart?
- Is the fabric count clearly stated (preferably 14-count Aida)?
- Are the needles blunt tapestry needles rather than sharp sewing needles?
- Do I have a small pair of sharp scissors at home, or should I purchase thread snips?
Frequently Asked Questions (FAQ)
Do I need a thimble for cross stitch?
No, you do not need a thimble for cross stitch. Thimbles are designed to protect your fingers when pushing sharp sewing needles through tough, un-pierced fabrics like denim or leather. Because cross stitch uses blunt-tipped tapestry needles that slip easily into the pre-existing holes of Aida cloth, you do not need to apply heavy pressure with your fingertips. Additionally, the standard two-handed stitching technique does not involve pushing the needle point directly with your fingers.
Should I wash my Aida cloth before starting?
No, you should not wash your Aida cloth before you begin stitching. High-quality Aida cloth is treated with a starch sizing that gives it stiffness and structure. This stiffness is highly beneficial because it keeps the fabric flat and prevents the holes from distorting while you stitch. Washing the fabric beforehand will remove this starch, leaving the Aida limp, difficult to handle, and highly prone to fraying along the cut edges. Save the washing for after your project is fully completed.
What is the difference between stamped and counted cross stitch kits?
Stamped cross stitch kits have the entire design printed directly onto the fabric in color-coded, water-soluble ink, allowing you to stitch directly over the pattern without counting. Once finished, you soak the piece in water to dissolve the printed ink, leaving only your stitches. Counted cross stitch kits provide blank fabric and a separate paper or digital chart. You must locate the center of the fabric and count the grid squares to determine where to place each stitch. Counted cross stitch is the traditional method and is highly recommended for learning proper technique and achieving a cleaner, more precise final look.
Community discussion
Share your experience or ask a question. Comments are reviewed before publication.