
Selecting your first embroidery hoop is one of the most important decisions you will make as a beginner needleworker. The hoop acts as your foundation, holding your fabric taut so that your needle can pass through smoothly without distorting the weave or puckering your stitches. A poorly made hoop can lead to constant frustration, requiring you to pull and readjust your fabric repeatedly, which can damage delicate fibers and unevenly stretch your design. By understanding what makes a hoop reliable, you can avoid common pitfalls and focus entirely on enjoying your new craft.
When shopping for a hoop, you will encounter a variety of materials, sizes, and tightening mechanisms. The ideal starter hoop is one that feels comfortable in your hand, maintains consistent tension across your fabric, and matches the scale of your first project. While it is tempting to buy the cheapest option available, investing a small amount of time in evaluating the construction quality of your tools will save you hours of stitching frustration.
Understanding Embroidery Hoop Basics
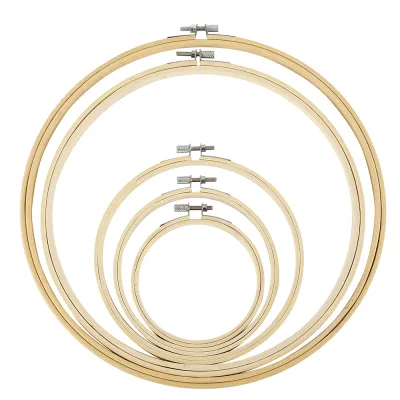
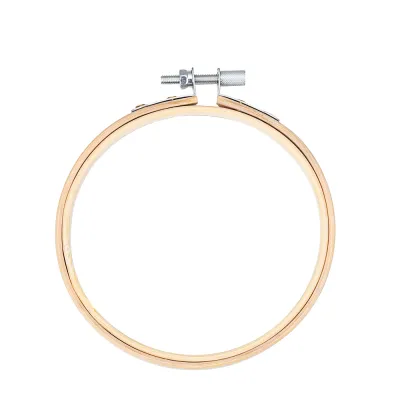
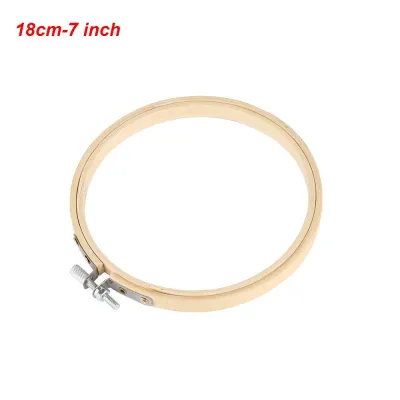
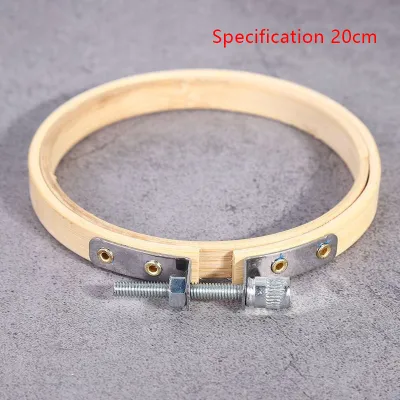
An embroidery hoop consists of two concentric rings that work together to clamp fabric in place. The inner ring is solid and smooth, while the outer ring features a split and a tightening screw mechanism. When you place your fabric over the inner ring and press the outer ring down over it, the fabric is sandwiched between the two layers. Tightening the screw pulls the outer ring closer to the inner ring, securing the fabric and creating the tension necessary for neat, even stitches.
Products mentioned in this guide
Prices are valid at publication and may change. Please refer to the product page for the latest price.
Wooden and bamboo hoops are the most traditional and widely available options. Bamboo hoops are lightweight and highly affordable, making them popular for quick projects, though they can sometimes have slight surface irregularities. High-quality wooden hoops, often crafted from dense hardwoods like beechwood, are sanded to a very smooth finish and offer excellent structural integrity. In humid tropical climates, cheap wood can absorb moisture from the air and warp over time, making high-quality sealed hardwoods or durable plastic hoops a more stable long-term choice.
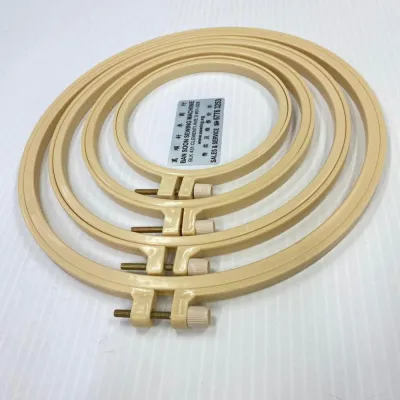
Plastic hoops are a modern alternative that offers exceptional durability and consistent tension. Many plastic hoops feature a molded lip or a ridge-and-groove system on the inner ring that locks into the outer ring. This design provides a highly secure grip, making plastic hoops particularly useful for slippery or heavy fabrics. They are also easy to clean and do not warp when exposed to moisture, though some crafters find them slightly heavier to hold for extended periods than lightweight wood.
Standard screw-tightened hoops are the most versatile choice for beginners, but you may also encounter spring tension hoops and scroll frames. Spring tension hoops utilize a flexible metal inner ring with squeeze handles that fits inside a plastic outer ring. While they allow for rapid fabric adjustments, the spring mechanism can be stiff and difficult to squeeze if you have limited hand strength. Scroll frames, which roll the fabric onto rollers at the top and bottom, are excellent for large, complex projects but are generally too bulky and expensive for a beginner’s first project.
Key Features to Evaluate Before Buying
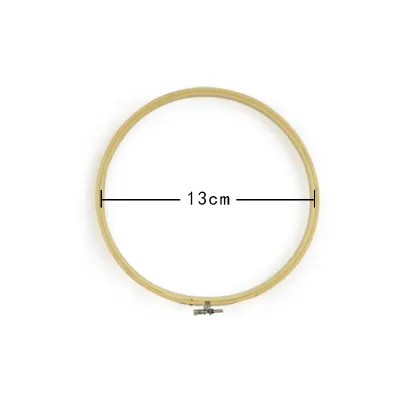
The diameter of the hoop is the first specification you should consider, as it directly impacts your physical comfort and the size of your stitching area. For absolute beginners, a hoop with a diameter of 6 inches (approximately 15 cm) or 8 inches (approximately 20 cm) is highly recommended. This size range fits comfortably in one hand, allowing you to hold the frame securely while stitching with your dominant hand. It also provides a generous working area that accommodates most beginner patterns without requiring you to move the hoop constantly.

To choose the correct size, measure your intended design and select a hoop that is at least 1 to 2 inches (2.5 to 5 cm) larger than the outer boundaries of the pattern. This margin ensures that your needle has enough clearance to work near the edges of the design without hitting the inner ring. If you attempt to stitch too close to the frame, the angle of your needle changes, which can lead to uneven stitch lengths and tension issues.
Hoop depth, or the thickness of the rings, also plays a critical role in tension distribution. Standard hoops typically have a depth of about 3/8 inch (approximately 1 cm). If you plan to work with thicker fabrics or want more stability, look for hoops with a depth of 1/2 inch (approximately 1.3 cm) or more. Deeper hoops provide a larger surface area of contact between the inner and outer rings, which distributes the clamping force more evenly and prevents the fabric from sagging in the center.
Examine the tightening hardware closely before making a purchase. High-quality hoops feature sturdy metal screws, often made of brass or steel, with clean, deep threads that do not strip easily. Look for screws that include a slot for a flathead screwdriver or a small nut that can be tightened with a wrench. This feature is incredibly helpful for securing the hoop tightly, especially if you find it difficult to turn the screw sufficiently using only your fingers. Avoid hoops with thin, flimsy plastic screws or brackets that flex when tightened, as these are prone to breaking under pressure.
The surface finish of the inner ring is another vital quality indicator. Run your fingers along the inside and outside surfaces of both rings to check for splinters, rough patches, or sharp plastic molding seams. Any roughness can snag your embroidery floss, fray your fabric, or leave permanent marks on your work. The inner ring must be perfectly round and sit completely flush against the outer ring; any gaps between the two rings when clamped together will allow fabric to slip, destroying your tension.
Matching Hoop Specifications to Your Starter Project
Pairing your hoop material and mechanism with your specific fabric type is essential for achieving the best results. If you are starting with lightweight, stable fabrics like plain-weave cotton, calico, or linen, a standard wooden or beechwood hoop is an excellent match. These fabrics have enough natural texture to grip the wood securely, and the moderate tension provided by a standard screw mechanism is more than sufficient to keep the fabric taut.
For stretchy, slippery, or highly delicate fabrics like silk, satin, or jersey knits, a plastic hoop with an interlocking ridge is often a better choice. The physical barrier of the ridge prevents the fabric from sliding through the rings, even under light tension. If you prefer to use a wooden hoop for these materials, you can wrap the inner ring with cotton twill tape. This process, known as binding, adds friction and cushions the fabric, protecting delicate fibers from being crushed or marked by the hard wood.
The scale of your project should also dictate your choice of hoop. Small, detailed designs, such as monogram letters or miniature floral patterns, are easiest to stitch in small hoops of 3 to 4 inches. A small hoop keeps the fabric incredibly tight right around the stitching area and is lightweight enough to hold for hours without hand fatigue. Conversely, attempting to stitch a small design in a very large hoop can result in loose fabric tension in the center, making it difficult to maintain consistent stitch quality.
Be aware of the limitations of standard hoops when working with heavy materials like denim, canvas, or wool felt. These thick fabrics require a wider gap between the inner and outer rings. If you try to force a thick fabric into a standard hoop, you may bend the screw, warp the rings, or damage the fabric fibers. For heavy materials, look for specialized deep-sided hoops or frames designed specifically for thick textiles, or choose a hoop with an extra-long tightening screw that can accommodate the added bulk.
What to Inspect When Your Hoop Arrives
Once your embroidery hoop arrives, performing a few quick quality checks will ensure it is ready for use and free of manufacturing defects. Start with a visual and tactile inspection of the rings. Lay the inner ring flat on a completely level surface, such as a table or countertop. If the ring rocks or shows visible gaps between the wood and the table, it is warped. A warped ring cannot distribute pressure evenly, which will lead to persistent fabric slippage during your projects.
Next, test the screw mechanism by turning it completely in and out. The screw should glide smoothly through the threads without catching, grinding, or wobbling. Check the brackets that attach the screw hardware to the outer ring; they should be firmly anchored to the wood or plastic. If the brackets wiggle or feel loose, the hoop will not be able to hold high tension, and the hardware may eventually pull away from the ring entirely.
Perform a practical tension test using a scrap piece of your starter fabric. Mount the fabric in the hoop, pull it gently until it is taut, and tighten the screw firmly. Tap the center of the fabric with your finger; it should produce a clear, drum-like sound, indicating excellent tension. Leave the hooped fabric on your desk for an hour, then check it again. If the fabric has sagged significantly or if the screw has loosened on its own, the hoop’s rings may not be perfectly concentric, or the hardware may be failing to hold.
If your hoop fails any of these basic structural or functional checks, it is best to return or exchange it immediately. Attempting to stitch with a defective hoop will only lead to frustration, uneven stitches, and potential damage to your embroidery projects. A high-quality hoop should feel solid, hold fabric securely without constant readjustment, and provide a smooth, comfortable grip that makes your introduction to embroidery a pleasant and rewarding experience.
Frequently Asked Questions (FAQ)
Do I need to bind my embroidery hoop?
Binding your embroidery hoop is not strictly necessary for every project, but it is highly beneficial under specific conditions. You should consider binding your inner wooden ring if you are working with slippery fabrics like silk, satin, or polyester, which tend to slide out of standard hoops. It is also useful for very heavy fabrics or when you want to prevent ‘hoop burn’—the permanent creasing or fiber flattening that can occur when a hoop is clamped tightly for long periods.
To bind a hoop, wrap cotton twill tape or bias tape tightly around the inner ring, overlapping the edges slightly until the entire ring is covered, then secure the ends with a few hand stitches or fabric glue. This simple modification increases the thickness of the ring, adds excellent friction to grip slippery fibers, and provides a soft cushion that protects your fabric from direct contact with the hard wood.
Can I use the same hoop for framing my finished piece?
While you can use a standard working hoop to frame your finished embroidery, there are important differences between hoops meant for stitching and those designed for display. Working hoops are subjected to hand oils, moisture, and repeated tension adjustments, which can leave subtle marks or cause the wood to darken over time. If left in an untreated, cheap wooden hoop long-term, the natural acids in the wood can eventually transfer to your fabric, causing yellowing or staining.
If you wish to use a hoop for framing, it is best to transfer your finished piece to a dedicated display hoop. Display hoops are often made of high-quality, sealed hardwoods, or decorative faux-wood rubber that does not require a tightening screw. These hoops provide a clean, polished aesthetic and are designed to protect your fabric for long-term archival display. If you do choose to use a standard wooden hoop for framing, ensure it is clean, dry, and consider sealing the wood or lining it with acid-free felt to protect your stitches from environmental damage.
Community discussion
Share your experience or ask a question. Comments are reviewed before publication.