
Leather customization has grown from a niche hobby into a highly popular form of personal expression in Singapore. Whether you want to breathe new life into a faded pair of classic white sneakers, personalize a leather wallet, or restore a vintage handbag, acrylic leather paint offers a durable and vibrant solution. However, stepping into the world of leather crafting can feel overwhelming due to the sheer variety of paints, preparation fluids, and finishing sealants available. For beginners, an all-in-one starter kit is often the most practical entry point, reducing initial decision fatigue and ensuring you have the correct chemical agents to make your paint stick.
Choosing the right starter kit requires looking beyond just the paint colors. You must evaluate the volume of the bottles, the types of preparation and finishing chemicals included, and the quality of the application tools. In Singapore’s unique tropical climate, factors like humidity also play a significant role in how these materials behave. This guide will walk you through the essential components of a beginner-friendly leather paint kit, help you match your kit selection to your very first project, and provide actionable tips on where to source authentic products locally and online while avoiding counterfeit goods.
Essential Components to Look for in a Starter Kit
When browsing starter kits, it is easy to be swayed by sets offering dozens of tiny paint pots. However, a well-curated beginner kit focuses on quality and versatility over sheer quantity. The first element to evaluate is paint volume. Standard Angelus leather paint bottles for customization typically come in 1-ounce (approximately 29.5 ml) sizes. This volume is the ideal sweet spot for beginners: it provides more than enough paint to complete several small-to-medium projects while remaining compact and affordable. Avoid kits packaging paint in extremely small, unsealed plastic cups, as these are prone to drying out quickly and rarely contain enough product for a complete project.
Products mentioned in this guide
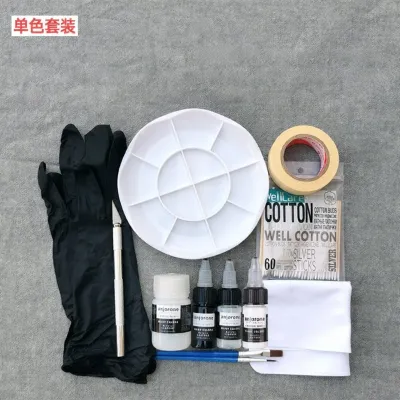
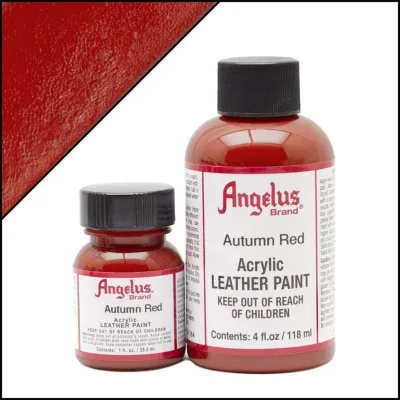
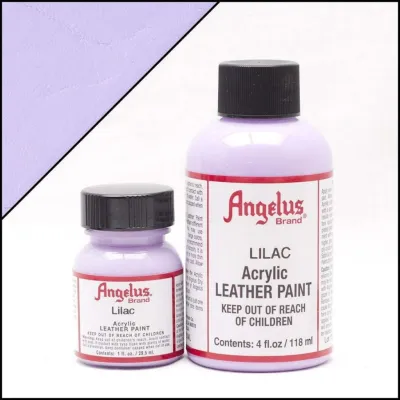
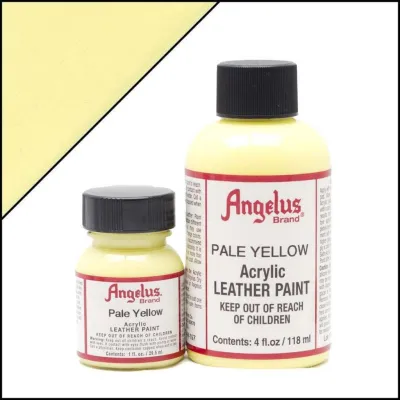
Prices are valid at publication and may change. Please refer to the product page for the latest price.
Color selection is another critical factor. Instead of buying a kit with highly specific, pre-mixed shades, look for a set including the foundational building blocks of color theory. A versatile starter kit should feature neutral bases—specifically flat white and flat black—alongside the primary colors: red, blue, and yellow. With these five essential colors, you can mix almost any shade, hue, or tint you require. This not only saves space but also teaches you the valuable skill of color mixing. If your first project involves a specific theme, such as restoring a brown leather belt or customizing a pair of green sneakers, ensure the kit either includes that specific color or the components needed to mix it easily.
Beyond the paint itself, a successful leather painting project relies heavily on chemical preparation and finishing agents. Acrylic paint cannot adhere directly to factory-finished leather because manufacturers apply a protective, water-resistant topcoat. A complete starter kit must include a leather preparer and deglazer. This solvent strips away the factory finish, opening up the pores of the leather so the paint can form a strong bond. Additionally, the kit should contain an acrylic finisher. This topcoat seals the painted surface, protecting it from minor scratches, water, and daily wear. Finishers come in various sheens, such as matte, satin, or high gloss; for general versatility, a matte or satin finisher is highly recommended for beginners as it mimics the natural look of original leather.
Finally, examine the application tools included in the kit. Acrylic leather paint is thicker than standard artists’ acrylics, requiring brushes that can handle its viscosity without leaving heavy textures. Synthetic paintbrushes are the industry standard for this medium. Your kit should include a variety of brush shapes and sizes: a wider flat brush for covering large surface areas smoothly, and a fine detail brush (such as a round size 0 or 2) for clean lines and edges. Some kits also include sponge applicators, which are incredibly useful for applying finishers evenly or creating soft gradient effects. A plastic or ceramic mixing palette is another highly useful inclusion, allowing you to blend custom colors without making a mess.
Matching the Kit to Your First Customization Project
The ideal starter kit configuration depends heavily on the specific item you plan to customize first. Different leather goods present unique challenges regarding surface area, flexibility, and wear. For instance, if your first project is a pair of leather sneakers, you will be dealing with high-flex zones, particularly around the toe box where the shoe creases naturally during walking. For sneakers, you need a kit emphasizing thin, flexible paint layers and including a high-quality finisher to withstand outdoor elements. The standard 1-ounce bottles in a typical starter kit are perfect for this, as they provide ample paint to build up the multiple thin coats required for a durable finish on footwear.

Conversely, if you are starting with smaller accessories like cardholders, wallets, watch straps, or keychains, your primary challenge is precision rather than paint volume. These items have tight corners, delicate stitching, and small surface areas. For these projects, a kit including ultra-fine detail brushes and a steady mixing palette is far more valuable than one with large sponge applicators. Because these items are handled constantly and slide in and out of pockets, a high-durability finisher is essential to prevent the paint from rubbing off over time.
Estimating paint coverage is an important step in planning your project. While the exact coverage depends on the porosity of the leather and the color contrast—such as painting a light yellow over dark black leather, which requires more coats—a single 1-ounce bottle of Angelus paint can generally cover several pairs of shoes or dozens of small accessories when applied correctly. Acrylic leather paint should always be applied in paper-thin layers; thick coats will crack and peel. Therefore, a standard starter kit containing four to six 1-ounce bottles will easily last through your first few projects.
However, there are scenarios where a basic starter kit may need to be supplemented with individual purchases. If you plan to use an airbrush instead of traditional paintbrushes, you will need to purchase a paint thinner, such as Angelus 2-Thin, separately, as starter kits rarely include airbrush mediums. Similarly, if your project involves painting the fabric sock liners of shoes or soft mesh panels, you will need a fabric medium like Angelus 2-Soft to prevent the paint from drying stiff and rough. If you prefer a completely non-reflective, factory-like look on your leather, you might also want to buy a separate dulling agent to mix into your paint or finisher.
Where to Buy and How to Verify Authenticity in Singapore
Finding genuine Angelus leather paint in Singapore is crucial, as counterfeit or improperly stored paints can ruin your leather goods by cracking, peeling, or failing to dry. Fortunately, Singapore has a robust community of crafters and sneaker customizers, which has led to excellent local availability. To ensure you are buying authentic products, your first stop should be established local art supply stores, particularly those located in historic art hubs like the Bras Basah Complex. Specialized sneaker customization boutiques and official brand distributors in Singapore are also highly reliable sources, as they source their inventory directly from the manufacturer.
When purchasing in person, you have the advantage of physically inspecting the starter kit. First, examine the packaging and labels. Genuine Angelus bottles feature crisp, high-resolution printing on their labels; blurry text, misaligned logos, or spelling errors are immediate red flags. Second, check the physical integrity of the bottles. Authentic paints come with a secure inner seal beneath the cap to prevent drying and leakage during transit. If this seal is broken, missing, or looks hand-glued, avoid purchasing that kit. You can also check for a printed batch code on the bottom or side of the bottle, which manufacturers use for quality control.
If you prefer the convenience of shopping online via general e-commerce platforms or online marketplaces in Singapore, you must exercise extra caution. Avoid listings offering prices that seem too good to be true, as these are often counterfeit products or old, expired stock that has separated and dried out. Always check the seller’s ratings and read customer reviews carefully. Look for reviews mentioning the packaging condition, delivery speed, and whether the paints arrived sealed. Prioritize sellers offering clear return policies and buyer protection programs, allowing you to return the kit if it does not meet authenticity standards upon arrival.
Additionally, pay attention to how the seller describes the product. Authentic listings will clearly state the volume of the bottles (typically 1 oz or 29.5 ml) and list the exact contents of the kit. If a listing uses generic terms, lacks brand branding, or refuses to show photos of the actual bottle labels, it is best to look elsewhere. Sourcing your kit from a reputable local seller not only guarantees product quality but also ensures you can easily purchase matching refills or specialized additives as your customization skills grow.
Pre-Painting Preparation and Safety Checks
Before you open your paint bottles, setting up a safe and organized workspace is essential. Leather preparation chemicals, such as deglazers and preparers, contain strong solvents like acetone. These chemicals evaporate quickly and can cause headaches or dizziness if inhaled in closed spaces. Always set up your workspace in a well-ventilated area. If working indoors, open windows and use a fan to direct fumes away from your face. Working on a balcony or near a large open window is ideal. Additionally, wear protective gloves (such as nitrile gloves) to prevent these solvents from drying out your skin, and consider wearing safety glasses to protect against accidental splashes.
The longevity of your custom paint job depends almost entirely on the quality of your preparation work. Begin by cleaning the leather surface to remove any surface dirt, dust, or body oils. A clean, damp microfiber cloth is usually sufficient for this step; let the leather dry completely before moving on. Next, apply your leather preparer or deglazer. Pour a small amount onto a cotton pad or rag and gently wipe down the areas you plan to paint. You will observe the factory shine starting to dull, and the surface may feel slightly tacky. This is a sign that the protective factory topcoat has been successfully removed, exposing the raw leather fibers so the paint can adhere properly.
Before applying paint to the entire item, it is highly recommended to perform a patch test. Select a small, hidden area of the leather—such as the inside of a shoe tongue, the inner fold of a wallet, or the underside of a strap. Apply a small amount of the preparer, followed by a thin layer of paint, and let it dry completely. Once dry, perform a simple flex and scratch test. Gently bend the leather and scratch the painted area with your fingernail. If the paint remains flexible, does not crack, and resists peeling, your material is compatible, and you can proceed with confidence.
However, you must also establish clear stop conditions. If during the patch test the leather begins to warp, discolor severely, bubble, or if the paint peels off effortlessly like a sticker, stop immediately. These reactions indicate that the leather may have been treated with specialized chemicals, or it might be a synthetic material that is incompatible with standard preparation solvents. In such cases, continuing with the project could permanently damage the item. Consult the manufacturer’s guidelines or seek advice from a professional leather restorer before proceeding.
Frequently Asked Questions (FAQ)
Do I need a separate leather preparer if my kit doesn't include one?
Yes, using a leather preparer or deglazer is a non-negotiable step for achieving a durable finish. If your starter kit does not include a prep solution, you must purchase one separately before starting your project. Without this step, the acrylic paint will sit on top of the factory’s water-resistant silicone coating rather than bonding with the leather fibers, leading to rapid cracking and peeling. While high-purity acetone can serve as an alternative, it must be used with extreme caution as it can dry out and damage delicate leathers if applied too heavily.
Can I use Angelus paint on synthetic or vegan leather?
Yes, Angelus paint can be applied to synthetic and vegan leathers, but the preparation process requires extra care. Because synthetic materials are plastic-based and non-porous, they do not absorb paint the way natural leather does. Check the manufacturer’s product specifications for compatibility. When working on synthetic leather, avoid aggressive deglazers that can melt or warp the plastic surface. Instead, clean the surface thoroughly and apply extremely thin coats of paint, verifying adhesion with a localized scratch test before painting the entire item.
How does Singapore's humidity affect the drying and finishing process?
Singapore’s high relative humidity slows down the evaporation of water from acrylic paint, which can significantly extend the drying time between coats. To prevent the paint from bubbling, cracking, or remaining tacky, you must allow extra time for each layer to cure. Do not rely on fixed time limits; instead, use tactile and visual cues. The paint layer must feel completely dry, smooth, and non-tacky to the touch before you apply the next coat. Working in an air-conditioned room, using a dehumidifier, or placing a small fan near your workspace can help circulate air and facilitate a more consistent curing process.
Community discussion
Share your experience or ask a question. Comments are reviewed before publication.