
Selecting an elegant presentation for Teacher’s Day gifts involves more than just picking a colorful container. A well-chosen gift bag serves as the foundation for your entire presentation, especially when you plan to elevate the look with ribbon decorations. A suitable bag must not only hold the gift securely but also provide a stable, receptive surface for bows, bands, and ties.
When decorating with ribbons, the physical characteristics of the bag—such as its material stiffness, surface texture, and structural design—directly impact how well your decorations stay in place. A bag that is too flimsy will buckle under the tension of a tied ribbon, while an overly slick surface can cause carefully tied bows to slip out of position. By understanding how different bag materials and structures interact with ribbons, you can create a beautiful, professional-looking gift that shows your genuine appreciation.
Key Material Features for Ribbon Decoration
The material of your gift bag determines how easily you can apply, secure, and display ribbon embellishments. Evaluating these material features before purchasing ensures your decorative efforts do not go to waste.
Products mentioned in this guide
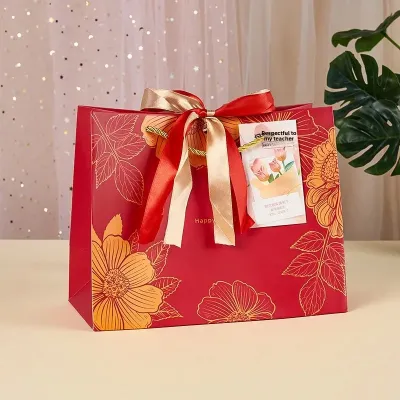
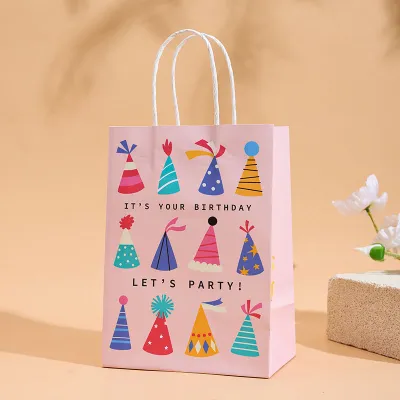
Prices are valid at publication and may change. Please refer to the product page for the latest price.
Paper weight and stiffness are the primary factors in maintaining the bag’s shape. For ribbon wrapping, look for bags made from heavy-weight paper, typically indicated by a higher grams per square meter (GSM) rating on the packaging, or verify the stiffness by gently pressing the sides. A sturdy bag of at least 120 to 150 GSM resists buckling when you pull a ribbon tight around its body. If the paper is too thin, the tension of the ribbon will collapse the sides inward, crushing the presentation.
Surface texture plays a critical role in how adhesives and ribbons behave on the bag. Matte paper and uncoated kraft paper provide excellent grip for double-sided tape, glue dots, and hot glue because the adhesive can bond directly with the exposed paper fibers. Glossy, laminated, or metallic finishes offer a sleek, modern look but are notoriously slippery. On these smooth surfaces, ribbons can easily slide out of alignment, and standard adhesives may peel away under the tension of a heavy bow. If you choose a glossy bag, plan to use physical tying methods rather than relying solely on adhesives.
Load-bearing limits must also be verified to prevent the bag from sagging or tearing once the gift is placed inside. Examine the bottom gusset and the area around the handles for reinforcement. A sagging bag bottom distorts the overall shape, causing wrapped ribbons to slacken. Choosing a bag with a reinforced cardboard base insert keeps the bottom flat, ensuring the bag stands upright and the ribbon decorations remain perfectly positioned.
Bag Styles and Structures That Work Best
The structural design of a gift bag dictates how you can attach and style your ribbons. Different bag shapes and handle configurations lend themselves to specific decorating techniques.

Top edge designs greatly influence how you can secure ribbons around the opening of the bag. Bags with folded top edges are inherently stronger than those with simple flat-cut edges, making them ideal if you plan to punch holes to thread ribbons through. If the bag features die-cut handles, you can easily thread a wide satin or grosgrain ribbon through the handle openings, tying a large, decorative bow that naturally keeps the bag closed while serving as a stunning focal point.
Handle types also determine your decorating options. Bags with rope handles allow you to tie decorative accents directly to the handle base. Paper twist handles are highly functional but can look plain; wrapping a coordinating ribbon around their base instantly elevates their appearance. For a minimalist look, handle-less pinch-bottom bags are excellent for folding the top flap over and sealing it with a wide ribbon band.
Base construction is essential for how the gift is displayed. Flat-bottom bags with wide side gussets are highly stable, allowing them to stand independently on a classroom desk or staff room table. This stability is crucial if you are adding a large, elaborate bow that might otherwise cause a less stable bag to tip over. Pinch-bottom bags, which lack a flat base, are best suited for flat, lightweight gifts like bookmarks or personalized notebooks, and are typically presented lying flat.
Matching Bag Size to Your Gift and Ribbon
Achieving a balanced look requires careful coordination between the size of the bag, the dimensions of the gift, and the width of the ribbon.
Before selecting a bag, measure your gift’s height, width, and depth. Ensure the bag is slightly larger than the gift, leaving at least two to three centimeters of clearance on all sides. This extra space prevents the gift from stretching the paper, which can distort the flat surfaces of the bag and cause attached ribbons to pop loose or look strained. If you plan to use tissue paper as a filler, factor in its volume so it does not push excessively against the top ribbon closure.
Proportion guidelines help maintain visual harmony. A small gift bag decorated with an excessively wide ribbon looks cluttered, while a large bag with a thin ribbon looks unfinished. As a general rule, use narrow ribbons (6mm to 12mm) for small favor bags, medium ribbons (15mm to 25mm) for standard book-sized bags, and wide ribbons (38mm to 50mm) for large gift bags.
Avoiding common sizing errors prevents a sloppy presentation. A bag that is too deep will cause the gift to sink to the bottom, tempting you to overfill the top with tissue paper, which can interfere with ribbon ties. Conversely, a bag that is too narrow will bulge, creating curved surfaces that make it difficult to wrap a ribbon flat. Selecting a bag that snugly but comfortably fits the gift ensures the paper remains flat and the ribbon sits perfectly.
Practical Tips for Attaching Ribbons Securely
Applying the right techniques when securing your ribbons prevents damage to the bag and ensures the decorations remain intact during transport.
When threading ribbons, use a standard hole punch to create clean entry points. To prevent the paper from tearing, punch the holes at least 1.5 centimeters away from the top edge. Always cut ribbon ends at a sharp diagonal angle to prevent fraying. If you are using satin or grosgrain ribbon, a tiny dab of clear craft glue on the cut edges will seal the fibers.
Adhesive selection should match the bag’s surface and the local environment. In Singapore’s warm and humid climate, standard double-sided tapes can lose their tackiness over time, especially on glossy papers. For a long-lasting hold, use high-tack glue dots or a low-temperature hot glue gun, applying the adhesive sparingly to avoid warping the paper. Always perform a quick test on an inconspicuous area of the bag, such as the inside flap, to ensure the adhesive does not stain or dissolve the paper’s finish. When using hot glue or scissors, work on a flat, protected surface and keep them out of reach of young children.
Reinforcement strategies are highly effective for heavy or complex ribbon designs. If you are attaching a large, multi-looped bow to the front of a paper bag, the weight can cause the paper to sag forward. To prevent this, cut a small piece of stiff cardstock and glue it to the inside of the bag, directly behind the spot where the bow is attached. This simple step distributes the weight across a larger surface area, keeping the front of the bag perfectly flat and professional.
Frequently Asked Questions (FAQ)
Can I use fabric or reusable bags for ribbon decoration?
Yes, reusable fabric bags, such as cotton or canvas totes, make wonderful, eco-friendly options for Teacher’s Day. However, fabric behaves differently than paper when it comes to decoration. Standard adhesives like double-sided tape or glue dots do not adhere well to fabric fibers and will likely fall off. Instead, secure your ribbons by tying them directly around the tote handles, or use a small safety pin hidden on the inside of the bag to pin the ribbon bow in place. This allows the teacher to easily remove the ribbon and reuse the bag afterward.
How do I prevent the bag from tipping over with a heavy ribbon bow?
A top-heavy bag is a common issue when using large, elaborate ribbon bows. To maintain stability, always place the heaviest items of your gift at the very bottom center of the bag to lower its center of gravity. If the gift itself is very light, such as a gift card or a set of stickers, you can add stability by placing a custom-cut piece of heavy cardboard at the bottom of the bag to keep the base flat and wide. This ensures the bag stands proudly on the teacher’s desk without tipping forward under the weight of the bow.
Community discussion
Share your experience or ask a question. Comments are reviewed before publication.