
Selecting the right strong adhesive glue for school projects requires balancing structural integrity with age-appropriate safety. While a primary school student working on a cardboard diorama needs a forgiving, washable formula, a secondary school student building a load-bearing bridge model requires a heavy-duty bond that cures quickly and holds under tension. Choosing the wrong adhesive can lead to collapsed projects, ruined materials, or safety hazards like skin bonding and toxic fume inhalation. By understanding how adhesive chemistry interacts with different materials and student motor skills, parents and educators can select the ideal bonding agent for every educational stage.
Understanding Adhesive Strength and Safety Boundaries
In a school environment, the term “strong” does not simply refer to industrial-grade tensile strength. Instead, it describes how effectively an adhesive holds specific materials together under the typical stresses of handling, transport, and display. A strong bond is achieved when the adhesive penetrates the pores of the materials or chemically grips their surfaces, creating a unified structure. For school projects, strength must be evaluated alongside the physical properties of the substrates, such as paper, cardboard, balsa wood, felt, or plastic.
Safety boundaries are the most critical constraint when selecting school adhesives. Strong adhesives often contain solvents, volatile organic compounds (VOCs), or fast-acting chemicals that pose risks to younger users. Industrial-grade glues, such as standard cyanoacrylates or solvent-based contact cements, can bond skin instantly, irritate the eyes, or release harmful fumes that require dedicated ventilation systems. Consequently, these hardware-grade options are entirely inappropriate for primary school classrooms and home study spaces where adult supervision may be limited.
Products mentioned in this guide
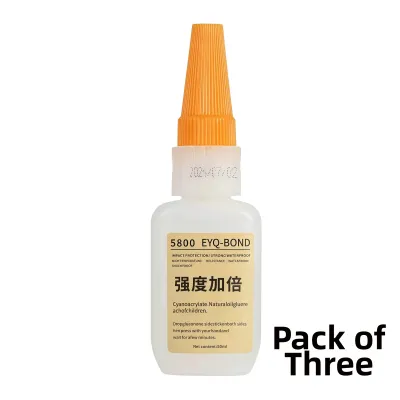
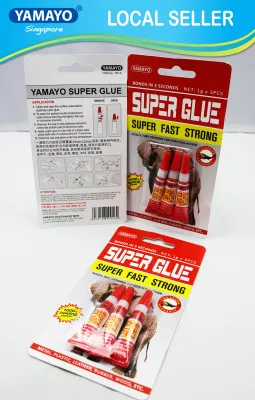
Prices are valid at publication and may change. Please refer to the product page for the latest price.
To maintain a safe learning environment, parents and teachers must prioritize non-toxic, water-based formulations for younger students. These products are designed to wash out of clothing and off skin easily while still providing sufficient adhesion for lightweight craft materials. As students mature and their projects demand more robust structural bonds, stronger adhesives can be introduced gradually. However, this transition must always be accompanied by appropriate safety measures, such as working in well-ventilated areas, wearing protective gloves, and establishing clear adult-supervision protocols.
Matching Adhesive Types to Grade Levels and Project Needs
Selecting the right adhesive is a matter of matching the glue’s chemical properties to the student’s developmental stage and the complexity of the assignment. As students progress through school, their fine motor skills improve, allowing them to handle more precise application methods and faster-setting formulas. Simultaneously, school projects evolve from flat paper collages to complex, multi-material 3D structures that require structural support.

A successful project relies on a systematic decision framework. For younger children, the priority is a forgiving adhesive that allows for repositioning and easy cleanup. For older students, the focus shifts to structural integrity, material compatibility, and specialized bonding techniques. By categorizing adhesives by grade level, we can ensure that students have the tools they need to succeed without exposing them to unnecessary physical risks.
Lower Primary (Ages 7–9): Safe, Washable, and Forgiving Bonds
Lower primary students are still developing their fine motor skills and spatial awareness. Their school projects typically involve lightweight, porous materials such as drawing paper, construction paper, thin cardboard, cotton wool, and felt. For these applications, the ideal strong adhesive glue is a high-tack, water-based polyvinyl acetate (PVA) liquid glue or a heavy-duty glue stick. These formulations offer a stronger hold than standard light-duty glue sticks while remaining completely non-toxic and washable.
One of the greatest advantages of water-based PVA glues for this age group is their forgiving nature. They have a relatively long open time, which is the period during which the adhesive remains wet and the materials can be adjusted or repositioned. If a student misaligns a paper cutout, they can easily slide it into the correct position before the glue begins to set. Furthermore, accidental spills on desks, hands, or school uniforms can be cleaned up effortlessly with warm water and soap, eliminating the need for harsh chemical solvents.
When selecting a liquid PVA glue, pay attention to the applicator tip. A fine-point nozzle allows for precise application, preventing excess glue from warping thin paper or seeping through to adjacent pages. If a project involves bonding heavier cardboard, a wider spreader tip can distribute the adhesive more evenly. Because drying speed depends on the exact material combination and ambient humidity, students should allow ample drying time—often several hours or overnight—before handling the completed project. Placing a light weight, such as a book protected by wax paper, on top of flat bonded items can help ensure a smooth, warp-free finish.
However, these safe formulations have distinct physical limitations. Because they rely on water evaporation to cure, they require porous surfaces that can absorb moisture. They are highly ineffective for bonding non-porous materials like smooth plastics, metals, or glass. Additionally, because they remain flexible and have low shear strength, they cannot support heavy or load-bearing structures, such as thick wooden blocks or heavy clay models. Attempting to use washable school glues on these materials will result in joint failure and collapsed projects.
Upper Primary (Ages 10–12): Mid-Strength Options for Mixed Media
As students enter upper primary school, their science and social studies projects become more ambitious. They begin constructing detailed historical dioramas, basic architectural models, and science fair display boards. These assignments often combine diverse materials, including balsa wood, corrugated cardboard, polystyrene foam, fabric, and lightweight plastics. To bond these mixed media successfully, students require mid-strength adhesives that set faster and hold firmer than basic school glues.
Multi-purpose tacky glues and low-temperature hot glue guns are excellent choices for this intermediate stage. Tacky glue is a thicker version of PVA glue that runs less, grabs surfaces more quickly, and dries clear and flexible. For structural elements that need to stand upright immediately, a low-temperature hot glue gun provides an instant physical bond as the melted thermoplastic cools. Because low-temperature guns operate at significantly lower temperatures than industrial hot glue guns, they reduce the risk of severe skin burns while still requiring basic adult supervision and safety instruction.
When using a low-temperature hot glue gun, selecting the correct glue stick size and formula is critical. Most school-grade glue guns use standard 7mm or 11mm diameter glue sticks, which must match the gun’s specifications exactly to prevent jamming. Additionally, students should be taught to rest the gun on its integrated stand when not in use, rather than laying it on its side, to prevent melted glue from backing up into the heating chamber. Keeping a small bowl of cold water nearby during crafting provides an immediate cooling remedy in case of accidental skin contact with hot glue.
When working with mixed media, verifying material compatibility is essential. For instance, solvent-based adhesives can melt polystyrene foam, ruining hours of student work. Before applying any adhesive to the final project, students should perform an observable trial on scrap pieces of the same materials. This test allows them to verify whether the glue bonds securely, dries within an acceptable timeframe, and does not warp, dissolve, or discolor the substrates.
Secondary School (Ages 13+): Heavy-Duty and Specialized Adhesives
Secondary school students frequently engage in advanced design and technology, physics, or fine arts courses. Their projects may involve building load-bearing balsa wood bridges, assembling acrylic display cases, or joining metal components. These demanding applications require heavy-duty, specialized adhesives such as cyanoacrylates (commonly known as super glue), two-part epoxies, and polyurethane-based contact adhesives. These products create exceptionally strong, rigid bonds that can withstand significant mechanical stress.
Because these adhesives rely on rapid chemical reactions or strong organic solvents, they demand strict safety protocols. Cyanoacrylates can bond human skin instantly, while epoxies and contact cements release strong chemical vapors during the curing process. Secondary students must handle these materials independently only after receiving thorough safety training. This includes working in a well-ventilated area—ideally outdoors or near an open window—wearing protective nitrile gloves, and using safety goggles to prevent accidental splashes.
For structural projects like balsa wood bridges or acrylic displays, clamping is often necessary to achieve a strong bond. Clamps hold the materials in precise alignment and apply consistent pressure while the adhesive sets. If specialized clamps are unavailable, household items like rubber bands, masking tape, or heavy books can serve as temporary substitutes. Students must verify that the adhesive has fully cured before subjecting the joint to any load-bearing tests, as premature stress can micro-fracture the adhesive bond and lead to sudden structural failure.
To ensure project success, students must learn to read and interpret manufacturer specifications on the product packaging. They need to verify the adhesive’s open time (how long they have to apply and align the parts), clamping time (how long the joint must be held under pressure), and full cure time (the time required for the chemical bond to reach maximum strength, which is often 24 hours). Understanding these variables prevents premature handling, which is the leading cause of structural failure in advanced school models.
What to Check on the Label Before Purchasing
When shopping for strong adhesive glue at a local stationery shop or online marketplace, parents should not rely solely on marketing claims like “super strong” or “ultra bond.” Instead, a systematic inspection of the product label is necessary to ensure safety and performance. The first thing to look for is a recognized safety standard or non-toxic certification. In many regions, labels such as “AP Non-Toxic” (from the Art and Creative Materials Institute) or compliance with international standards like EN 71 (safety of toys) indicate that the product has been evaluated for harmful chemicals and is safe for student use.
Next, examine the manufacturer’s material compatibility list, which is usually printed on the back of the packaging. A high-quality adhesive label will explicitly state which materials it can bond—such as wood, paper, ceramics, leather, or specific plastics—and which materials it cannot. For example, many standard glues struggle to adhere to polyethylene (PE) or polypropylene (PP) plastics. Checking this list beforehand prevents the frustration of purchasing a glue that fails to hold the specific components of your child’s project.
Finally, pay close attention to the drying and curing specifications. The label should clearly distinguish between “tack time” (when the glue becomes sticky), “set time” (when the bond is strong enough to hold itself together without support), and “full cure time” (when the bond reaches its maximum rated strength). For school projects with tight deadlines, selecting an adhesive with a fast set time can prevent long delays. However, always ensure that the student has enough open time to align the pieces accurately before the adhesive begins to cure.
Safe Handling, Storage, and Cleanup Practices
Proper handling and storage of strong adhesives are essential for maintaining their performance and ensuring household safety. All glues should be stored in a cool, dry place away from direct sunlight and out of reach of younger siblings. After each use, the nozzle or applicator tip must be wiped clean with a dry cloth or paper towel to prevent the cap from bonding to the bottle. Ensuring that the cap is sealed tightly prevents air from entering the container, which can dry out water-based glues or trigger the premature curing of cyanoacrylates.
Cleanup methods vary significantly depending on the chemical composition of the adhesive. Water-based glues, such as PVA and tacky glues, can be washed off skin and work surfaces easily using warm water and soap while they are still wet. Once dried, they can often be peeled off smooth surfaces or softened with a damp cloth. In contrast, solvent-based or chemical-curing adhesives require specific removal agents. For example, cured cyanoacrylate on skin should never be forced apart; instead, it should be softened gradually using acetone or soapy water and gently peeled away.
It is vital to establish clear stop conditions for students using strong adhesives. If glue accidentally comes into contact with the eyes, is ingested, or causes skin irritation, students must immediately stop working and seek adult assistance. For accidental skin bonding with high-strength glues, do not pull the skin apart forcefully, as this can cause tearing. Instead, consult the product’s first-aid instructions or seek medical advice if the adhesive cannot be safely dissolved with household methods.
Frequently Asked Questions (FAQ)
Can I use regular school glue for heavy 3D model projects?
Regular school glue, such as standard white PVA glue, is generally unsuitable for heavy 3D model projects. Because it has a high water content and low shear strength, it lacks the structural integrity required to hold heavy materials like thick wood, metal, or dense plastics under tension. For these projects, upgrade to a multi-purpose tacky glue, a low-temperature hot glue, or a specialized wood glue, depending on the student’s age and the materials being joined.
How do I safely remove strong adhesive from skin or clothing?
The removal method depends entirely on the type of adhesive used. For water-based glues, wash the affected area with warm, soapy water. For stronger adhesives like cyanoacrylate (super glue) on skin, apply a small amount of acetone or nail polish remover to a cotton swab, gently dab the bonded area to dissolve the adhesive, and wash thoroughly with soap and water afterward. Always check the product label for specific first-aid and cleanup instructions before attempting removal.
Community discussion
Share your experience or ask a question. Comments are reviewed before publication.