
Selecting the right sticker label for school supplies is more than a matter of aesthetics; it is a practical strategy to prevent lost property and streamline daily organization. The ideal label choice depends heavily on the student’s age, the specific items being labeled, and the environmental conditions those items will face. While primary school students require highly visible, durable labels to navigate busy communal classrooms, secondary school students benefit from structured, color-coded systems that assist with complex schedules and multiple subjects.
By understanding the physical properties of different label materials and matching them to specific school gear, you can ensure that names, subjects, and contact details remain legible throughout the academic year. This guide outlines how to align your labeling strategy with different grade levels, select the right materials for various school items, and apply them for maximum longevity.
Understanding Labeling Priorities Across Grade Levels
The organizational challenges students face change significantly as they transition from primary to secondary school. In the early primary years, the primary goal of labeling is lost-and-found prevention. Young children are still developing their sense of personal responsibility, and items like water bottles, pencil cases, and jackets are frequently misplaced in shared spaces. For these students, highly visible labels featuring bright colors, distinct icons, or large, clear fonts are incredibly helpful. These visual cues allow children who may not yet read fluently to recognize their belongings instantly, while also helping teachers return misplaced items to the correct cubby.
Products mentioned in this guide
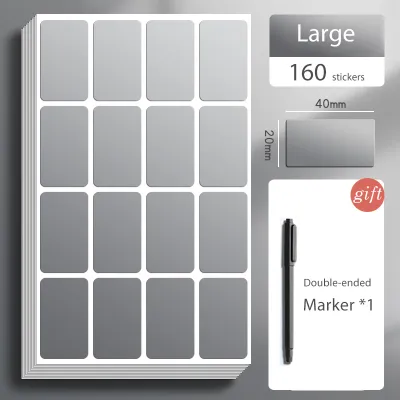
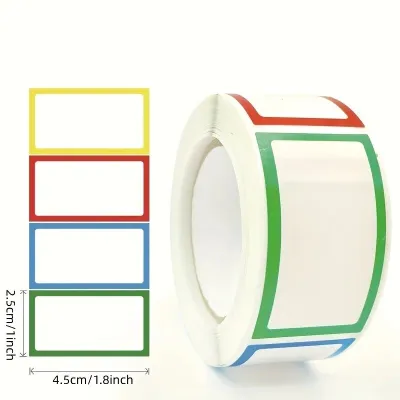
Prices are valid at publication and may change. Please refer to the product page for the latest price.
As students enter secondary school, their organizational needs shift from simple identification to complex time and subject management. Older students typically move between different classrooms for various subjects, carrying a wider array of textbooks, notebooks, and specialized gear. At this stage, labeling priorities transition toward subject organization and schedule tracking. Color-coded labels become invaluable tools, allowing students to identify the correct notebook or folder for a specific class at a single glance during short transition periods.
Furthermore, secondary school students generally prefer more discreet and minimalist labeling. Large, cartoonish name tags are often replaced by sleek, compact labels placed in less conspicuous areas, such as the inside cover of a binder or the underside of a calculator. This approach maintains the student’s privacy and aligns with their preference for mature-looking school gear, while still providing clear proof of ownership if an item is misplaced.
Building a Sticker Label Shortlist for Essential School Supplies
To build an effective labeling system, it is helpful to categorize school supplies by their usage patterns and physical characteristics. Different items require different label formats to withstand daily wear and tear.

Name Labels for Personal Gear Personal items that leave the classroom or are used during lunch and physical education require the highest level of durability. Water bottles, lunchboxes, and food containers are subjected to daily washing, friction, and moisture. For these items, waterproof vinyl name labels are the standard choice. These labels resist peeling and fading even when exposed to water and mild dish soap. For school uniforms, hats, and physical education kits, standard paper stickers will not suffice; instead, look for specialized fabric labels, such as iron-on name tapes or heavy-duty peel-and-stick fabric labels designed to withstand repeated laundry cycles.
Subject and Color-Coded Labels Textbooks, exercise books, and ring files are best organized using paper or matte synthetic labels that allow for easy writing. Color-coded sticker labels are highly effective for grouping materials by academic subject. For example, assigning blue labels to mathematics materials, green to science, and red to language arts helps students pack their school bags quickly and accurately. These labels should be large enough to clearly display the subject name, the student’s name, and the class or classroom number.
Size and Dimension Labels for Specialized Equipment Art supplies, mathematical instrument sets, and storage boxes kept in school lockers require specialized labeling sizes. Small, narrow strip labels are ideal for thin items like pens, pencils, paintbrushes, and rulers, wrapping securely around curved surfaces without peeling at the edges. Conversely, larger storage bins, art portfolios, and music instrument cases benefit from large, high-visibility labels that can be read from a distance, ensuring that shared classroom storage spaces remain orderly.
Verifying Material and Adhesive Specifications Before Purchase
Before purchasing sticker labels, it is important to verify their technical specifications to ensure they can handle the demands of a typical school year. Examining product packaging and manufacturer descriptions will help you select the right material and adhesive combination.
Checking Water Resistance and Ink Durability For any item that will be washed or exposed to outdoor elements, verify that the labels are explicitly rated as water-resistant or waterproof. Look for labels made from synthetic materials like vinyl, polyester, or polypropylene rather than standard paper. Additionally, consider the ink durability; labels printed with thermal transfer or pigment-based inks are much less likely to smudge or fade when exposed to sweat, sunscreen, or water compared to standard inkjet-printed paper labels.
Matching Adhesive Types to Item Surfaces Adhesives generally fall into two categories: permanent and removable. Permanent adhesives form a strong, long-lasting bond with the surface and are ideal for personal items that the student will keep for the entire year, such as calculators, rulers, and pencil cases. Removable adhesives, on the other hand, are designed to peel away cleanly without leaving sticky residue. These are highly suitable for rented textbooks, school-issued tablets, or items that you plan to resell or pass down to younger siblings at the end of the term.
Reviewing Care Instructions for Washable Items When selecting labels for clothing or fabric gear, carefully review the manufacturer’s application and care instructions. Some fabric labels require a specific heat setting on an iron to activate the adhesive backing, while others rely on high-tack pressure-sensitive adhesives. Always check the maximum washing temperature the labels can withstand and note any curing times; many manufacturers recommend waiting 24 to 48 hours after application before running the item through a washing machine or dishwasher to allow the adhesive bond to fully mature.
Application Techniques and Safe Removal Guidelines
Proper application is just as important as selecting the right label material. Following a few simple steps during application can significantly extend the lifespan of your sticker labels, while proper removal techniques will protect your school gear from damage.
Surface Preparation Before applying any sticker label, ensure the surface of the item is completely clean and dry. Dust, oils from fingers, and manufacturing residues can severely weaken the adhesive bond. Wipe the application area with a clean, lint-free cloth. For non-porous surfaces like plastic, metal, or glass, you can use a small amount of rubbing alcohol to remove stubborn oils, ensuring the surface is fully dry before placing the sticker.
Strategic Placement To prevent edges from peeling prematurely, apply labels to flat, smooth areas of the item. Avoid placing stickers over curved edges, seams, textured surfaces, or high-friction zones where the student’s hands will constantly grip the item. For example, when labeling a water bottle, place the sticker near the top neck or the flat base rather than around the middle grip area. Once positioned, press down firmly from the center of the label outward to smooth out any air bubbles and ensure complete contact.
Safe Removal Methods When it is time to update or hand down school supplies, removing old labels safely prevents damage to the underlying material. For stubborn permanent labels on hard plastics or metals, applying mild heat from a hairdryer on a low setting can soften the adhesive, making it easier to peel away. If sticky residue remains, consult the item manufacturer’s care instructions before applying any cleaning agents. Often, rubbing a small amount of vegetable oil or using a mild, soapy cloth will lift the remaining adhesive without scratching or discoloring the surface of the item. Avoid using sharp metal blades or highly abrasive scrubbers, which can permanently damage plastic and metal finishes.
Frequently Asked Questions (FAQ)
Can I use the same sticker labels for both clothing and hard stationery?
Standard paper or vinyl sticker labels designed for hard stationery are not suitable for clothing. Fabric is flexible and porous, meaning standard adhesives cannot grip the fibers effectively and will quickly peel off during wear or washing. For clothing, you must use specialized fabric labels, such as iron-on name tapes or high-tack peel-and-stick fabric labels. Always check the manufacturer’s packaging to verify if a label is rated for fabric use and machine washing.
How do I remove permanent adhesive labels from reusable water bottles?
To remove permanent labels from reusable water bottles without damaging the surface, start by checking the bottle manufacturer’s care guidelines. You can often soften the adhesive by soaking the labeled area in warm, soapy water for several minutes, or by applying gentle heat with a hairdryer. Once the adhesive is warm, gently peel the label off. For any remaining sticky residue, apply a small amount of cooking oil or a mild adhesive remover, let it sit for a few minutes, and then wipe it clean with a soft cloth. Avoid using abrasive scouring pads, which can scratch stainless steel or plastic surfaces.
Community discussion
Share your experience or ask a question. Comments are reviewed before publication.