
When preparing for school art projects or science dioramas, choosing the right glue guns cordless designs ensures that children can work independently without safety hazards. Traditional corded hot glue guns present distinct challenges in a busy environment: they restrict movement, require proximity to wall outlets, and create a constant tripping hazard that can pull a hot tool off a desk. Cordless models, powered by rechargeable lithium-ion batteries, solve these issues by providing complete mobility and a cleaner workspace.
However, a tool that is perfect for an older student can be frustrating or unsafe for a younger child. Selecting the right cordless glue gun requires matching the device’s operating temperature, physical size, weight, and safety mechanisms to your child’s specific developmental stage and hand size. By understanding these key factors, parents can make an informed purchase that balances safety with creative freedom.
Quick Guide: Matching Glue Guns Cordless Options to Primary School Levels
Primary school students undergo rapid physical and cognitive development, meaning their crafting tools must evolve alongside them. For lower primary students (Primary 1 to Primary 3, typically ages 7 to 9), the priority is absolute safety, ultra-low operating temperatures, and lightweight bodies that fit smaller hands. At this stage, children are still refining their fine motor skills, so the tool must be highly forgiving and easy to manipulate without causing hand fatigue.
Products mentioned in this guide
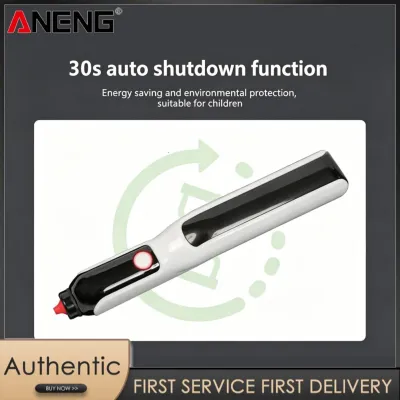
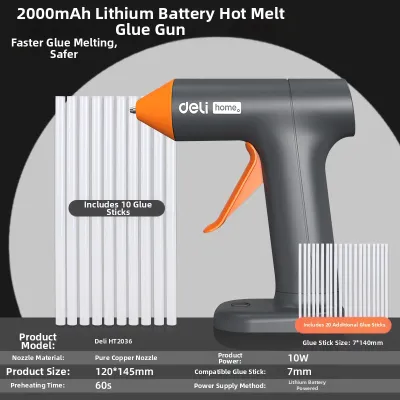

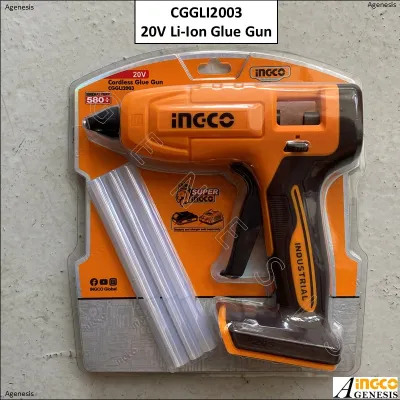

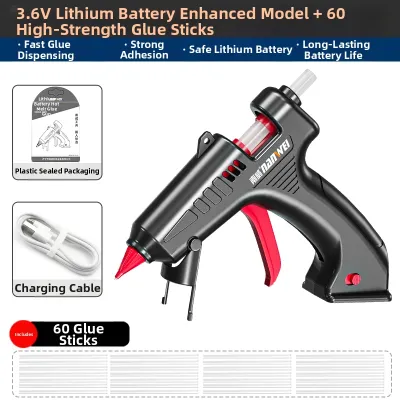
Prices are valid at publication and may change. Please refer to the product page for the latest price.
In contrast, upper primary students (Primary 4 to Primary 6, typically ages 10 to 12) tackle more complex school projects, such as building structural science models, design prototypes, or detailed historical dioramas. These older students require dual-temperature flexibility to bond diverse materials like wood, thick cardboard, and fabrics, along with larger battery capacities and precision nozzles for clean, detailed work. Their improved hand-eye coordination allows them to handle slightly heavier tools with more advanced features safely.
By eliminating trailing power cables, cordless models remove the single most common cause of glue gun accidents in classrooms and homes. A corded gun can easily be dragged off a table if a child trips over the cable, leading to contact burns or damaged property. Cordless designs sit securely on the work surface, allowing students to focus entirely on their assembly techniques rather than cable management.
Lower Primary (Grades 1 to 3): Prioritising Safety and Small-Hand Ergonomics
For children in Primary 1 to Primary 3, a cordless glue gun must be treated primarily as a child-friendly craft tool rather than an industrial adhesive applicator. At this developmental stage, children are highly enthusiastic but may lack the precise spatial awareness required to avoid hot surfaces consistently. Therefore, physical safety features and ergonomic designs must do the heavy lifting to prevent accidental injuries.

When shopping for this age group, look for dedicated low-temperature models that are physically incapable of reaching high temperatures. The physical housing must also be designed to protect small fingers from the heating chamber. The goal is to provide a tool that builds confidence without exposing the child to unnecessary risks.
Temperature Limits and Burn Prevention
For lower primary students, dedicated low-temperature cordless glue guns are essential. These models typically operate at a fixed temperature range of 100°C to 120°C, which is hot enough to melt specialized low-temperature glue sticks but significantly cooler than standard high-temperature models that exceed 190°C. Avoid adjustable-temperature models for this age group, as children can easily slide a switch or press a button that accidentally raises the heat to dangerous levels.
To verify burn protection, examine the physical nozzle of the glue gun before purchasing. High-quality child-safe models feature a thick layer of thermal insulation around the metal nozzle tip, often encased in a protective heat-resistant silicone sleeve. This sleeve should leave only the very tip of the nozzle exposed, minimizing the surface area of hot metal that could make contact with skin or work surfaces.
Always check the product packaging or manufacturer specifications for explicit “low-temp,” “child-safe,” or “cool-touch” ratings. These labels indicate that the external housing of the tool is engineered to remain cool to the touch even during extended heating cycles, isolating the internal heating element completely from the user’s hands.
Ergonomics for Developing Motor Skills
Children in the lower primary grades are still developing their grip strength and fine motor control, making the physical dimensions of the glue gun highly critical. A standard adult-sized glue gun is often too bulky, forcing small hands into awkward angles that lead to rapid fatigue and loss of control. Opt for compact, lightweight bodies weighing under 200 grams, which balance naturally in a child’s hand without tipping backward.
Another critical ergonomic factor is the trigger mechanism. Look for models featuring a long, multi-finger paddle trigger rather than a small, single-finger lever. A paddle trigger allows the child to use their entire hand grip to squeeze and extrude the glue, which requires significantly less localized finger strength and ensures a smoother, more controlled flow of adhesive.
Additionally, prioritize models with contoured handles and soft-touch, rubberized grip panels. These textured surfaces prevent the tool from slipping out of sweaty or small hands during precise tasks. A secure grip reduces the likelihood of accidental drops, which can damage the tool or cause the hot tip to contact the child’s lap or workspace.
Battery Design and Charging Safety
To ensure maximum safety, cordless glue guns for younger children should feature built-in, non-removable rechargeable lithium-ion batteries. Avoid any models that utilize loose, replaceable lithium cells (such as 18650 batteries) that can be extracted by curious fingers, presenting ingestion or short-circuit risks. A sealed internal battery compartment ensures the electrical components remain completely inaccessible to the child.
When evaluating charging options, look for recessed USB-C or micro-USB ports located at the very base of the handle. A recessed port protects the internal charging pins from dust and accidental impacts, while a standard USB interface allows parents to charge the tool using common household adapters. Ensure the charging port is designed so that the tool cannot be turned on or operated while plugged in, enforcing a strict “charge-then-use” boundary.
An automatic shut-off feature is another non-negotiable safety element for younger users. Children frequently walk away from their craft projects without turning off their tools. An integrated auto-sleep timer that cuts power to the heating element after 3 to 5 minutes of inactivity prevents the battery from draining completely and eliminates the risk of an unattended hot tool sitting on a desk.
Upper Primary (Grades 4 to 6): Balancing Power, Battery Life, and Precision
As students enter Primary 4 to Primary 6, their crafting requirements shift toward more demanding materials and higher precision. They are often tasked with constructing sturdy structures for science, geography, or art classes, which require stronger, faster-setting bonds. For these older students, a cordless glue gun needs to offer greater thermal flexibility and longer operating times without sacrificing safety.
While safety remains important, students in this age bracket have developed the cognitive discipline to respect hot tools and follow safety protocols. This allows parents to select models with advanced features, such as dual-temperature settings and specialized nozzles, which expand the range of compatible materials and project types.
Dual-Temperature Flexibility for Mixed Materials
Older students frequently work with a wide array of craft mediums, ranging from delicate items like polystyrene foam, thin ribbons, and balloons to denser materials like balsa wood, thick corrugated cardboard, and heavy fabrics. To accommodate these diverse projects, look for cordless glue guns that feature dual-temperature settings, allowing users to switch between low and high heat.
- Low-Temperature Setting (approx. 100°C to 120°C): Ideal for delicate materials that would otherwise melt, warp, or shrivel under high heat, such as polystyrene foam, thin plastics, and delicate synthetic fabrics.
- High-Temperature Setting (approx. 150°C to 190°C): Necessary for creating deep, structural bonds on porous, heavy materials like wood, thick cardboard, leather, and dense textiles used in advanced dioramas.
When choosing a dual-temperature model, verify that it features a clear, physical slide switch or distinct LED indicator lights that change color (e.g., green for low, red for high) to show the active temperature mode. This visual feedback helps the student confirm the current heat level before applying the glue to sensitive materials.
Battery Capacity for Extended Projects
For older students tackling detailed school projects, battery capacity determines how much work they can complete in a single session. Check the manufacturer’s technical specifications for the battery capacity, which is measured in milliampere-hours (mAh). For upper primary students, look for models with a battery capacity of at least 2000mAh to 3000mAh.
It is important to understand the difference between standby time and active heating time. While a glue gun may remain powered on in standby mode for several hours, the continuous heating and extrusion of glue draws a high electrical current, which typically limits active runtime to between 45 and 90 minutes. Ensure the selected model provides a realistic continuous runtime that matches the length of a typical school art class or home crafting session.
To prevent the frustration of a tool dying mid-project, choose models equipped with multi-stage LED battery level indicators. A simple three-light or four-light LED array on the handle allows the student to monitor the remaining power at a glance, prompting them to recharge the device during natural breaks in their work rather than running out of power unexpectedly.
Precision Nozzles and Flow Control
Advanced school projects often require neat, clean joints with minimal visible adhesive residue. To facilitate this, look for cordless glue guns that feature fine-tip nozzles, typically with an aperture diameter of 1mm to 1.5mm. These narrow nozzles allow students to apply tiny, precise dots or ultra-thin beads of glue, which is essential for detailed model assembly and intricate papercrafts.
To maintain a clean workspace and prevent wasted adhesive, prioritize models equipped with built-in anti-drip mechanisms or internal check valves. These features create a physical barrier or reverse suction when the trigger is released, stopping the flow of molten glue instantly and preventing it from oozing out of the nozzle onto the desk or project surface.
Finally, inspect the glue stick feed mechanism. A high-quality model should feature a precision-engineered internal chamber that advances the glue stick smoothly and consistently with each trigger squeeze. This prevents common issues like internal slipping, jamming, or uneven extrusion, allowing the student to maintain a steady hand and achieve professional-looking results.
Essential Safety Features to Verify on the Product Label
Before purchasing any cordless glue gun, parents must look past marketing claims and verify the presence of specific physical safety features and official certifications. These mechanical and electrical safeguards protect both the user and the surrounding environment from electrical faults, overheating, and physical accidents. Use the following checklist to evaluate any model before making a final decision:
- Physical Stability: The glue gun must feature a wide, flat base or a highly stable, integrated kickstand that allows the tool to stand upright securely when placed on a table. Avoid top-heavy designs that tip over easily, as a fallen hot nozzle can scorch work surfaces or ignite loose paper.
- Internal Thermal Fuses: Ensure the product specifications mention built-in overheat protection or integrated thermal fuses. These internal sensors automatically cut all electrical power to the heating element if the internal temperature exceeds safe operating limits, preventing thermal runaway and potential fire hazards.
- Electrical Safety Certifications: Verify that the glue gun, its internal battery, and the included charging accessories carry recognized international safety marks, such as CE, UL, FCC, or the local Singapore Safety Mark on the power adapter. These certifications guarantee that the device has undergone rigorous electrical safety testing.
- Mechanical Power Switch: Look for a physical, mechanical on/off slide switch rather than a soft-touch electronic button. A physical switch completely severs the electrical circuit, providing a reliable way to ensure the device is fully powered down and cannot be turned on accidentally in a school bag.
Safe Usage, Storage, and Maintenance Rules for Students
Even the safest cordless glue gun requires proper handling and maintenance to ensure longevity and prevent accidents. Parents and educators should establish a clear set of safety and maintenance rules with students before allowing them to use the tool independently. Consistent habits protect the student, preserve the tool’s performance, and keep the crafting environment clean.
Before turning the device on, students should perform a quick pre-use inspection. Check the nozzle to ensure it is free of large, dried glue blockages that could cause pressure buildup, and inspect the charging cable for any signs of fraying or exposed wires. If any damage is found, do not use the tool; consult the manufacturer’s manual or seek professional assistance.
To set up a safe crafting workspace, always place a heat-resistant silicone craft mat on the desk to protect the surface and catch any accidental drips. Students must keep the hot nozzle away from flammable materials, loose clothing, long hair (which should be tied back), and their own fingers. If glue accidentally contacts the skin, immediately run cold water over the affected area and seek medical attention if necessary.
After crafting is complete, enforce a mandatory cooling-down period of at least 15 to 20 minutes before storing the tool away. The glue gun should be stored in a cool, dry place out of reach of younger siblings. Finally, instruct students to never pull a partially melted glue stick out of the rear feed mechanism. Pulling a stick backward can tear the internal silicone sleeve, causing molten glue to backflow into the electronic housing, which permanently damages the tool and voids the warranty.
Frequently Asked Questions (FAQ)
Can I use standard high-temp glue sticks in a low-temp cordless glue gun?
No, you should not use standard high-temperature glue sticks in a low-temperature cordless glue gun. While high-temperature glue sticks may physically fit into the feed mechanism, they require temperatures exceeding 150°C to melt and flow properly. Because a low-temperature gun only reaches 100°C to 120°C, the high-temp stick will not melt fully, resulting in poor flow, weak adhesive bonds, and severe jamming that can damage the internal feeding gears. Always match the glue stick’s specific temperature rating to your glue gun’s operating specifications.
How long does a typical cordless glue gun battery last on a single charge?
On a single charge, a typical cordless glue gun battery provides between 45 minutes and 2 hours of active continuous heating and extrusion, depending on the battery’s mAh capacity and the selected temperature setting. High-temperature settings draw more power and deplete the battery faster than low-temperature settings. Keep in mind that standby time—when the tool is on but not actively heating or extruding—is significantly longer, but the heating element remains the primary power drain. Always refer to the manufacturer’s specifications for exact runtime estimates.
What should I do if the glue gun nozzle gets clogged with dried glue?
If the nozzle becomes clogged, never attempt to pick or scrape at the cold nozzle with sharp metal tools, scissors, or pins, as this can easily scratch the nozzle tip or damage the internal anti-drip ball valve. Instead, turn the glue gun on to its lowest heat setting and allow it to warm up for 2 to 3 minutes to gently soften the blockage. Once the glue has softened, use a thick, dry cotton cloth or a heat-resistant silicone scraper to carefully wipe away the excess glue from the exterior of the nozzle. For internal clogs, consult the manufacturer’s instruction manual for approved cleaning procedures, and never use chemical solvents.
Community discussion
Share your experience or ask a question. Comments are reviewed before publication.