
Selecting the right magnetic tape for your workspace or classroom can transform how you organize documents, display teaching aids, and store everyday tools. The ideal 3M magnetic tape variant for your project depends entirely on the weight of the items you want to mount, the texture of your receiving surfaces, and whether you require a customizable continuous roll or convenient pre-cut strips. By matching the physical specifications of the tape to your specific organizational tasks, you can ensure a secure hold without damaging your walls, whiteboards, or stationery.
Quick Guide to 3M Magnetic Tape Specifications
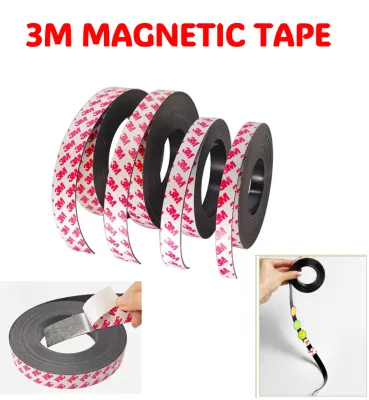
Understanding the technical dimensions of flexible magnetic tape is the first step toward a successful organizing project. Magnetic tape generally consists of a flexible, strontium ferrite-infused polymer strip paired with a pressure-sensitive adhesive backing on the reverse side. The physical dimensions of this strip directly dictate its magnetic performance and structural limits.
Width and Thickness:
Products mentioned in this guide
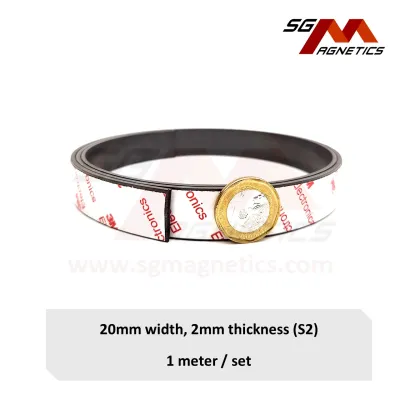
Prices are valid at publication and may change. Please refer to the product page for the latest price.
The width and thickness of a magnetic tape variant are the primary factors determining its magnetic pull force. Thicker tapes contain more magnetic particles per square centimeter, which creates a stronger magnetic field and a more robust grip. Narrower, thinner tapes are highly flexible and lightweight, making them easy to cut with standard classroom scissors, but they offer less surface area for magnetic contact. When selecting a tape, remember that doubling the width of the tape generally doubles the contact area, thereby increasing the overall holding capacity.
Format Options:
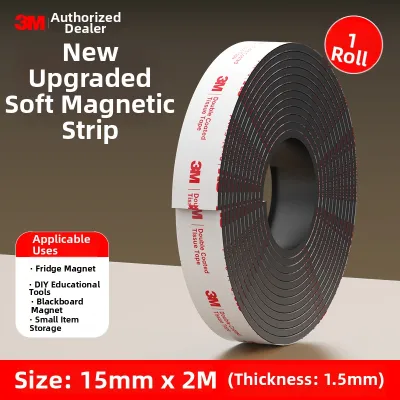
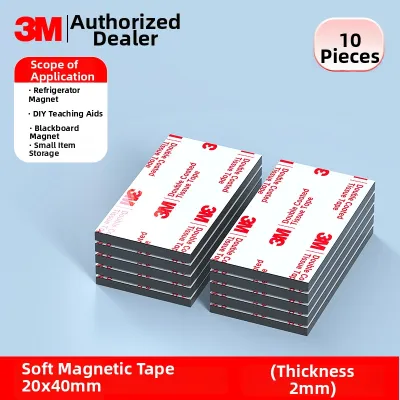
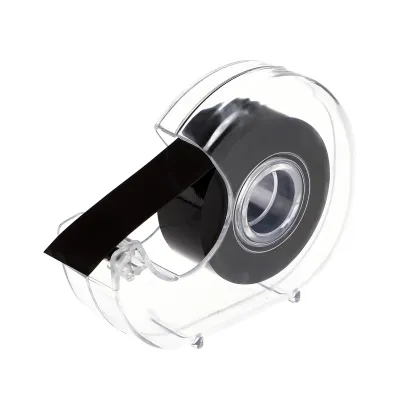
You will typically find magnetic tape in two main formats: continuous rolls and pre-cut strips or sheets. Continuous rolls offer maximum flexibility, allowing you to measure and cut custom lengths for oversized posters, long banners, or custom-sized labels. Pre-cut strips, squares, or patches are designed for rapid deployment, providing uniform sizes that are ideal for standardizing classroom labels, student name tags, or small office signs without the need for cutting tools.
Adhesive Backing Types:
The adhesive side of the tape is just as critical as the magnetic side. Standard acrylic-based adhesives work exceptionally well on smooth, non-porous surfaces such as glass, metal, and rigid plastics. For porous or textured surfaces like cardboard, cardstock, or painted concrete walls, you may need to look for variants featuring heavy-duty or rubber-based adhesives. Always verify the adhesive type on the product packaging to ensure it matches the material of the item you are mounting.
Reading Product Labels:
When browsing options in Singapore stationery shops or online marketplaces, pay close attention to the manufacturer’s specifications on the packaging. Look for the rated weight capacity, which is often expressed in grams or kilograms per unit length (such as per 10 centimeters of tape). Additionally, check for indicators of magnetic polarity; some tapes are designed to stick only to steel surfaces, while others are magnetized in matching pairs to allow tape-to-tape alignment.
Matching Tape Variants to Office and School Tasks
A successful organization system relies on matching the physical profile of your magnetic tape to the structural demands of the items you wish to display or store. Using a heavy-duty tape for a lightweight paper memo is an unnecessary expense, while using a thin, decorative tape to hold a pair of metal scissors will inevitably lead to dropped items and potential damage.

By analyzing the weight, shape, and rigidity of your target objects, you can select a tape variant that provides the exact balance of adhesive grip and magnetic pull required. This scenario-based approach ensures that your displays remain intact, your tools stay within arm’s reach, and your surfaces remain undamaged.
Mounting Documents, Photos, and Lightweight Paper
For standard office memos, student artwork, and lightweight photographs, a thin and narrow magnetic tape variant is highly suitable. These items have minimal mass and lie flat against the receiving surface, requiring very little magnetic pull force to stay secure.
- Recommended Dimensions: A tape width of approximately 12mm to 19mm with a thickness of less than 1.5mm is generally sufficient for paper-based items. This low profile ensures that the mounted documents do not protrude excessively from the whiteboard or filing cabinet, maintaining a clean and professional appearance.
- Evaluating Pull Force: Standard printer paper, lightweight cardstock, and glossy photo paper require minimal magnetic force. A light-duty flexible magnetic tape can easily support these materials. However, if you are mounting laminated sheets or thick cardstock, you must account for the added weight and stiffness of the plastic laminate, which may require a slightly wider strip to prevent the corners from curling away from the magnetic surface.
- Textured and Uneven Surfaces: If you are mounting these lightweight items onto textured magnetic boards or painted steel surfaces with slight imperfections, the magnetic contact area is reduced. In these environments, choose a slightly thicker tape variant. The extra thickness provides a minor degree of flexibility, allowing the magnet to conform better to surface irregularities and maintain a reliable hold.
Organizing Tools, Pens, and Heavier Supplies
Storing heavier, three-dimensional items like whiteboard markers, metal scissors, rulers, and tape dispensers requires a significantly more robust magnetic tape variant. These items exert rotational force on the magnetic bond, meaning they need both high magnetic pull and a strong adhesive backing to stay in place.
- Thicker and Wider Variants: To support the weight of office tools, select a tape variant with a thickness of 2mm or more and a width of at least 25mm. The increased thickness provides the necessary magnetic flux density to hold heavier objects securely against vertical steel surfaces, preventing them from sliding downward over time.
- Evaluating Weight Limits: Before applying tape to any tool, weigh the object or estimate its mass. Compare this weight against the manufacturer's specified weight limit on the tape packaging. As a general rule of thumb, always use more tape than the minimum calculated requirement to create a safety margin, especially for items with uneven weight distribution.
- Application Techniques for Irregular Shapes: Cylindrical objects like pens and markers have a limited flat surface area for adhesive contact. To secure these items, apply a continuous strip of tape along the entire length of the marker barrel rather than a small square at one end. For heavier tools like scissors, consider wrapping a piece of tape around the handle or using multiple parallel strips to distribute the weight evenly and maximize the contact area.
Creating Removable Displays, Labels, and Signs
Classrooms and agile office spaces frequently require modular displays, temporary signage, and reusable labels. For these applications, the ease of formatting and the ability to reposition items quickly are paramount.
- Pre-Cut Strips vs. Continuous Rolls: When creating a large volume of uniform labels—such as student name tags for a whiteboard attendance tracker—pre-cut magnetic strips or squares are highly efficient. They eliminate the time spent measuring and cutting, ensuring every label has an identical appearance. For custom-sized signs, directional arrows, or long headers, a continuous roll allows you to tailor the length precisely to the sign's dimensions.
- Adhesive Selection for Temporary Mounting: When building removable displays, you will often apply the adhesive side of the magnetic tape to a non-magnetic item (like a laminated sign or a foam board cutout) and then place the magnetic side onto a steel whiteboard. Ensure the adhesive backing is rated for a permanent bond with the display material so the magnet does not peel off the back of the sign during frequent handling.
- Supporting Heavy Display Materials: Thick foam boards, heavy cardstock posters, and large laminated teaching aids require careful tape placement. To prevent the display from sagging or bowing, apply magnetic tape along the entire top edge and add smaller anchor pieces to the bottom corners. This distribution keeps the display flat and professional-looking throughout the school term.
Verifying Surface Compatibility and Adhesion Limits
Before purchasing or applying any magnetic tape, you must verify that both your receiving surface and your target objects are compatible with the tape’s magnetic and adhesive properties. Failing to perform these checks can result in falling items, wasted materials, or costly surface damage.
The Magnetic Test:
Not all metallic surfaces are magnetic. Many modern office fixtures, aluminum whiteboards, and stainless steel appliances do not attract magnets due to their specific alloy compositions. Before planning your organization system, perform a simple physical test: take a standard kitchen magnet and place it on the target surface. If the magnet does not cling firmly, magnetic tape will not work on that surface, and you will need to seek alternative mounting solutions.
Adhesive Compatibility:
The adhesive backing on 3M magnetic tape is designed to bond with specific materials. Check the manufacturer’s instructions to confirm compatibility with your target surface, whether it is painted drywall, glass, varnished wood, or plastic. Some adhesives are optimized for smooth, non-porous surfaces and may fail prematurely if applied to dusty concrete, unvarnished wood, or highly textured plastics.
High-Risk Surfaces:
Be extremely cautious when applying adhesive-backed tape to delicate or high-value surfaces. Freshly painted walls (cured for less than a month), delicate wallpaper, antique wooden furniture, and thin drywall are highly susceptible to damage. The strong adhesive bond can tear away paint layers, wood fibers, or paper backing when removed. If you must use magnetic tape in these areas, consider applying the adhesive side to a removable, damage-free mounting strip first.
Application and Safe Removal Best Practices
To achieve the maximum rated holding power and ensure a clean, damage-free removal process, you must follow proper application and removal protocols.
Surface Preparation:
Adhesives require a clean, dry, and dust-free surface to form a strong molecular bond. Before applying the tape, clean the target surface thoroughly with a mild soap solution or isopropyl alcohol, depending on the surface material’s tolerance. Allow the surface to dry completely. Avoid using household glass cleaners that leave behind a slick residue, as this can severely compromise the adhesive bond.
Pressure and Curing:
When applying the adhesive side of the tape to your object, press down firmly along the entire length of the strip. Apply consistent pressure for at least 30 seconds to activate the pressure-sensitive adhesive. In Singapore’s warm and humid climate, adhesive curing times can be affected; it is highly recommended to let the adhesive bond cure for 24 hours before subjecting it to any weight or magnetic pull.
Safe Removal Techniques:
When it is time to remove the magnetic tape, pulling it off directly can damage the underlying surface. Instead, use a hair dryer on a low, warm setting to gently heat the tape, which softens the adhesive backing and makes it easier to peel. Alternatively, you can slide a piece of dental floss or thin fishing line behind the tape in a sawing motion to cut through the adhesive layer safely.
Residue Cleanup and Professional Consultation:
If any adhesive residue remains after removal, check the product label for approved cleaning agents. For stubborn residue on durable surfaces, a mild adhesive remover or warm soapy water applied with a soft microfiber cloth is often effective. If you notice signs of structural damage, cracking paint, or if the residue is on a highly delicate antique surface, stop immediately and consult a professional surface restoration specialist or the manufacturer to prevent further damage.
Frequently Asked Questions (FAQ)
Can 3M magnetic tape stick to stainless steel refrigerators?
Many modern stainless steel appliances, including refrigerators, are manufactured with non-magnetic stainless steel alloys (such as austenitic grades) that do not attract magnets. Before purchasing magnetic tape for your kitchen or office breakroom, always test the specific panel with a standard household magnet to verify its magnetic properties.
How do I clean the adhesive residue left by magnetic tape?
To clean leftover adhesive residue, first consult the specific 3M product packaging or the manufacturer’s website for approved solvents. For a gentle, non-chemical approach, apply warm soapy water to a soft cloth and gently rub the area. Always test any cleaning agent or solvent on a small, inconspicuous area of the surface first to ensure it does not discolor or damage the finish.
Does the magnetic strength degrade over time?
Flexible magnetic tape is highly durable and will retain its magnetic properties for years under normal indoor office and classroom conditions. However, exposure to extreme heat, direct sunlight, or severe physical bending can disrupt the alignment of the magnetic domains, leading to a gradual loss of magnetic pull force over time. Keep your tape stored in a cool, dry place away from direct heat sources to maximize its lifespan.
Community discussion
Share your experience or ask a question. Comments are reviewed before publication.