
Quick Guide to Choosing Your First Needle Threader
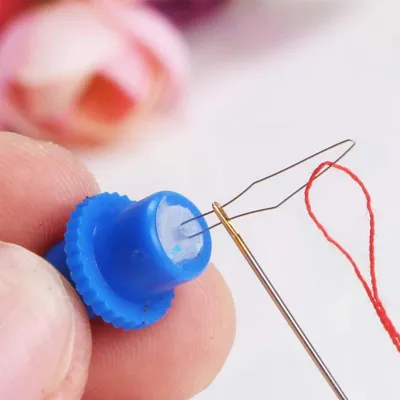
Embroidery beginners in Singapore often face frustration when trying to thread multi-strand cotton floss through small needle eyes. The most forgiving and practical option for starting out is a wire loop threader equipped with a sturdy, wide handle. This design provides a secure grip and excellent control, making it much easier to guide the wire through the needle eye.
Before purchasing, the primary compatibility check is ensuring the threader’s wire is fine enough to pass through your specific embroidery needle eye without bending or catching. If you have to force the wire through, the eye is too small, which will quickly ruin the tool.
Keep in mind that wire loops are inherently delicate tools. Setting realistic expectations about their durability is important; they are consumable items that will eventually stretch, bend, or snap, and knowing when to replace them prevents damage to your embroidery threads.
Products mentioned in this guide
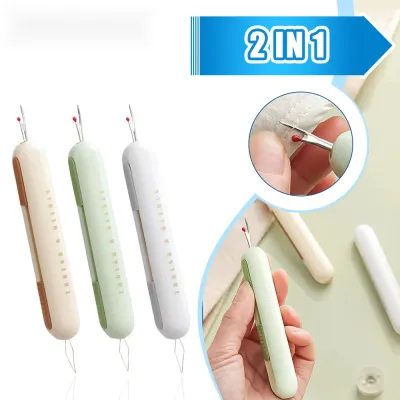
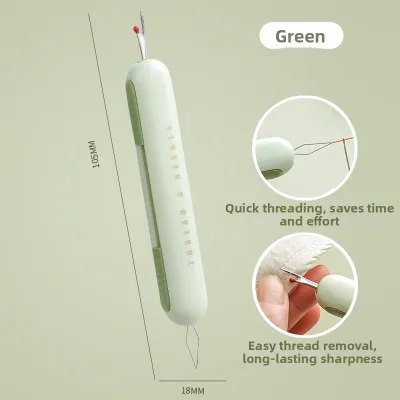
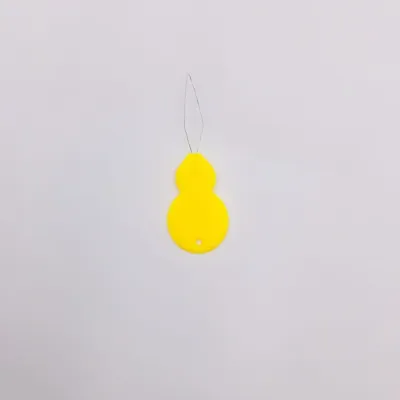
Prices are valid at publication and may change. Please refer to the product page for the latest price.
Why Embroidery Beginners Need a Reliable Needle Threader
Embroidery is a deeply rewarding and meditative craft, but the initial setup can test any beginner’s patience. One of the most common hurdles is preparing the needle, especially when working with multi-strand embroidery floss. Unlike standard sewing thread, embroidery floss consists of several loosely twisted strands that easily separate, fray, and splay when pushed against a narrow metal opening.

Attempting to thread a needle by sight alone often leads to eye strain, particularly during long stitching sessions under typical indoor lighting. This constant struggle can quickly drain your creative momentum and turn a relaxing hobby into a source of physical tension.
A reliable needle threader acts as a physical bridge, keeping the individual fibers of your floss aligned and compressed as they pass through the needle eye. By eliminating the friction that causes fraying, the tool preserves the integrity of your thread ends, ensuring your stitches remain clean, smooth, and uniform from the very first pull.
Investing in a dedicated threader allows you to focus your energy on learning new stitches and enjoying the creative process, rather than fighting with stubborn thread ends before every single color change.
Best Needle Threader Types for Embroidery Beginners
Selecting the right needle threader depends on your physical comfort, hand dexterity, and the scale of your embroidery projects. Different designs offer distinct advantages in terms of grip, durability, and ease of use.
Wire Loop Threaders with Ergonomic Handles
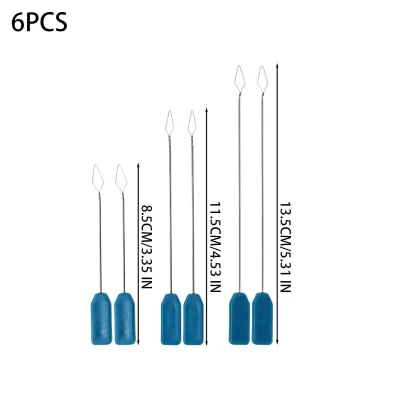
The classic wire loop design features a thin, flexible wire folded into a diamond shape, attached to a handle. For beginners, choosing a version with an upgraded, wide, and textured handle is highly recommended over the flat, flimsy metal tabs often found in basic sewing kits.
The larger handle provides a comfortable surface for your fingers, which is especially helpful for crafters with limited fine motor control or hand fatigue. The textured surface prevents slipping, allowing you to maintain a steady hand as you guide the wire through the needle eye.
However, the primary limitation of this design is its delicate nature. The fine wire can easily bend, warp, or detach from the handle if it is forced through a needle eye that is too small for its gauge.
This type is best suited for standard crewel needles and projects where you frequently separate and thread multi-strand cotton embroidery floss.
Automatic or Push-Button Threaders
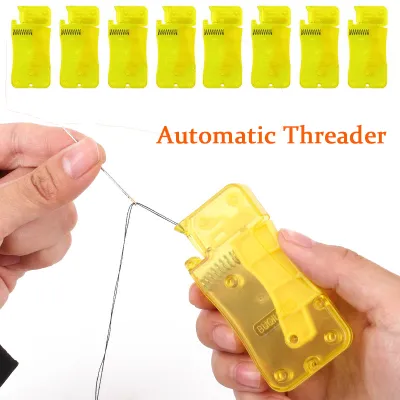
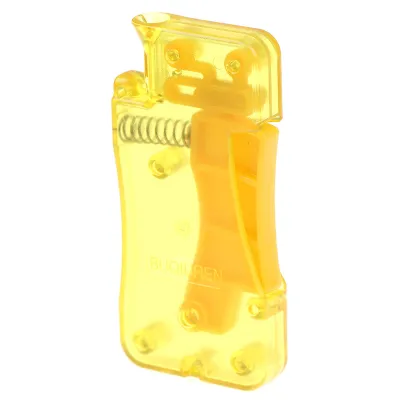
Automatic or push-button threaders utilize an enclosed mechanical system to pass a tiny hook or wire through the needle eye. By housing the delicate threading mechanism inside a plastic casing, these devices protect the wire from accidental bending, crushing, or snapping during storage.
To use this tool, you place the needle eye-down into a designated slot, lay the thread across a guide path, and press a button or lever. The internal mechanism pushes a loop of thread directly through the eye, allowing you to pull it through from the other side.
While highly convenient, these devices have a slight learning curve. You must ensure the needle eye is aligned precisely with the internal guide slot before pressing the button, as forcing the mechanism can damage both the needle and the tool.
This option is ideal for users who find themselves frequently breaking traditional wire loops or those who prefer a durable, self-contained tool that can be easily tossed into a sewing basket.
Desktop or Standalone Threaders
Desktop threaders are stationary devices designed to sit firmly on your work table, offering a hands-free threading experience. These tools are typically larger and heavier than portable threaders, often featuring a weighted base or non-slip rubber feet to prevent sliding.
The setup involves inserting your needle into a vertical slot, draping the thread over a guide, and depressing a lever. Because the device remains stable on your desk, you can use both hands to align the thread and operate the lever, minimizing the need for precise finger coordination.
The main trade-off with desktop threaders is their lack of portability and the physical desk space they occupy. They are not easily carried in a small travel sewing kit, making them less suitable for stitching on the go.
This type is best for long, intensive stitching sessions at home, preparing multiple needles simultaneously, or for crafters who experience significant hand tremors or limited joint mobility.
Self-Threading Needles as an Alternative
Self-threading needles, also known as easy-thread needles, offer a tool-free alternative to separate threading devices. These needles feature a specialized eye design, typically with a tiny V-shaped slot or a spring-loaded opening at the very top of the needle head.
Instead of guiding a thread through a closed loop, you simply stretch the thread taut and push it down into the slot from above. The thread slips into the eye and is held in place by the tension of the metal.
While highly convenient, these needles carry a risk of snagging. If the metal slot has any microscopic rough edges or burrs from the manufacturing process, it can easily shave or fray delicate embroidery floss as you stitch through fabric.
This alternative is best reserved for quick repairs, travel sewing kits, or beginners who frequently misplace small tools and prefer a streamlined, single-item solution.
How to Match the Threader to Your Embroidery Needles and Threads
Achieving a seamless threading experience requires matching the physical dimensions of your threader, needle, and thread. Using mismatched tools is the leading cause of broken threaders and frayed embroidery floss.
The first step is verifying the relationship between the needle eye size and the threader wire thickness. Visually inspect the wire loop; it must be significantly thinner than the opening of the needle eye. When you insert the wire, it should slide through with absolutely zero resistance. If you feel any friction or have to wiggle the wire to get it through, stop immediately, as forcing it will warp the wire or break the solder joint at the handle.
Next, consider the specific type of thread you are using. Standard cotton embroidery floss is composed of six individual strands that can be separated. If you are stitching with four to six strands, you will need a threader with a larger wire loop that can comfortably hold the bulk of the fibers without squeezing them too tightly.
For single-strand threads, such as fine silk, wool, or metallic threads, a much finer wire loop is required. Metallic threads are particularly abrasive and can easily cut through delicate wire loops, so using a threader with a reinforced or slightly thicker wire is advisable for these materials.
Always check the manufacturer specifications on the packaging of both your needles and your threaders. Many brands list the compatible needle sizes (such as sizes 1 to 10) and the maximum thread thickness their tools can accommodate. Keeping a small assortment of threaders in different sizes ensures you always have the correct match for your current project.
Where to Buy Needle Threaders in Singapore
Finding the right needle threader in Singapore is straightforward, with several local and online options catering to different shopping preferences.
Visiting local craft, fabric, and haberdashery shops is highly recommended for beginners. Shopping in person allows you to physically examine the tools, check the weight and comfort of the handles, and even ask the shop staff for recommendations based on your specific needle sizes. Many of these traditional shops are located in central areas or neighborhood hubs, offering a tactile shopping experience where you can also browse embroidery hoops and colorful floss.
For basic wire loop threaders, local stationery and hobby shops are excellent, budget-friendly options. These stores frequently stock multi-packs of simple threaders for under S$5, allowing you to keep spares in your sewing box, travel kit, and desk drawer without spending a lot of money.
If you prefer the convenience of home delivery, online marketplaces and specialized e-commerce platforms offer a vast selection of needle threaders, including advanced automatic and desktop models. When shopping online, it is crucial to verify seller ratings and read customer reviews carefully. Look for feedback specifically mentioning the durability of the wire loops and the ease of alignment for mechanical models to ensure you are purchasing a reliable tool.
Frequently Asked Questions (FAQ)
How do I fix a bent wire on a standard needle threader?
Attempting to bend a fine threader wire back into its original shape is generally not recommended. The metal wire used in these tools is extremely thin and loses its structural integrity once bent. Trying to straighten it with pliers or your fingers usually weakens the metal further, leading to micro-fractures that will cause the wire to snap during your next threading attempt. Additionally, a bent wire can develop sharp edges that will snag and fray your embroidery floss. It is best to replace the damaged threader or reserve it strictly for larger-eyed needles, such as tapestry or yarn needles, where the wire does not need to be perfectly straight to pass through.
Can I use a standard sewing needle threader for embroidery floss?
Using a standard sewing needle threader for multi-strand embroidery floss is highly risky. Standard sewing threaders are designed for very fine, single-strand sewing threads and have narrow wire loops to match. When you attempt to pull multiple strands of cotton embroidery floss through these small loops, the bulk of the thread creates intense friction. This friction can catch, shred, or completely sever the delicate fibers of your floss, and the excessive force required to pull it through will often snap the threader wire. Always check the wire thickness and choose a threader specifically labeled for embroidery or heavy-duty hand sewing to ensure it can handle the volume of your thread.
Why does my thread keep fraying when I pull it through the needle eye?
Thread fraying during the threading process is usually caused by friction from a damaged tool or an incorrect technique. Inspect the inside of your needle eye and the surface of your threader wire for any microscopic burrs, rough spots, or dried adhesive, as these imperfections will shave the thread fibers. Another common cause is pulling the thread through at an awkward, sharp angle, which forces the floss to scrape against the sharp inner edges of the needle eye. To prevent this, trim the end of your embroidery floss at a clean, sharp angle using sharp fabric shears before threading. Ensure the threader wire is fully withdrawn from the needle eye before you attempt to pull the thread through, allowing the fibers to pass through smoothly without catching.
Community discussion
Share your experience or ask a question. Comments are reviewed before publication.