
Selecting the right light board for drawing and tracing involves balancing workspace limits, paper compatibility, and power requirements. In Singapore, where study spaces and home offices are often compact, finding a tool that fits your desk layout while delivering consistent, flicker-free illumination is essential for comfortable creative work. Whether you are an illustrator working on detailed comic panels, a calligrapher perfecting script alignment, or a hobbyist engaged in diamond painting, understanding the underlying technical specifications of these devices will help you make an informed purchase.
Rather than relying on vague marketing claims, artists should evaluate light boards based on observable physical characteristics and verifiable electrical standards. A high-quality board should offer uniform brightness across its entire surface, a durable exterior that resists scratches, and a reliable power connection that fits your workflow. By focusing on these practical factors, you can find a dependable tool that enhances your creative process without causing eye strain or cluttering your workspace.
Core Specifications to Evaluate Before Buying
Active area dimensions are the first critical factor to consider when choosing a light board. Standard sizes typically follow the international paper format, ranging from compact A4 models to expansive A3 and A2 boards. However, the total footprint of the device is always larger than the active illuminated area due to the surrounding bezel. When planning your desk space, especially on a compact study table, always check the external dimensions listed on the packaging to ensure the board fits comfortably alongside your other tools.
Products mentioned in this guide
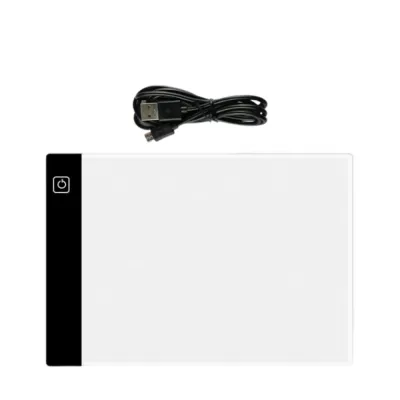
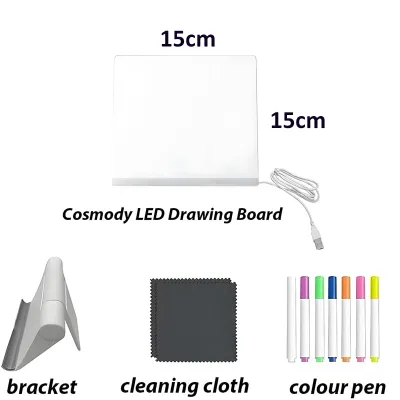
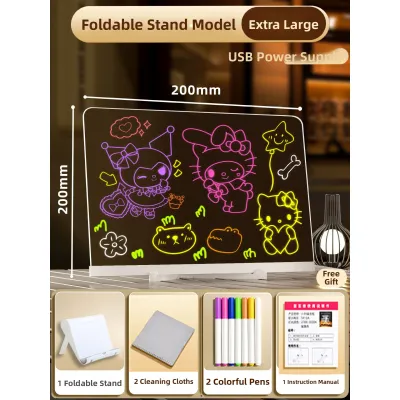
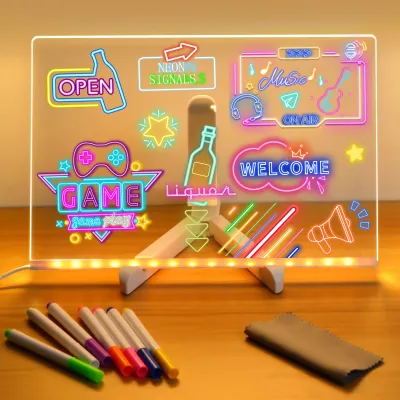
Prices are valid at publication and may change. Please refer to the product page for the latest price.
Brightness levels and the mechanism used to adjust them directly affect how well you can see through different paper weights. Light boards generally offer either stepped dimming, which provides three to five preset brightness levels, or stepless dimming, which allows you to adjust the light continuously by holding down the power button. Stepless dimming offers greater flexibility, allowing you to fine-tune the illumination to match the ambient light in your room and the specific opacity of your paper.
Power supply configurations determine where and how you can use your light board. Most modern boards utilize a USB connection, which can be powered by a standard wall adapter, a computer port, or a portable power bank. While USB-powered models offer excellent portability, larger professional-grade boards may require a dedicated AC adapter to deliver the voltage necessary for high-intensity illumination. It is important to check the cable length and the position of the power port to ensure it does not interfere with your hand placement while drawing.
Board thickness and weight influence both the portability of the device and your physical comfort during long drawing sessions. Ultra-thin light pads, often measuring between 5mm and 8mm in thickness, are lightweight and easy to slip into a backpack, but they can sometimes flex under heavy hand pressure. Thicker light boxes provide a more rigid drawing surface but are heavier and less convenient to transport. Additionally, consider the surface texture; a slight matte finish can prevent paper from sliding, whereas a high-gloss acrylic surface may offer slightly sharper light transmission but is more prone to showing fingerprints and scratches.
Matching Board Features to Your Specific Art Style
For anime, manga, and comic inking, uniform edge-to-edge brightness is paramount. When tracing complex layouts or clean ink lines from rough sketches, any dimming or dark spots near the borders of the board can lead to inconsistent line weights and eye fatigue. Illustrators working in these mediums should look for boards with high-quality light guide plates that distribute LED light evenly across the entire surface, ensuring that details in the corners are just as visible as those in the center.

Calligraphy, lettering, and diamond painting projects often require larger formats and highly stable working surfaces. A larger A3 or A2 board allows calligraphers to work on long guidelines and expansive layouts without constantly shifting the paper. For diamond painting, which involves applying small resin facets to a sticky canvas, a sturdy board with non-slip rubber feet is essential to prevent the workspace from sliding. Some boards also feature integrated physical rulers or grid lines printed under the acrylic surface, which are incredibly helpful for maintaining straight lines in lettering and precise alignment in crafts.
On-the-go sketching and field work demand a focus on portability and flexible power options. If you frequently draw in local cafes, libraries, or outdoor spaces, an ultra-slim A4 light pad that weighs under 500 grams is highly practical. Pairing a lightweight board with a standard 5V power bank allows you to work anywhere without searching for an electrical outlet. In these mobile scenarios, a board with a physical button lock or a recessed power switch is beneficial to prevent accidental shut-offs while you are holding the edges of the device.
Heavy media and mixed media applications, such as watercolor painting or thick cardstock drafting, require maximum light penetration and a robust surface. Standard light boards may struggle to shine through heavy 300 GSM watercolor paper, meaning you will need a model capable of reaching higher lux levels. Furthermore, because wet media or heavy pressure can damage delicate electronics, ensure the board has a sealed edge design to prevent moisture ingress and a scratch-resistant acrylic panel that can withstand the scraping of masking tape, transfer tools, or hard pencils.
Pre-Purchase Verification and Safety Checks
Before finalizing your purchase, verify the actual illuminated area against the total dimensions of the board. Manufacturers frequently highlight the overall size of the device in their main titles, which can lead to confusion. For example, a product labeled as an “A4 light board” should have an active light area of at least 210mm by 297mm. Carefully read the detailed specification sheet on the packaging or product listing to confirm that your drawing paper will fit entirely within the lit boundary without overlapping the dark plastic bezel.
Power input requirements must be verified to ensure safe and stable operation. Most portable light boards operate on a 5V USB input, but the required amperage can vary between 1A and 2A depending on the size of the panel. Using a low-quality phone charger or an underpowered USB port can result in screen flickering, reduced maximum brightness, or overheating near the power connection. Always match the power source to the manufacturer’s specified input requirements to protect the internal LED strip from premature failure.
Evaluate eye-care claims by looking for technical indicators rather than marketing buzzwords. High-quality light boards utilize constant-current drivers to eliminate high-frequency flickering, which is a primary cause of eye strain and headaches during extended use. To protect your vision, avoid working with a high-brightness light board in a completely dark room. Instead, plan to use the board in a well-lit space or pair it with a soft ambient desk lamp to minimize the harsh contrast between the glowing panel and your surroundings.
Review the warranty terms and seller support options before buying, especially when ordering online. Look for sellers that offer a clear return policy and a warranty period of at least six months to cover potential manufacturing defects. Upon receiving your light board, perform an immediate inspection: check for dead LEDs, uneven light distribution, a loose power port, or physical warping of the frame. Testing these elements immediately ensures you can request a replacement or refund within the seller’s return window.
Sourcing and Shopping Strategies for Local Buyers
Visiting local art supply and stationery stores in Singapore is an excellent way to evaluate light boards before spending money. Specialized retail hubs, such as the art supply shops located in Bras Basah Complex or central shopping districts, often have display models available for hands-on testing. This allows you to physically feel the rigidity of the frame, test the responsiveness of the power button, and observe the actual brightness and color temperature of the LEDs under standard lighting conditions.
When shopping on online marketplaces, use filtering tools to identify reputable local sellers and read verified buyer reviews. Pay close attention to feedback regarding delivery times, packaging quality, and product defects. If you are purchasing a larger light board that requires a direct wall connection, ensure the listing specifies a compatible power adapter. In Singapore, electrical appliances must use a compatible plug configuration, so look for listings that include a standard 3-pin Type G plug or a certified USB wall adapter.
Compare the value of bundled kits against standalone light boards. Many online listings package the light board with accessories such as tracing paper, clips, a plastic stand, a carrying sleeve, or weeding tools for vinyl crafting. While these bundles can seem convenient, the included accessories are sometimes of lower quality than those you could purchase separately. If you already own high-quality drawing clips or a tablet stand, investing your budget into a higher-grade standalone light board with superior LED uniformity is generally the wiser choice.
Be vigilant for red flags in product listings to avoid low-quality counterfeits or outdated stock. Common warning signs include missing electrical specifications, vague dimensions that do not specify the active light area, and listings that rely solely on heavily edited stock photos. A reputable manufacturer will clearly state the input voltage, power consumption, dimensions of both the frame and the active area, and the type of USB port used, giving you confidence in the product’s build quality.
Setup, Care, and Maintenance for Longevity
Proper physical setup is key to maintaining both your comfort and the lifespan of your light board. Position the board on a flat, stable desk surface where it will not wobble or slide during use. To reduce neck strain, consider placing the board on a sturdy, adjustable laptop stand set at a gentle angle. Ensure that the power cable is routed cleanly away from your drawing hand and is not bent at a sharp angle, which can cause internal wire breakage over time.
Cleaning the acrylic surface requires gentle methods to prevent micro-scratches that can scatter light and obscure your drawings. Always unplug the device before cleaning. Use a dry or slightly damp microfiber cloth to wipe away dust, fingerprints, and graphite residue. Avoid using paper towels, which can be abrasive, and never apply harsh chemical solvents, alcohol-based cleaners, or glass sprays directly to the acrylic panel, as these substances can cloud the plastic and degrade the adhesive seals.
Cable management and proper storage are essential for preventing damage to the internal electronics. When unplugging the power cable, always grasp the plastic connector head rather than pulling on the cord itself, as pulling can loosen the internal solder joints of the USB port. Store the light board flat or vertically in a padded sleeve or its original box to protect the screen from pressure. Placing heavy objects on top of a stored light board can compress the internal layers, leading to permanent dark spots or uneven light diffusion.
Monitor your light board for signs of wear or electrical degradation over time. If you notice the LEDs flickering, changing color toward a yellow or blue tint, or dimming significantly in specific areas, the light guide plate or the LEDs may be reaching the end of their lifespan. Additionally, if the area around the power port or control button becomes unusually hot to the touch during use, unplug the device immediately and consult the manufacturer, as this indicates a potential power regulation issue that requires replacement.
Frequently Asked Questions (FAQ)
Can I use a regular tablet or monitor as a light board?
While you can use a digital tablet or computer monitor to trace drawings in a pinch, they are not ideal substitutes for a dedicated light board. Consumer tablets generally have much lower maximum brightness levels, making it difficult to project light through thicker drawing papers. Furthermore, using a pen or pencil on a tablet screen carries a high risk of scratching or cracking the expensive glass display. Digital screens also emit light through a grid of pixels, which can cause distracting visual patterns and eye strain when viewed through paper, unlike the smooth, diffused light of a dedicated tracing pad.
Do I need a special type of paper for tracing on a light board?
No specialized paper is strictly required, but the weight and texture of your paper will determine how easily light passes through it. Standard copy paper (70 to 80 GSM) and dedicated tracing paper (40 to 60 GSM) allow light to penetrate easily, even on lower brightness settings. Heavier mediums like cartridge paper (150 GSM) or watercolor paper (300 GSM) require a light board with high-intensity LEDs and adjustable brightness to show underlying lines clearly. When working in Singapore’s humid climate, paper can absorb moisture and warp; using low-tack drafting tape to secure your sheets will prevent them from shifting or tearing when removed.
Community discussion
Share your experience or ask a question. Comments are reviewed before publication.