
Choosing the right embroidery needle is one of the most critical decisions you will make when starting your needlework journey. The best sewing needle brands for beginners are those that offer exceptional manufacturing consistency, smooth eye interiors, and durable coatings that resist the humid climate of Singapore. While premium brands like John James, Clover, Prym, and Pony are highly regarded by experienced crafters, beginners do not need to spend a fortune to get started. Instead, focusing on reputable brands that provide assorted starter packs allows you to experiment with different sizes and find the perfect match for your fabric and thread without unnecessary expense.
A common mistake for newcomers is grabbing any standard sewing needle from a household kit, only to experience shredded threads, puckered fabrics, and hand fatigue. By understanding the structural differences between needle types, learning how to read sizing specifications, and knowing how to inspect a needle for physical defects, you can set yourself up for a smooth, frustration-free embroidery experience. This guide provides a practical framework to help you evaluate needle quality, select the right specifications, and build a versatile starter kit that will last through your first several projects.
Understanding Embroidery Needles vs. Standard Sewing Needles
To the untrained eye, hand sewing needles might all look identical, but their structural designs are tailored to very specific tasks. Standard sewing needles, often sold as sharps, are engineered for construction sewing using fine, single-strand threads. They feature a small, round eye designed to keep the thread snugly in place while minimizing the overall profile of the needle as it passes through fabric. While excellent for joining seams, this tight, round eye is highly unsuitable for the thicker, multi-strand threads used in decorative embroidery.
Products mentioned in this guide
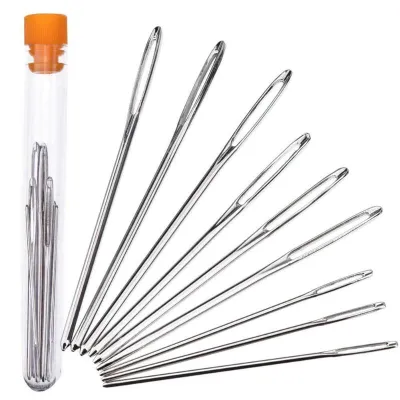
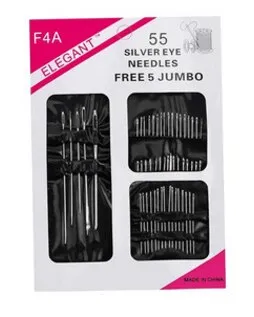
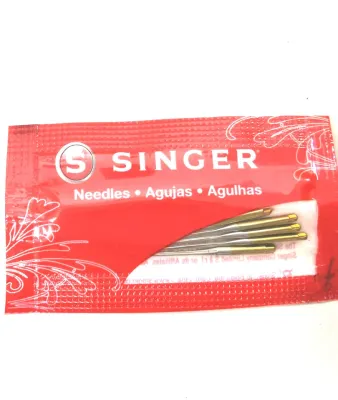
Prices are valid at publication and may change. Please refer to the product page for the latest price.
Embroidery needles, historically referred to as crewel needles, are specifically designed to accommodate the unique demands of decorative stitching. The most defining feature of an embroidery needle is its long, elongated eye. This elongated shape makes it significantly easier to thread multiple strands of cotton floss, thick wool, or textured specialty threads. Because embroidery often involves splitting six-strand cotton floss into various ply counts, the needle eye must provide ample space for these strands to lie flat side-by-side without bunching or twisting.
Beyond the eye, the relationship between the needle’s shaft thickness and its eye width is carefully calibrated. In a high-quality embroidery needle, the eye is slightly wider than the shaft. This design choice is intentional: as the needle pierces the fabric, the wider eye stretches the fabric fibers apart just enough to create a temporary pathway. This pathway allows the rest of the needle and the thick thread to glide through with minimal friction. Once the thread passes through, the natural elasticity of the fabric fibers allows them to snap back into place around the stitch.
Using a standard sharp sewing needle for embroidery introduces several immediate problems. Because the eye of a standard sharp is narrow, forcing multi-strand floss through it compresses the fibers tightly. Every time you pull the needle through the fabric, the tight eye acts as a friction point, scraping against the thread. Over the course of just a few stitches, this friction shreds the outer fibers of your floss, causing it to lose its sheen, become fuzzy, and eventually snap. Furthermore, the excessive force required to pull a mismatched needle and thread through the fabric leads to uneven tension, puckered fabric, and sore fingers.
Key Specifications to Check Before Buying
Navigating the needle aisle can be intimidating due to the numerical sizing systems used by manufacturers. For hand sewing and embroidery needles, the sizing system operates on an inverse scale: the larger the size number, the finer and shorter the needle. For example, a size 1 needle is thick, long, and robust, whereas a size 10 needle is incredibly thin, short, and delicate. For general surface embroidery, beginners will find that sizes 5 through 10 are the most useful and versatile options to keep in their sewing kit.

Matching your needle size to your thread ply count is essential for maintaining clean stitches and preserving fabric integrity. Standard embroidery floss consists of six individual strands twisted together, which you can separate depending on the level of detail your pattern requires. If you are working on fine, delicate details using only one or two strands of floss, you should select a fine needle, such as a size 9 or 10. Using a needle that is too large for a single strand will leave visible, unsightly holes in your fabric because the needle creates a pathway wider than the thread can fill.
Conversely, if you are stitching bold lines or filling in large areas with three to four strands of floss, a medium-sized needle like a size 7 or 8 is ideal. For heavy textures, satin stitch fills, or when using all six strands of floss at once, you must step up to a size 5 or 6 needle. If you attempt to use a fine size 10 needle with all six strands, the thread will bunch up at the eye, making it nearly impossible to pull through the fabric and causing immediate thread damage.
The point type of the needle must also match the structure of your backing fabric. Embroidery needles feature a sharp point, which is necessary for piercing woven fabrics like linen, cotton calico, canvas, and denim. The sharp tip cuts cleanly through the woven threads without pushing them out of alignment. However, if you decide to try counted thread techniques like cross-stitch or hardanger on open-weave fabrics like Aida, you should switch to a tapestry needle. Tapestry needles feature a blunt, rounded point designed to slip between the woven threads of the fabric rather than piercing them, ensuring your stitches remain perfectly aligned with the grid.
How to Evaluate Needle Brands for Beginners
When shopping for embroidery needles, it is easy to assume that all brands offer the same level of quality, but closer inspection reveals significant differences in manufacturing standards. The most critical area to evaluate is the interior of the needle eye. High-quality brands use advanced polishing techniques to ensure that the inside of the eye is perfectly smooth and free of microscopic metal burrs. Cheap, unbranded needles often skip this polishing step, leaving rough edges from the stamping process that act like tiny blades, shredding your thread as you work.
The finish and coating of the needle shaft also play a major role in how smoothly the needle glides through fabric. Reputable manufacturers apply high-quality platings, such as nickel, gold, or platinum, to carbon steel shafts. These coatings reduce friction and protect the underlying steel from corrosion. In Singapore’s warm and humid climate, atmospheric moisture and natural oils from your hands can quickly cause unprotected steel needles to rust or tarnish. A tarnished needle loses its smooth glide, dragging against the fabric and making stitching a chore.
Packaging is another practical indicator of a brand’s commitment to user experience. For beginners, clear and informative packaging is incredibly helpful. Look for brands that clearly label the needle type, the specific sizes included in the pack, and the materials used. Reusable packaging, such as slide-top plastic cases, compact paper envelopes with secure slots, or small protective tubes, helps you keep your needles organized and prevents them from getting lost or damaged in your sewing basket.
When assessing cost, look at the price-per-needle rather than just the total package price. While a pack of premium needles might cost slightly more than a generic budget set, the difference is usually only a few Singapore dollars. Investing S$5 to S$10 in a high-quality assorted pack from a recognized brand is far more cost-effective than buying cheap needles that bend easily, shred your expensive threads, or ruin your fabric. To avoid counterfeit or poorly finished crafting supplies when shopping on online marketplaces, purchase from established local craft retailers or official brand storefronts rather than unverified third-party sellers.
Building Your First Embroidery Needle Kit
Assembling your first embroidery needle kit does not require buying dozens of different specialty packs. For a beginner, the most practical and budget-friendly approach is to purchase a single assorted pack of crewel needles, typically containing sizes 5 through 10. This single pack provides you with a complete range of thicknesses, allowing you to experiment with different thread ply counts and fabric weights to discover what feels most comfortable in your hands.
Before launching into your first major embroidery project, get into the habit of testing your needle and thread combinations on a scrap piece of your project fabric. Take a small piece of the fabric, thread your needle with the intended number of strands, and work a few basic stitches. Observe how the needle behaves: it should pierce the fabric with minimal resistance, and the resulting hole should be just large enough for the thread to pass through smoothly. If the needle is hard to pull, switch to a larger size; if the thread looks loose or the hole is highly visible around the stitch, switch to a finer size.
To round out your starter kit, pair your needles with a few essential accessories that make stitching much easier. A high-quality needle threader—ideally one with a sturdy wire loop or a dual-hook design—is invaluable for threading multi-strand floss without fraying the ends. A magnetic needle minder is another highly recommended accessory; this small, decorative magnet clamps onto your embroidery hoop, providing a secure spot to park your needle when you need to change threads or take a break. Finally, consider adding a small emery cushion, which is filled with abrasive mineral sand. Inserting your needle into the emery cushion a few times cleans away surface oils, dirt, and minor tarnish, keeping the shaft perfectly smooth.
Care, Storage, and Replacement Signals
Proper care and storage are essential for extending the lifespan of your embroidery needles and protecting your hard work. Because Singapore’s high humidity can accelerate rust formation, you should never leave your needles exposed to the open air or stuck directly into your embroidery project for long periods. Moisture trapped in the fabric fibers can react with the metal, leaving permanent rust stains on your fabric. Instead, store your needles in a dedicated needle case, a fabric needle book, or on a magnetic strip inside a sealed container, ideally with a small silica gel packet to absorb excess moisture.
Learning to recognize when a needle is worn out or damaged is crucial for maintaining the quality of your stitches. Over time, the constant friction of passing through fabric will wear down the needle’s protective coating and dull its sharp point. Run your fingernail gently along the shaft and tip of the needle; if you feel any rough spots, tiny scratches, or a slight bend at the tip, the needle has developed a burr or is damaged. A damaged needle will snag the delicate fibers of your fabric and shred your embroidery floss.
Another reliable indicator of a dull needle is the sound and feel of your stitching. A fresh, sharp needle should slide through woven fabric silently and effortlessly. If you start hearing a distinct popping or clicking sound as the needle pierces the fabric, or if you feel a noticeable resistance that requires you to push harder, the tip has become blunt and needs to be replaced. Working with a blunt needle not only distorts your fabric weave but also increases hand strain.
When it is time to discard a bent, rusted, or dull needle, safety should be your primary concern. Never throw loose needles directly into your household trash bin, as they can easily pierce plastic bags and cause injuries to you, your family, or waste management workers. Instead, create a dedicated needle safe using a small, puncture-proof container, such as an empty plastic pill bottle, a small metal tin, or a designated sharps container. Once the container is full, secure the lid tightly with tape before disposing of it in accordance with local waste guidelines.
Frequently Asked Questions (FAQ)
Can I use regular sewing needles for basic embroidery? (FAQ)
While you can technically use a regular sewing needle for basic embroidery, it is not recommended because of the structural differences in the needle eye. Regular sewing needles, such as sharps, have small, round eyes designed for thin, single-strand sewing threads. Forcing multi-strand embroidery floss through a small eye compresses the fibers, creating intense friction every time the needle passes through the fabric. This friction quickly shreds and dulls the floss, leading to uneven tension, frequent thread breaks, and puckered fabric. Dedicated embroidery needles feature an elongated eye that allows multiple strands of floss to lie flat, ensuring smooth passage and preserving the thread’s natural sheen.
How often should I change my embroidery needle? (FAQ)
You should change your embroidery needle as soon as you notice any physical wear, dullness, or resistance while stitching. On average, a needle remains in peak condition for about 8 to 12 hours of active stitching, though this lifespan varies depending on the fabric and thread materials you use. Working with dense, tightly woven fabrics like heavy canvas, or using abrasive specialty threads like metallics, will dull the needle point and wear down its protective coating much faster. Visual and tactile cues—such as a popping sound when piercing the fabric, visible tarnish on the shaft, thread snagging at the eye, or a bent tip—are clear signals that the needle needs immediate replacement.
What is the difference between crewel and chenille needles? (FAQ)
The primary difference between crewel and chenille needles lies in their shaft thickness and overall proportions, despite both featuring sharp points and elongated eyes. Crewel needles, which are the standard needles used for surface embroidery, have relatively fine shafts and are designed for stranded cotton floss and delicate fabrics. Chenille needles, on the other hand, feature a much thicker shaft and a significantly larger, wider eye. This robust design makes chenille needles ideal for working with thick, heavy threads, such as crewel wool, tapestry yarn, or silk ribbons, on heavy, tightly woven backing fabrics where a standard crewel needle would bend or fail to create a large enough pathway.
Community discussion
Share your experience or ask a question. Comments are reviewed before publication.