
Selecting the right pair of school scissors for your child in Singapore depends on their grade level, physical hand size, and specific classroom art requirements. For Primary 1 to Primary 3 students, safety is the top priority, making 13 cm blunt-tipped scissors with ergonomic handles the ideal choice. As students advance to Primary 4 through Primary 6, they require 15 cm to 17 cm pointed-tip stainless steel scissors to handle more intricate designs and thicker craft materials. Always consult your school’s official booklist first, as specific stationery guidelines can vary across institutions.
Understanding School Stationery Lists and Scissor Needs
In Singapore, primary schools distribute detailed stationery lists before the start of each academic year, typically during the year-end holidays or orientation. These lists serve as the primary authority on what materials are permitted in the classroom. If a school specifies a particular size, brand, or safety standard for cutting tools, parents must prioritize those requirements over general recommendations to ensure compliance.
Age-appropriate cutting tools are essential for physical development and motor skill coordination. Cutting requires bilateral coordination, where one hand guides the paper and the other operates the tool. If the loops are too large or the blades too heavy, children often adopt awkward wrist angles, leading to hand fatigue and frustration. A properly sized tool ensures they can focus on developing precision and control.
Products mentioned in this guide
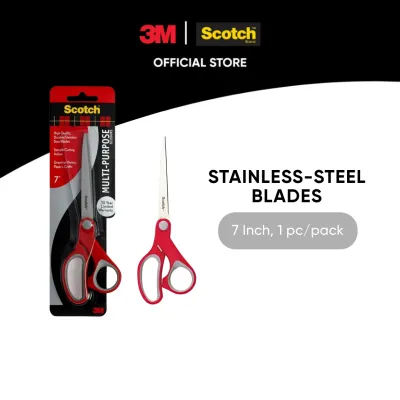
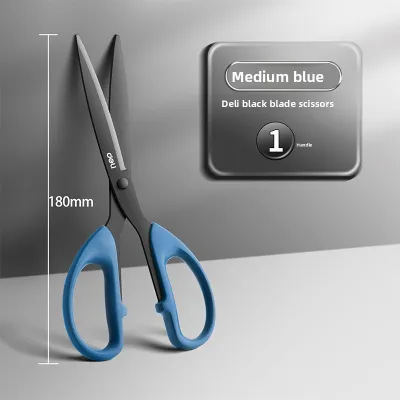
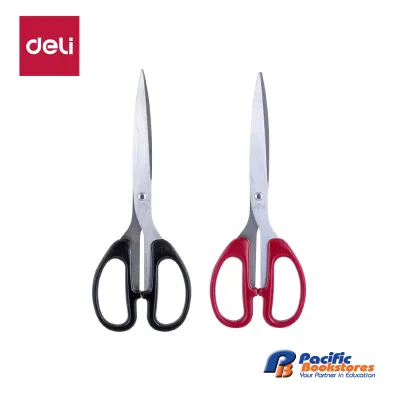
Prices are valid at publication and may change. Please refer to the product page for the latest price.
The transition from lower to upper primary brings a noticeable shift in the school art curriculum. Primary 1 to 3 students work primarily with thin paper and basic shapes, making blunt safety blades ideal. By Primary 4 to 6, students tackle complex projects involving cardboard construction, stencils, and fabric, which demand sharper, more precise blades. Matching the tool to these developmental stages ensures a safe and productive learning experience.
Lower Primary (P1 to P3): Prioritizing Safety and Motor Skill Support
For Primary 1 to Primary 3 students (ages seven to nine), safety and muscle development are the primary focus. Younger children are still building hand strength, so their tools must be easy to manage and highly secure.

Blade Type and Tip Design Always choose blunt or rounded tips for lower primary students. These rounded ends prevent accidental puncture wounds in busy classrooms. While some safety models feature plastic-covered blades that only expose the cutting edge at specific angles, verify that they can cut drawing paper without tearing it. Avoid pointed tips entirely for this age group to minimize classroom risks.
Size and Scale The overall length of the tool should match the size of your child’s hand. For P1 to P3, a total length of approximately 13 cm (5 inches) is standard. To verify the fit, have your child hold the tool; their fingers should easily reach the loops without stretching, allowing them to open and close the blades fully without shifting their grip.
Handle Design and Ergonomics Look for handles with soft-grip, rubberized loops to cushion small fingers. Asymmetrical handles—with a small round loop for the thumb and a larger loop for the other fingers—are highly recommended. This design naturally guides correct finger placement, helping children apply leverage efficiently and reducing hand fatigue.
Training Aids and Spring-Loaded Mechanisms For P1 students struggling with the cutting motion, training scissors with a flip-down spring-loaded lever can help. The spring automatically reopens the handles after each squeeze, allowing the child to focus on steering the paper. These are temporary aids; transition your child to standard tools as their grip strength improves.
Upper Primary (P4 to P6): Upgrading for Precision and Complex Crafts
As students enter Primary 4 to Primary 6 (ages ten to twelve), their art projects require greater precision and power. Older children have developed the motor skills and safety awareness needed to handle advanced cutting instruments.
Blade Type and Pointed Tips Upper primary students frequently execute detailed cuts and start internal cut-outs. For these tasks, transition your child to semi-pointed or pointed-tip blades. The sharp tip allows for accurate positioning and clean corners. Before upgrading, verify that your child understands basic safety rules, such as carrying the tool point-down and keeping fingers clear of the cutting path.
Size and Scale for Growing Hands As hands grow, a 13 cm tool becomes cramped and inefficient. For P4 to P6 students, upgrade to a standard length of 15 cm to 17 cm (6 to 6.5 inches). Longer blades allow for continuous cuts with a single motion, producing smoother edges on large sheets of drawing paper or construction cardstock.
Blade Material and Build Quality Choose high-quality stainless steel blades for older students. Upper primary art lessons involve cutting thick corrugated cardboard, felt, and foam sheets. Thin, cheap metal blades will flex or jam when cutting these materials, leading to uneven cuts. Stainless steel provides the structural rigidity needed to slice through diverse craft materials cleanly.
Specialized Edges and Supplementary Tools While a straight-edge blade remains the primary classroom requirement, upper primary students may occasionally use specialized tools, such as decorative or crimped-edge scissors (such as pinking shears). These tools cut wavy or zig-zag borders for creative presentations. Keep these as supplementary items at home, rather than replacing the standard straight-edge tool in their daily school pencil case.
Key Features to Verify Before Buying: Handedness, Weight, and Build
Evaluating specific physical attributes before buying ensures the cutting tool is comfortable, safe, and durable enough to survive the school year.
Handedness and Blade Orientation Avoid purchasing generic “ambidextrous” scissors for a left-handed child. True left-handed scissors feature reversed blade orientation, where the left blade is positioned on top. This allows a left-handed user to see the cutting line clearly. Using right-handed or ambidextrous tools forces a left-handed child to bend their wrist awkwardly to peer over the blade, leading to hand fatigue and uneven cuts. Always verify the physical blade overlap.
Pivot Mechanism The pivot point where the blades connect impacts long-term performance. Scissors generally feature either an adjustable screw or a fixed metal rivet:
- Adjustable Screws: These allow you to adjust blade tension and clean out paper dust, though they can occasionally loosen over time.
- Fixed Rivets: These are maintenance-free and cannot be disassembled by children, but they cannot be repaired if they loosen over time.
Weight and Balance A well-designed school tool should feel balanced. If the blades are too heavy relative to the handle, the tool will tip forward, forcing the child to use extra wrist strength. Have your child open the tool slowly; the center of gravity should rest near the pivot point. Avoid heavy metal handles for younger children, opting instead for lightweight composite plastics with rubber grips.
Protective Covers and Portability In Singapore, primary school students carry stationery in packed school bags. A secure plastic sheath or cap is a vital accessory. This cover prevents the blades from poking through the pencil case, protects other items from scratches, and ensures the child does not get cut when reaching into their bag. Look for covers that click securely into place.
Maintenance, Storage, and Safe Handling Habits
Establishing regular maintenance habits and safety rules extends the lifespan of the tool and prevents accidents in the classroom and at home.
Cleaning and Residue Removal During art classes, blades frequently contact sticky materials like glue sticks, liquid adhesive, and tape. This residue causes the blades to drag or tear paper. Instruct your child to wipe the blades down regularly. For stubborn residue, check the manufacturer’s care instructions first; usually, wiping the blades with a dry microfiber cloth or a slightly damp cloth with mild soap is sufficient. Always dry the blades completely immediately after cleaning to prevent rust.
Storage and Transport Rules Enforce a strict rule that the protective blade cover must always be placed on the tool before it is stored. In the classroom, teach your child to store the tool point-down in their pencil case. This practice protects the blades and ensures that anyone reaching into the case will not touch a sharp point.
Usage Boundaries and Material Limits Standard school scissors are engineered specifically for paper, thin cardstock, and light craft materials. Children should be reminded that using these tools to cut hard plastics, metal wires, or hair will quickly misalign the pivot and dull the cutting edges. If a specific project requires cutting unusual materials, consult the manufacturer’s guidelines to ensure the tool is rated for that material.
Frequently Asked Questions (FAQ)
Can my child use fabric scissors for school art projects?
No, using fabric scissors for everyday school paper crafts is highly discouraged. Paper fibers are highly abrasive and will quickly dull the precision edge of fabric scissors, making them ineffective for cutting textiles later. Keep a dedicated pair of paper scissors for general schoolwork, and only use fabric shears if a specific home economics or advanced craft project requires cutting textiles under supervision.
How do I know if the scissors are truly left-handed?
To verify if a pair is truly left-handed, hold them in your left hand in a natural cutting position and look down at the blades. The blade on the left-hand side must be the top blade, allowing you to see the cutting line clearly without the metal blocking your view. If the right blade is on top, the tool is configured for right-handed use, regardless of how symmetrical or comfortable the handle loops feel.
Are spring-loaded scissors allowed in primary schools?
While spring-loaded or training scissors are excellent for building initial motor skills at home, you must check your school’s specific stationery list and consult the teacher before sending them to class. Some primary school teachers prefer standard scissors to maintain classroom uniformity, simplify storage in standard pencil cases, and ensure all students learn standard manual cutting mechanics as soon as they are physically ready.
Community discussion
Share your experience or ask a question. Comments are reviewed before publication.