
The selection of a drawing projector for architectural drafting and technical drawings requires a shift in priority from standard entertainment or presentation metrics. While home theater projectors focus on color saturation and high frame rates, a technical drafting environment demands absolute geometric accuracy, edge-to-edge focus uniformity, and high contrast resolution. For architects, engineers, and design students, a drawing projector serves as a precision tool to transfer digital CAD layouts, complex structural grids, or hand-drawn conceptual schematics onto physical mediums like vellum, tracing paper, or heavy illustration board. The ideal system must project crisp, undistorted lines that allow the user to trace with millimeter-level accuracy without suffering from the visual skewing common in standard consumer models.
To make an informed decision, you must evaluate how a projector handles the unique challenges of technical drawing. Unlike freehand art, where a slight curve or minor proportion shift can be overlooked, a technical drawing relies on strict scale ratios and perfect perpendicularity. A single degree of distortion can render an entire site plan or section detail useless. Therefore, understanding the optical mechanics, physical setup constraints, and key specifications of these devices is essential for integrating them successfully into your drafting workflow.
Core Visual and Geometric Requirements for Technical Drafting
To establish a reliable baseline for selecting a drawing projector, you must first analyze the specific visual and geometric demands of technical drafting. In general art tracing, a projector is often used to establish basic outlines and proportions, which are then filled in freehand. In contrast, technical drafting requires the projector to act as a highly accurate, continuous reference guide. Every projected line must align perfectly with physical drafting tools, such as T-squares, parallel bars, and triangles, requiring a level of precision that standard projection equipment rarely provides out of the box.
Products mentioned in this guide
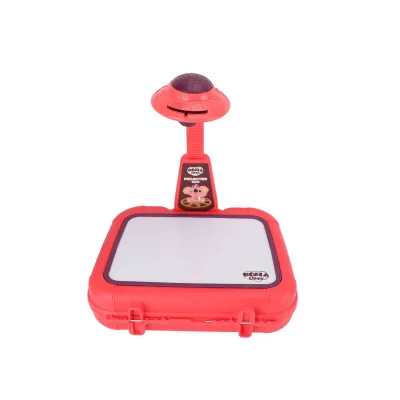
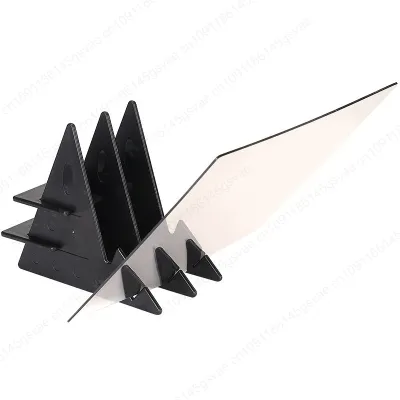
Prices are valid at publication and may change. Please refer to the product page for the latest price.
Line sharpness and contrast thresholds are the first critical parameters to consider. Technical drawings utilize a strict hierarchy of line weights, often ranging from ultra-fine 0.13mm lines for hatch patterns and dimension lines to thicker 0.70mm lines for structural cuts and borders. A projector with poor contrast or low native resolution will blur these distinctions, causing fine lines to bleed into one another or disappear entirely. To prevent this, the projector must deliver high native contrast, allowing you to clearly distinguish fine technical pen strokes and grid lines even when projecting onto textured or semi-translucent papers.
Geometric distortion control is perhaps the most challenging requirement for any drafting projector. Most consumer projectors suffer from minor optical aberrations, such as barrel distortion (where straight lines bow outward) or pincushion distortion (where lines bend inward). While these distortions are virtually invisible when watching a movie, they are immediately apparent when you align a physical metal ruler with a projected line. To maintain accurate scale, straight lines, and true right angles across the entire drafting surface, the projector’s lens assembly must be engineered to minimize these geometric anomalies, ensuring that a projected square remains a perfect square from corner to corner.
Finally, you must balance ambient room light with projection brightness. Drafting is a highly tactile process that cannot be performed in a pitch-black room; you need sufficient ambient light to see your physical drawing instruments, select the correct pen sizes, and monitor your ink flow. However, excessive ambient light will wash out the projected image, making fine lines invisible. The projector must offer a brightness level that is high enough to cut through comfortable working light without being so intense that it causes eye strain or washes out the subtle pencil marks and paper textures you rely on during the drafting process.
Optical vs. Digital Projectors: Matching the Mechanism to Your Workflow
Choosing between an optical (opaque) projector and a digital projector is a fundamental decision that shapes your entire drafting workflow. Each mechanism has distinct advantages and limitations, and the right choice depends heavily on whether your primary source material consists of physical drawings or digital CAD files.

Optical projectors, often referred to as opaque projectors or art enlargers, utilize a system of high-intensity bulbs, internal mirrors, and adjustable lenses to project physical, hard-copy originals directly onto your drawing surface. This traditional setup is highly suited for workflows that rely on physical tracing, hand-drawn conceptual sketches, or transferring details from printed books and physical blueprints. Because they do not require a computer, software, or digital files, optical projectors offer a straightforward, plug-and-play experience. They are completely free from digital pixelation, meaning that no matter how close you stand to the drawing surface, the projected lines remain as smooth and continuous as the original physical sketch. However, optical models are physically bulky, generate substantial heat due to their high-wattage halogen or LED bulbs, and have a limited enlargement scale constrained by the physical track of the lens.
Digital projectors, on the other hand, are designed to project digital files directly from computers, tablets, or USB storage devices. This makes them highly advantageous for modern architectural workflows that integrate computer-aided design (CAD) software, Building Information Modeling (BIM) programs, and digital sketching applications. With a digital projector, you can easily project complex vector files, toggle layers on and off, and adjust the scale of your drawing digitally before projecting. This eliminates the need to print intermediate drafts, saving both time and material costs. Digital models are also generally more compact and portable than their optical counterparts, making them easier to mount overhead or transport between a home studio and a university drafting lab.
The trade-offs between these two mechanisms extend to portability, setup time, and environmental comfort. Optical projectors require a stable, dedicated space because their heavy lens assemblies and physical copy chambers make them difficult to move and recalibrate frequently. They also require careful monitoring of heat generation; prolonged exposure to the intense heat of an optical projector’s bulb can warp delicate tracing papers, dry out technical pens prematurely, or even damage sensitive physical originals. Digital projectors run significantly cooler, especially those utilizing modern solid-state LED light sources, but they require more initial setup time to configure device connectivity, adjust digital display settings, and ensure that the digital file’s aspect ratio matches the physical projection surface perfectly.
Key Specifications to Verify Before Purchasing
When evaluating potential drawing projectors, you should rely on a concrete checklist of technical specifications rather than marketing descriptions. Verifying these specifications on product labels or technical data sheets will ensure the device can handle the rigorous demands of technical drafting.
The first specification to verify is the throw ratio, which determines the relationship between the distance from the projector lens to the drawing surface and the width of the projected image. For drafting applications, a short-throw or ultra-short-throw projector is highly desirable. Standard-throw projectors require a significant distance to create a large image, which often means mounting the projector far behind or above your workspace, increasing the likelihood that your head, hands, or drafting tools will cast shadows on the paper. A short-throw projector can be positioned much closer to the drafting table, minimizing shadow interference and allowing for a more compact workspace setup.
Resolution and pixel density are critical for digital models. You should look for a projector with a high native resolution—ideally Full HD (1920 x 1080 pixels) or higher. Avoid projectors that list a high “supported resolution” but have a low “native resolution” (such as SVGA or WVGA), as the native resolution dictates the actual physical pixels projecting your image. A low native resolution will cause fine diagonal lines to appear jagged or stair-stepped, making it extremely difficult to trace smooth curves or precise angles. High pixel density ensures that even the thinnest digital lines remain crisp and continuous, even when the image is enlarged to cover a large drafting sheet.
Lens quality and edge-to-edge focus uniformity are equally vital. Many consumer-grade projectors suffer from soft focus around the perimeter of the image, meaning that while the center of your drawing is sharp, the corners are blurry. For architectural drafting, where details are spread across the entire sheet, you must verify that the projector offers excellent edge-to-edge focus. Additionally, look for robust physical keystone correction or lens shift capabilities. While digital keystone correction is common, it can degrade image resolution and introduce aliasing along diagonal lines. Physical lens shift or manual optical keystone adjustments are preferred because they preserve the full resolution and clarity of the projected image.
Finally, consider the connectivity options, cable lengths, and software compatibility. The projector should feature modern input ports, such as HDMI or USB-C, to ensure seamless integration with your drafting laptop, workstation, or tablet. If you plan to mount the projector overhead, verify that the included power and data cables are long enough to reach your outlets without creating tripping hazards, or plan to invest in high-quality extension cables that do not degrade the signal. For wireless models, ensure that the casting protocols are compatible with your operating system to prevent lag or connection drops during long drafting sessions.
Workspace Setup and Surface Compatibility
An exceptional projector can only perform as well as the environment in which it is installed. Setting up your drafting workspace requires careful planning to ensure physical stability, accurate alignment, and a comfortable working posture.
The first step is matching your projection surface with the projector’s physical mounting options. If you work on a traditional tilted drafting table, you will need a mounting system that can tilt to match the exact angle of your tabletop. A ceiling mount offers a permanent, out-of-the-way solution, but it requires precise installation to ensure the projector is perfectly perpendicular to the drafting surface to avoid trapezoidal distortion. For more flexible setups, a heavy-duty vertical stand or an adjustable articulated arm mounted directly to the edge of your desk can be highly effective. Whichever mounting method you choose, it must be completely rigid; even minor vibrations from walking across the room or adjusting your drafting chair can cause the projected image to shake, disrupting your tracing accuracy.
Securing your paper is another critical factor, especially when working with large-format sheets such as A1 or A0. Because technical drawings can take hours or even days to complete, the paper must remain perfectly stationary throughout the entire process. Use high-quality, low-tack drafting tape to secure the corners of your paper to the drafting board. This tape holds the paper firmly without tearing the surface or leaving sticky residue when removed. If you are projecting onto translucent tracing paper or vellum, consider placing a solid white backing sheet underneath to maximize the contrast and visibility of the projected lines.
Managing room lighting and minimizing shadows are essential for reducing eye strain and maintaining accuracy. Position your workspace so that ambient light sources, such as windows or overhead room lights, do not shine directly onto the projection surface. Instead, use adjustable task lamps with directional shades to illuminate your physical workspace from the side opposite your drawing hand. For example, if you are right-handed, position your task light on the left side of your desk. This setup ensures that your hand and drafting tools do not cast shadows over the specific area you are actively tracing, allowing you to see both the projected guide lines and your physical pen tip clearly.
Building Your Shortlist Based on User Profiles
To narrow down your options and build a practical shortlist, it is helpful to categorize your needs based on your specific professional, academic, or budgetary constraints. Different users require different balances of portability, precision, and investment.
For students and conceptual designers, portability and ease of setup are often the highest priorities. Students frequently need to transport their equipment between home, lecture halls, and shared studio spaces. In this scenario, a compact, lightweight digital projector that can be easily mounted on a standard camera tripod is highly practical. These models are typically budget-friendly, with suitable entry-level options ranging from approximately S$150 to S$400. While they may not offer the absolute highest resolution or advanced lens shift capabilities, they provide more than enough clarity for conceptual sketching, massing studies, and basic layout transfers.
For professional architects, structural engineers, and final-stage draftspersons, the priorities shift toward absolute optical precision, large-format capability, and long-term durability. Professional workflows demand a projector that can operate continuously for several hours without overheating or losing focus stability. These users should prioritize high-resolution digital projectors or heavy-duty optical enlargers with premium glass lenses that guarantee edge-to-edge sharpness. A professional-grade setup, including a stable mounting arm and calibration tools, typically represents a larger investment, often ranging from S$500 to S$1,500 or more. However, the savings in time, increased accuracy, and reduction in printing costs easily justify the initial expense.
Regardless of your profile, you should always verify the manufacturer’s warranty, local return policies, and the long-term availability of replacement parts before making a purchase. Projectors are precision optical instruments, and having access to reliable local customer support is invaluable if you encounter technical issues. Check if the manufacturer offers a warranty that covers both the projector unit and the light source, as replacement bulbs or LED modules can be costly. Additionally, ensure that the retailer has a clear return policy that allows you to test the projector in your actual workspace and return or exchange it if you find that the geometric distortion or edge focus does not meet your drafting standards.
Frequently Asked Questions (FAQ)
Can a standard presentation projector be used for architectural drafting?
While a standard office or classroom presentation projector can project an image onto a drafting table, it is generally not ideal for precise architectural drafting. Presentation projectors are optimized for high brightness to compete with bright office lighting, and they often prioritize color vibrancy over fine-line resolution. Consequently, they frequently suffer from noticeable geometric distortion around the edges of the projection and lack the edge-to-edge focus uniformity required to keep fine technical lines sharp across a large drafting sheet. Additionally, their standard throw ratios require them to be placed far from the drawing surface, which increases the likelihood of casting distracting shadows while you work.
How do I maintain accurate scale when tracing a projected image?
To maintain an accurate scale when tracing, you must perform a manual calibration check before starting your drawing. Begin by projecting a digital file or physical original that includes a known scale bar or a grid of precise dimensions (such as a 10cm x 10cm square). Use a physical, high-precision drafting scale or ruler to measure the projected grid directly on your drawing surface. If the projected square measures slightly larger or smaller than 10cm, adjust the physical distance of the projector or use the optical zoom controls until the projected dimensions match your physical ruler exactly. Once calibrated, tape down your paper securely and avoid touching the projector or its stand to prevent any accidental shifts in scale.
Community discussion
Share your experience or ask a question. Comments are reviewed before publication.