
Embarking on your first leather customization or restoration project can be daunting, but choosing a comprehensive leather paint starter kit simplifies the process by providing all the essential chemical agents and tools in a single package. A complete beginner’s kit eliminates the guesswork of sourcing compatible solvents, pigments, and sealants individually. When selecting a starter kit for leather paint, leather goods require specialized acrylic-polyurethane formulas designed to flex without cracking, along with a dedicated surface preparer and a protective topcoat. By investing in a curated kit, you ensure that every liquid formula works in harmony, saving time and preventing costly mistakes on your cherished shoes, bags, or accessories.
What Defines a Comprehensive Leather Paint Starter Kit?
To achieve professional results, chemical compatibility is the most critical factor in your leather painting journey. A true starter kit is not merely a collection of paint pots; it is a chemically coordinated system. The surface preparer, the paint layers, and the final topcoat must be formulated to bond with one another. Using a preparer from one brand, paint from another, and a sealer from a third can lead to chemical rejection, resulting in paint that bubbles, remains perpetually tacky, or peels off in sheets. A comprehensive kit ensures that all liquid components share a compatible chemical base, typically water-based acrylic-polyurethane hybrids, which guarantees optimal adhesion.
Many beginners make the mistake of assuming standard craft acrylic paints can be used on leather. Standard acrylics dry into a rigid, crystalline polymer structure. When applied to a flexible surface like leather, these paints cannot withstand the mechanical stress of bending, leading to immediate micro-cracking and flaking. In contrast, dedicated leather paints are formulated with highly flexible polyurethane binders. These binders allow the dried paint film to stretch and flex dynamically alongside the leather fibers, maintaining a seamless bond even in high-wear areas.
Products mentioned in this guide
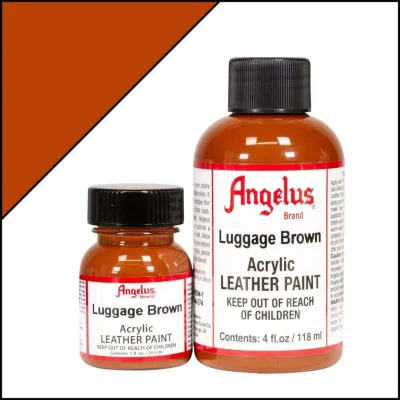
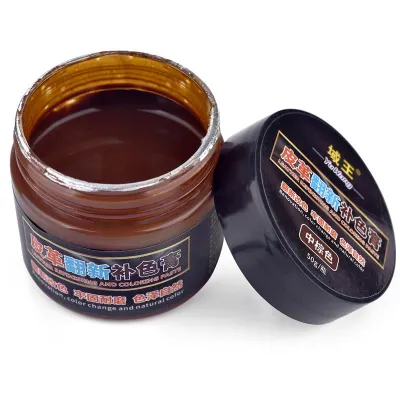
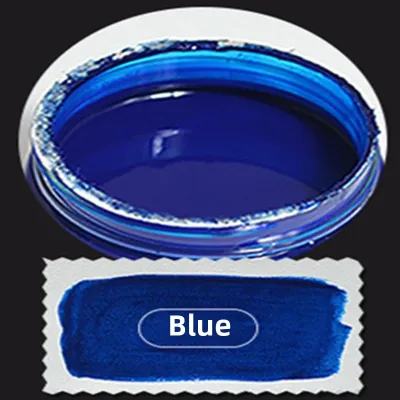
Prices are valid at publication and may change. Please refer to the product page for the latest price.
For a beginner, the inclusion of educational resources within a kit is just as valuable as the physical liquids. High-quality starter kits often feature detailed instructional booklets, color mixing charts, or QR codes linking to step-by-step video tutorials. Because starter kits typically include a streamlined selection of core colors, a color mixing chart is essential. It teaches you how to systematically combine primary shades to achieve complex tones, such as rich tans, deep olives, or soft pastels, without needing to buy dozens of individual bottles.
From a financial perspective, a starter kit offers exceptional value compared to buying components individually. In Singapore, purchasing a single bottle of premium leather paint typically costs between S$8 and S$12. When you add a dedicated deglazer (S$12 to S$18), a protective finisher (S$15 to S$22), and a set of quality synthetic brushes (S$15), your total individual cost can easily exceed S$80. A comprehensive beginner’s starter kit, containing smaller, project-appropriate volumes of all these components, generally ranges from S$35 to S$60. This makes kits a highly economical, low-risk entry point for hobbyists.
Essential Components Your Kit Must Include
Surface Preparers and Deglazers
Before a single drop of paint touches your item, the factory finish must be removed. Brand-new leather goods are treated with protective topcoats, waxes, and silicones designed to repel moisture and dirt. If you paint directly over this factory seal, the paint cannot grip the leather fibers. A surface preparer or deglazer—typically a mild solvent blend—strips away these factory coatings, opening up the pores of the leather to receive the paint.

When evaluating a starter kit, check the label of the included preparer to understand its solvent base and safety requirements. Many professional-grade deglazers rely on acetone-based formulas, which require careful handling. A kit that lacks a dedicated preparer, or instructs you to source pure hardware-store acetone separately, fails the “all-in-one” beginner standard. Pure acetone can be overly harsh, stripping away the leather’s natural moisture and causing it to dry out or stiffen if applied too heavily. A formulated, kit-included preparer is balanced to strip the finish safely while preserving the underlying leather’s structural integrity.
Flexible Leather Paints and Color Selection
At the heart of the kit is the paint itself, which must offer a balance of flexibility, strong adhesion, and high opacity. Cheap paints often have low pigment concentrations, requiring you to apply multiple thick layers to cover dark leather. Thick layers are the primary cause of cracking. Premium leather paints use finely milled pigments suspended in a highly concentrated acrylic-polyurethane binder, delivering excellent coverage in just two to three paper-thin coats.
Your starter kit should feature a versatile, core color palette rather than highly specific, niche shades. Look for a kit that includes the primary colors (red/magenta, blue/cyan, yellow) alongside substantial bottles of black and white. With these five essential colors, plus a neutral mixing medium, you can mix virtually any color on the spectrum. Ensure the kit provides paint bottles of at least 1 ounce (approximately 29.5 ml) each. Smaller 0.5-ounce pots are often insufficient for completing even a single medium-sized project, especially when accounting for the paint used during color-mixing trials.
Finishers and Sealers
Once your paint design is complete, it must be sealed to protect it from the elements. A finisher, or topcoat, acts as a clear, protective barrier against friction, scuffs, water, and ultraviolet light. Without a finisher, everyday wear will quickly erode your handiwork, and exposure to moisture can cause the paint to soften or bleed.
Finishers come in several distinct sheens, and a good starter kit should let you control the final look.
- Matte: Reflects minimal light, preserving a modern, flat, non-reflective aesthetic.
- Satin: Offers a soft, natural luster that closely mimics the original finish of luxury leather goods.
- Gloss: Delivers a high-shine, patent-leather appearance with maximum light reflection.
In Singapore’s hot and highly humid climate, choosing a high-quality finisher is incredibly important. Lower-grade sealers can become soft, sticky, or tacky when exposed to persistent atmospheric humidity. A premium, water-resistant polyurethane finisher cures to a hard, dry-touch barrier that prevents your painted items from sticking to your skin or other surfaces.
Application Tools and Accessories
The physical tools included in your kit dictate the smoothness of your paint application. Look for kits that supply synthetic nylon or taklon brushes rather than natural hair brushes. Natural bristles absorb water from water-based acrylic paints, causing the fibers to swell, splay, and leave heavy, unsightly brush marks. Synthetic bristles do not absorb water, allowing them to maintain their shape and lay down flat, uniform coats of paint.
An ideal starter kit should include a variety of brush shapes: a wide, flat brush for base coats; a medium round brush for general coloring; and an ultra-fine detail brush for linework. Useful accessories to look for include plastic mixing cups or palettes, transfer pipettes for precise paint measuring, and a roll of low-tack masking tape. Masking tape is essential for securing clean, sharp edges and protecting areas—such as shoe midsoles or metal buckles—that you do not want to paint.
Matching the Kit to Your First Leather Project
Customizing Sneakers and Footwear
Sneaker customization is a highly popular entry point for beginners, but footwear presents unique structural challenges. Shoes undergo constant flexing, creasing, and physical impact at the toe box. Therefore, a kit destined for sneaker projects must feature highly flexible paints and an exceptionally durable, scuff-resistant finisher.
Many modern sneakers combine genuine leather with synthetic leathers, vinyl, or rubber midsoles. If your project involves painting these synthetic elements, check if your starter kit includes or is compatible with an adhesion promoter. Synthetic surfaces are non-porous and do not absorb paint like natural leather. An adhesion promoter acts as a chemical primer, etching the synthetic surface at a microscopic level so the acrylic paint can form a permanent bond without peeling off under the stress of walking.
Restoring Bags, Wallets, and Jackets
Restoration projects focus on reviving worn leather and matching existing colors seamlessly. When working on larger items like handbags, leather jackets, or car seats, you will need a kit that provides larger volumes of paint—ideally 2-ounce to 4-ounce bottles of your primary matching shades.
For apparel and soft goods, maintaining the natural drape and soft “hand” of the leather is paramount. If you apply heavy, thick layers of paint, a leather jacket can become stiff and cardboard-like, leading to cracking along the natural folds of the sleeves. Look for kits that feature highly fluid paints and soft-drying matte or satin finishers. These formulations are designed to sink into the leather rather than sit heavily on top, ensuring the material remains pliable and comfortable to wear without any color transferring onto your clothing.
Small Crafts and Accessories
If your first project involves painting small, intricate items like watch straps, cardholders, keychains, or journal covers, precision is your main priority. For these projects, large volumes of paint are unnecessary. Instead, look for kits that prioritize a wider, more vibrant array of color options in smaller bottles, giving you maximum creative freedom.
Because small accessories are handled constantly and exposed to hand oils and sweat, the kit’s finisher must offer excellent moisture resistance. Look for kits that include ultra-fine detail brushes (such as sizes 0, 00, or 000) to help you execute clean borders and intricate patterns. Some craft-focused starter kits also bundle useful detailing tools, transfer carbon paper, or adhesive stencils, which are incredibly helpful for transferring complex designs onto very small surfaces.
Critical Checks and Safety Boundaries Before You Paint
Before you begin your project, you must perform several critical checks to protect your items and ensure your personal safety. Always read and follow the specific manufacturer’s safety and usage labels included in your kit, as instructions can vary.
- Material Verification: Standard acrylic-polyurethane leather paint kits are formulated strictly for smooth, finished leathers. They are completely unsuitable for open-pore, absorbent materials such as suede, nubuck, or raw, unfinished vegetable-tanned leather. Applying acrylic paint to suede will permanently ruin its soft, napped texture, turning it into a stiff, matted surface. To verify your material, place a single drop of water on an inconspicuous area of the item. If the water beads up on the surface, the leather has a finish and is safe to paint. If the water absorbs instantly and darkens the leather, the material is open-pore and requires specialized penetrating leather dyes rather than surface paints.
- The Spot Test: Never skip a spot test. Apply a small amount of the preparer, paint, and finisher to a hidden area of your item, such as the inside of a strap, the inner tongue of a shoe, or an interior pocket seam. Allow each layer to dry and cure completely according to the kit's instructions. Check the test area for any adverse reactions, such as the leather softening excessively, the original factory dye bleeding through the paint, or the paint peeling when rubbed firmly. This simple check ensures compatibility before you commit to the entire project.
- Safety and Ventilation: Leather preparers, deglazers, and finishers contain volatile organic compounds (VOCs) that emit strong chemical fumes. In Singapore, where many hobbyists work inside HDB apartments, proper ventilation is essential. Always work near an open window, use a fan to blow fumes away from your face, or set up your workspace in an open service yard or balcony. Wear nitrile gloves to protect your skin from drying solvents and pigments. If you use solvent-based preparers, store and dispose of used rags and paper towels in a sealed container, as solvent-soaked materials can pose a fire hazard if left in a heap.
- Shelf Life and Storage: Water-based leather paints are sensitive to environmental conditions. High humidity and heat can accelerate the degradation of the acrylic binders or lead to mold growth if the paint bottles are contaminated with tap water during dilution. Always store your kit in a cool, dry place away from direct sunlight, and ensure all caps are screwed on tightly. Before starting a project, shake each bottle vigorously; if the paint has separated into a thick, rubbery mass and a clear liquid that cannot be remixed, it has expired and must be replaced.
Frequently Asked Questions (FAQ)
Can I use regular acrylic paint instead of a leather paint kit?
No, regular craft or fine-art acrylic paints should not be used on leather. Standard acrylics lack the highly flexible polyurethane binders found in specialized leather paints. When applied to a flexible surface like leather, regular acrylics dry into a rigid plastic layer that will quickly crack, peel, and flake off when the item bends or experiences friction. Leather paint kits are chemically engineered to bond with the leather fibers and stretch dynamically with the material’s natural movement.
Do I need to sand the leather before applying the preparer?
Generally, sanding is not recommended for standard finished leather projects, as abrasive sanding can permanently score the natural grain and ruin the smooth texture of the leather. Instead, the chemical preparer or deglazer included in your kit is specifically designed to strip away the factory topcoat, oils, and waxes without causing physical damage. Sanding should only be reserved for repairing deep scratches, scuffs, or gouges using specialized leather filler prior to painting, and even then, only with ultra-fine sandpaper (typically 800-grit or higher) under careful guidance.
How long should I wait between applying paint and the final finisher?
While a thin coat of leather paint may feel dry to the touch within 15 to 30 minutes, the acrylic-polyurethane polymers require time to fully cure and cross-link for maximum durability. In Singapore’s humid climate, drying times can be significantly prolonged. It is highly recommended to wait at least 24 hours after applying your final coat of paint before applying the finisher. Once the finisher is applied, allow the entire item to cure undisturbed for 24 to 48 hours before wearing or handling it extensively to ensure the protective barrier is fully set.
Community discussion
Share your experience or ask a question. Comments are reviewed before publication.