
Protecting classroom teaching materials, student certificates, and high-traffic office signs requires a reliable lamination machine tailored to your daily volume and document types. In Singapore’s humid tropical climate, unsealed paper documents absorb moisture rapidly, leading to warping, ink smudging, and premature wear. Selecting the right laminator involves balancing document size, pouch thickness compatibility, processing speed, and safety features. By matching your specific school or office workflow to the correct roller system and heating capacity, you can achieve bubble-free, crystal-clear preservation that withstands years of handling.
Key Factors When Choosing a Lamination Machine
To find the ideal laminator for your workspace, you must evaluate several technical specifications that directly dictate performance and longevity. The first consideration is maximum document size compatibility. While standard A4 machines are highly popular for worksheets, certificates, and individual student activities, they cannot accommodate larger formats. If your school or office regularly produces classroom posters, large educational charts, or office floor plans, investing in an A3-capable machine is essential. An A3 laminator offers greater versatility because it can easily process smaller A4, A5, and flashcard sizes, whereas an A4 machine restricts you permanently to smaller formats.
Pouch thickness, measured in microns (sometimes denoted as mic or µm), is another critical dimension. In Singapore, laminating pouches typically range from 80 microns to 250 microns per flap. Standard 80-micron pouches are highly flexible and cost-effective, making them perfect for everyday worksheets, notices, and documents that will be stored in folders. Medium-weight 125-micron pouches provide a sturdier, semi-rigid barrier ideal for classroom rules, menu sheets, and frequently handled reference guides. For maximum rigidity and heavy-duty protection—such as student ID cards, outdoor signage, or reusable teaching aids—you will need a machine capable of sealing 175 to 250-micron pouches. Always verify that your chosen machine’s heating element can melt the thicker adhesive layers of these heavy-duty pouches, as under-heating results in incomplete sealing and cloudy patches.
Products mentioned in this guide
![[SG] GBC 240HS Home Office A3 Laminator | Fast Warm-Up Jam-Free Technology [Evergreen Stationery]](https://img.lazcdn.com/g/p/6d9e8892e7124e1b78cc71c262f1b954.jpg_400x400q80.jpg_.webp)
![[SG] GBC Inspire Plus A4/A3 Laminator + FREE 100pcs A4 Laminating Pouch | WHILE STOCKS LAST [Evergreen Stationery]](https://img.lazcdn.com/g/p/06857b24a21ec725cc1fa2ef76dffc97.jpg_400x400q80.jpg_.webp)
Prices are valid at publication and may change. Please refer to the product page for the latest price.
Warm-up time and lamination speed are the primary drivers of workflow efficiency. Standard consumer-grade machines often require three to five minutes to reach operational temperatures, which is perfectly acceptable for occasional, single-document tasks. However, in a busy school staffroom or corporate administrative department where multiple users queue to use the machine, a long warm-up time causes significant bottlenecks. High-performance models can heat up in under sixty seconds. Lamination speed, measured in millimeters per minute (mm/min), determines how quickly the rollers pull the pouch through the heating element. A speed of 300 mm/min is standard for personal use, while high-volume office machines can exceed 1,000 mm/min, allowing you to process large stacks of documents in a fraction of the time.
You must also choose between hot pouch lamination and cold lamination. Hot lamination utilizes heated rollers to melt the adhesive on the inside of the pouch, creating a permanent, highly durable bond with the paper fibers. This is the industry standard for almost all school and office documents. Cold lamination, on the other hand, relies on pressure-sensitive adhesive pouches and does not use heat. This method is indispensable for protecting heat-sensitive items, such as glossy photographs, certain types of crayon drawings, thermal paper receipts, and materials printed with heat-reactive inks that would otherwise melt, discolor, or run under hot rollers.
Before finalizing any purchase, always check the manufacturer’s product label for the maximum pouch thickness rating and the continuous run time limit. Budget-friendly, compact laminators often have a duty cycle of twenty to thirty minutes, after which they must be turned off to cool down and prevent internal damage. Forcing a light-duty machine to run continuously for hours during a major school project or corporate event will overheat the motor, warp the plastic casing, and void the warranty.
Recommended Machine Profiles for Light School and Personal Office Use
For individual educators, home-based businesses, and small administrative offices, heavy-duty industrial equipment is rarely necessary. Instead, the focus should be on space-saving designs, intuitive controls, and rapid readiness for small, spontaneous tasks.

Compact A4 Laminators with Quick Warm-Up
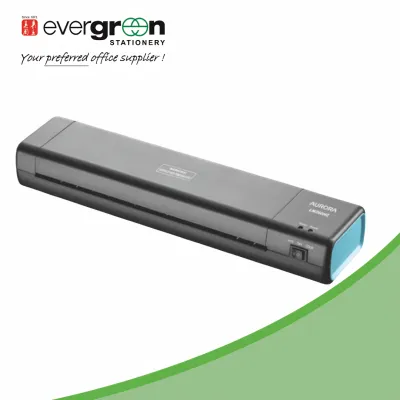
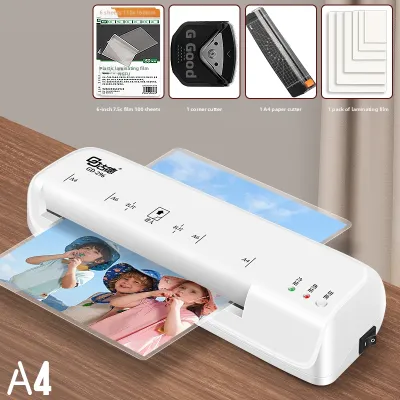
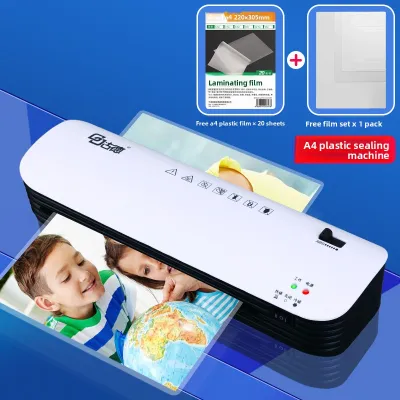
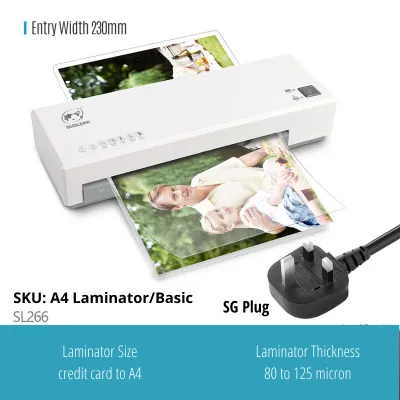
Compact A4 laminators designed for light use typically employ a reliable 2-roller heating system. In these machines, two motorized rollers simultaneously heat the pouch and apply pressure to seal it. Because they have fewer internal components, these models are exceptionally lightweight, budget-friendly, and easy to store on a classroom shelf or inside a desk drawer. They are ideal for laminating a single student award, a quick notice for the staff pantry, or individual flashcards.
These entry-level machines are optimized for standard 80 to 125-micron pouches, which cover the vast majority of everyday school and office tasks. While they may take three to five minutes to warm up, this wait time is a minor inconvenience if you only need to laminate one or two pages at a time. The key is to look for models equipped with clear, reliable indicator lights—often changing from red to green—or audible beeps that signal when the rollers have reached the correct operating temperature. Inserting a pouch before the machine is fully heated is a common mistake that leads to incomplete adhesive activation, resulting in a cloudy, semi-opaque finish that obscures text and ruins the document.
Portable and Cold Lamination Options
When mobility is a priority, such as when a teacher needs to move equipment between different classrooms or a mobile professional travels between client sites, portable laminators are the perfect solution. These models are designed with integrated carrying handles, cable management systems, and ultra-slim profiles that fit easily into a standard backpack or tote bag. Many of these portable units feature a dual-mode switch that allows you to toggle instantly between hot and cold lamination settings.
Utilizing the cold lamination setting, combined with pressure-sensitive self-adhesive pouches, is the safest way to preserve heat-sensitive school projects and delicate materials. For instance, children’s wax crayon drawings can melt under the high temperatures of hot rollers, creating a smeared mess and leaving sticky residue on the machine’s internal parts. Similarly, thermal paper documents and certain older glossy photographs can turn completely black when exposed to heat. When performing cold lamination, ensure that you purchase high-quality, pressure-sensitive pouches specifically labeled for cold use. Gently feed the pouch into the machine, allowing the rollers to apply uniform pressure to activate the adhesive backing without any risk of thermal damage to your precious originals.
Recommended Machine Profiles for Heavy-Duty Classroom and Corporate Use
In busy environments where multiple departments share a single machine, or where teachers must prepare hundreds of learning aids before the start of a new school term, structural durability and high throughput are paramount.
A3/A4 Multi-Roller Laminators for High Volume
For high-volume administrative tasks, professional-grade laminators utilizing multi-roller systems are highly recommended. Unlike basic 2-roller models, heavy-duty machines feature 4-roller or even 6-roller configurations. In a 4-roller system, the first pair of rollers heats and melts the adhesive, while the second pair applies intense pressure to seal and flatten the document. A 6-roller system adds additional heating and cooling phases. This advanced engineering ensures exceptionally even heat distribution across the entire surface area, virtually eliminating the risk of bubbling, wrinkling, or curling—even on large A3-sized posters, architectural blueprints, or corporate floor plans.
These robust machines are built to handle continuous, back-to-back lamination sessions without requiring cooling breaks. They feature powerful motors and heavy-duty heating elements that can easily process thicker, rigid pouches up to 250 microns. This capability is essential for creating durable, long-lasting materials such as outdoor safety signs, reusable whiteboard worksheets, and heavy-duty flashcards that will be handled by dozens of students daily. Furthermore, their superior lamination speeds—often exceeding 800 to 1,000 mm/min—ensure that large-scale print runs are completed quickly, saving valuable staff hours.
Models with Anti-Jam and Auto-Shutoff Features
When processing dozens of documents in a fast-paced school or office environment, occasional user errors are inevitable. A pouch inserted at an angle, or one that is folded, can easily wrap around the internal rollers and cause a severe jam. To prevent this from ruining the document and damaging the machine’s internal gears, look for models equipped with an Anti-Blocking System (ABS) or a dedicated manual jam release lever. Activating the ABS disengages the roller drive mechanism immediately, allowing you to safely and gently pull the misfed pouch backward out of the entry slot without tearing the paper or scratching the heating elements.
Safety is another critical factor in shared workspaces. Busy teachers and office administrators can easily forget to turn off a laminator at the end of a hectic day. To mitigate fire hazards and reduce energy consumption, high-quality heavy-duty laminators feature an intelligent auto-shutoff function. This safety system automatically powers down the heating element and motor after a set period of inactivity, typically thirty minutes. When purchasing a heavy-duty machine in Singapore, it is also highly advisable to verify the manufacturer’s warranty terms and confirm the presence of local service centers. Having access to authorized repair technicians and genuine replacement parts ensures minimal downtime if the machine ever requires maintenance.
Quick Comparison of Lamination Machine Specifications
This section provides a clear, scannable comparison between light-duty and heavy-duty lamination machine profiles to help you determine which specifications align with your daily operational requirements.
| Feature | Light-Duty Profile (Compact A4) | Heavy-Duty Profile (Multi-Roller A3/A4) |
|---|---|---|
| Roller Count | 2 Rollers | 4 to 6 Rollers |
| Max Pouch Thickness | 80 to 125 microns | Up to 250 microns |
| Warm-up Time | 3 to 5 minutes | 1 to 2 minutes (or less) |
| Max Document Size | A4 (up to 220 mm width) | A3 (up to 320 mm width) |
| Best Use Case | Occasional worksheets, individual certificates, home offices | Continuous bulk runs, large posters, shared school staffrooms |
| Key Protective Features | Basic thermal fuse, manual release lever | ABS jam release, auto-shutoff, active cooling fans |
Best Practices for Laminating School and Office Documents
Operating a lamination machine correctly not only guarantees professional, bubble-free results but also significantly extends the lifespan of the equipment. Following systematic preparation and maintenance steps prevents common failures and protects your valuable documents.
Before you begin, proper document preparation is essential. Ensure that the paper or cardstock is completely flat, dry, and free of any metal staples, paperclips, or adhesive tape, as these hard objects can permanently scratch the delicate silicone coating on the internal rollers. When placing your document inside the laminating pouch, position it centrally to leave a uniform border of at least 2 to 3 millimeters around all edges. This margin is crucial because it allows the top and bottom plastic layers of the pouch to melt directly together, creating a completely airtight, waterproof seal. If you trim the pouch too close to the paper’s edge before laminating, moisture from Singapore’s humid air can seep into the paper fibers over time, causing the layers to delaminate and peel apart.
During operation, always insert the sealed, pre-bonded edge of the laminating pouch into the machine’s feed slot first. Never insert the open end, and never cut a pouch into smaller pieces before running it through the machine. Inserting an open or cut edge first allows the hot, melted adhesive to squeeze out of the sides, wrapping the plastic around the spinning rollers and causing a catastrophic jam that can destroy both the document and the machine’s heating element. As the pouch feeds through, keep your hands clear of the entry and exit slots, and let the motorized rollers pull the document at their own pace; pulling or pushing the pouch manually will cause uneven heating, resulting in severe wrinkling and warping.
Safety and ongoing maintenance are vital for keeping your laminator in peak condition. Freshly laminated documents exiting the machine are extremely hot and flexible; handle them with care, and place them flat on a cool, level surface immediately to allow the plastic to cure and harden without bending. Because the high-temperature rollers pose a burn risk, always operate the machine on a stable surface out of reach of children. Over time, tiny amounts of adhesive residue will inevitably squeeze out of the pouches and accumulate on the rollers. To prevent this sticky buildup from causing future jams, run a specialized laminator cleaning sheet—or a clean piece of thick, uncoated cardboard—through the machine while it is still hot at the end of each laminating session. This simple step lifts away excess adhesive and keeps the rollers smooth.
If you encounter issues during the process, simple troubleshooting steps can resolve them. If your laminated document appears cloudy or has milky white patches, the machine was likely not hot enough. This can happen if you insert the pouch before the ready indicator light turns on, or if you are using a thick pouch on a low-temperature setting. To fix this, simply run the cloudy document through the machine a second time once it has reached full temperature. Conversely, if the finished document is severely wrinkled, warped, or shows signs of bubbling, the heat setting is too high for the pouch thickness, or the pouch was fed into the machine at an angle. Adjust the temperature downward, or allow the machine to cool slightly before continuing.
Frequently Asked Questions (FAQ)
Can I laminate documents printed with inkjet ink?
Yes, but you must take specific precautions because standard inkjet inks are water-based. If you expose a freshly printed inkjet document to the intense heat and pressure of a hot laminator immediately, the ink can liquefy, smear, or blur across the page. To prevent this, always allow your inkjet prints to dry completely—ideally for 24 hours in a low-humidity environment—before laminating them. Alternatively, perform a small test print on a scrap piece of paper first to verify compatibility, or use a laser printer, which uses heat-fused dry toner that is highly resistant to the lamination process.
How do I safely clear a jammed pouch?
If a pouch becomes jammed or begins to wrap around the rollers, immediately turn off the power switch and unplug the machine from the electrical outlet to prevent overheating and motor damage. If your laminator is equipped with a manual jam release lever or an ABS button, engage it to release the roller tension. Gently and slowly pull the pouch backward out of the feed slot. Never use sharp metal objects, such as scissors, knives, or paperclips, to pry the plastic loose, as these will permanently gouge the silicone rollers and ruin the machine’s ability to laminate smoothly.
When should I use cold lamination instead of hot pouches?
Cold lamination is highly recommended whenever you need to protect heat-sensitive materials that could be damaged or destroyed by high temperatures. This includes thermal paper receipts (which turn completely black when heated), wax-based crayon drawings, delicate glossy photographs, and documents featuring heat-reactive inks or ultra-thin plastics. Cold lamination relies on pressure-sensitive adhesive pouches and a cold roller setting to create a secure seal without applying heat, ensuring that your delicate items remain perfectly intact and undamaged.
Community discussion
Share your experience or ask a question. Comments are reviewed before publication.