
Embarking on a fabric dyeing project is an excellent way to breathe new life into faded garments, customize plain home textiles, or explore hands-on textile crafts. For beginners in Singapore, selecting the right fabric dye starter set is the most critical step to ensuring a successful, vibrant outcome. The ideal starter kit depends heavily on the specific fiber content of the material you plan to dye, the application technique you wish to use, and your household setup. By choosing a set that includes pre-measured colorants and clear instructions, you can bypass the complex chemical calculations often associated with professional textile design.
Navigating the array of options available on online marketplaces and in local Singapore art supply stores can feel overwhelming. Beginners often struggle with unpredictable color results, bleeding fabric, or accidental stains on home surfaces. Understanding the fundamental science of how different dyes interact with various fibers will help you select a kit that delivers reliable, long-lasting color. With the right preparation and a suitable starter set, you can easily transform cotton t-shirts, linen cushion covers, or canvas tote bags into personalized pieces of art right from your own kitchen or service yard.
What to Look for in a Beginner Fabric Dye Kit
Before purchasing any fabric dye starter set, you must verify the fiber composition of the items you plan to color. Fabric dyes are chemically formulated to bond with specific types of fibers, and using the wrong dye type will result in the color washing out completely. Natural fibers such as cotton, linen, silk, and wool are highly absorbent and bond easily with most beginner-friendly dyes. In contrast, synthetic fibers like polyester, acrylic, and nylon require specialized high-temperature disperse dyes to lock in color. Always check the care label on your garment or textile to confirm its exact material breakdown before selecting your kit.
Products mentioned in this guide
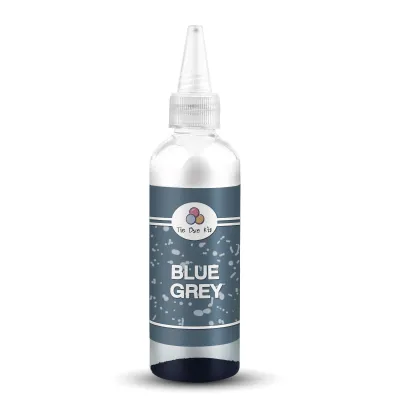
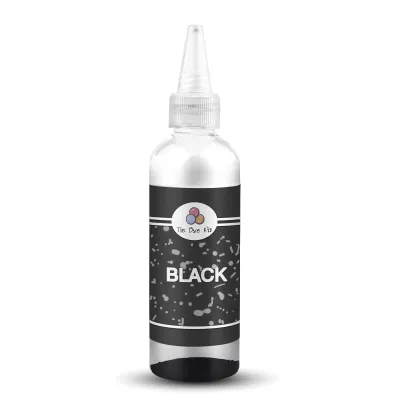
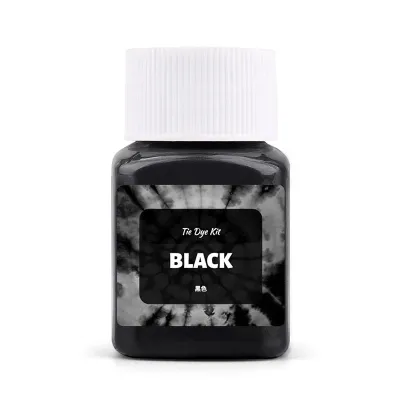
Prices are valid at publication and may change. Please refer to the product page for the latest price.
Beginners must also understand the distinction between all-purpose dyes and fiber-reactive dyes, as this dictates both the process and the final durability. All-purpose dyes are highly accessible and work on a wide variety of fibers, including natural-synthetic blends. However, they typically require a hot water bath and a separate fixing agent to achieve moderate colorfastness. Fiber-reactive dyes, on the other hand, form a direct covalent bond with cellulose fibers (like cotton and linen) at a molecular level. This chemical bond results in exceptional colorfastness and resistance to fading, even after repeated wash cycles, making them the preferred choice for long-lasting projects.
For those new to the craft, pre-measured or pre-mixed formulations are incredibly valuable for minimizing mess and reducing chemical handling. Measuring out loose dye powder requires high-precision scales and carries the risk of inhaling airborne chemical particles. Starter sets that feature liquid concentrates or pre-measured powder packets that dissolve directly in water simplify the mixing process. These kits ensure you achieve the correct dye-to-water ratio every time, leading to more predictable color saturation and reducing the likelihood of patchy or uneven results.
Finally, always scrutinize product labels and manufacturer specifications rather than relying on generic marketing claims like “universal” or “permanent.” A product labeled as a permanent dye may still require specific water temperatures, auxiliary chemicals, or curing times that are not feasible for your home setup. Reading the manufacturer’s detailed instructions online before buying allows you to verify whether the kit’s requirements align with the tools and space you have available.
Types of Fabric Dye Starter Sets to Consider
The best fabric dye set for your project depends on your desired aesthetic, the technique you want to practice, and the fabric you are using. Different kits cater to distinct creative goals, ranging from uniform solid-color immersion dyeing to highly patterned multi-color designs.

All-Purpose Dye Kits
All-purpose dye kits are the traditional choice for general fabric maintenance, solid-color dyeing, and basic garment restoration. These kits usually contain liquid or powder concentrates that are highly effective for dyeing natural fibers like cotton, wool, and silk, as well as nylon. They are ideal for projects where you want to refresh a faded pair of black jeans, change the color of a solid cotton tablecloth, or experiment with simple gradient dip-dyeing.
To achieve optimal results with all-purpose dyes, you generally need to use a heat-immersion method. This involves soaking the fabric in a hot water bath, often on a stovetop or in a large insulated container, while maintaining a high temperature. You will also need to add common household table salt (for cellulose fibers) or white vinegar (for protein fibers like silk and wool) to help the dye penetrate the material. While highly versatile, all-purpose dyes do not chemically bond as deeply as fiber-reactive dyes, meaning they may gradually fade over time and require careful washing.
Tie-Dye and Multi-Color Craft Kits
Tie-dye and multi-color craft kits are designed for vibrant, pattern-based projects and are exceptionally popular for beginners and group activities. These sets typically feature multiple squeeze bottles pre-loaded with dry, fiber-reactive dye powder, along with rubber bands, protective gloves, and sometimes a surface cover. They are incredibly forgiving because the patterns—such as spirals, bullseyes, and crumple designs—are intentionally organic, meaning minor mistakes simply add to the unique character of the piece.
Most tie-dye kits utilize cold-water fiber-reactive dyes, eliminating the need for boiling water or stovetop setups. To make the colors permanent, these kits rely on raising the pH of the fabric, which is usually achieved by soaking the material in a soda ash (sodium carbonate) solution before applying the dye. Some modern beginner kits pre-mix the soda ash directly into the dye powder, allowing you to simply add tap water to the squeeze bottles and begin applying color immediately. This significantly streamlines the process, though you must still allow the dyed fabric to cure in a plastic bag for 12 to 24 hours to let the chemical reaction complete.
Natural and Botanical Dye Kits
Natural and botanical dye kits offer an eco-friendly, low-chemical alternative for crafters interested in traditional textile techniques. These sets contain plant extracts, dried flowers, roots, or mineral pigments—such as indigo, avocado pits, marigold, or madder root—to produce soft, earthy, and complex tones that synthetic dyes cannot replicate. Because they do not emit harsh chemical fumes, natural dye kits are highly suitable for small living spaces and educational family projects.
Working with botanical dyes requires a different set of expectations and a longer, more methodical process. Natural pigments do not naturally adhere well to fabric fibers on their own, meaning you must pre-treat your textiles with a mordant, such as alum (potassium aluminum sulfate), to create a chemical bridge between the fiber and the dye. The dyeing process itself often involves simmering the fabric with the botanical material for several hours, followed by a slow cooling process. While the colors are beautiful and unique, they are typically more sensitive to UV light and pH changes, requiring gentle hand-washing with pH-neutral soap.
Essential Supplies to Check Before You Buy
Many beginner fabric dye kits are marketed as “complete,” but the definition of complete varies widely between brands. To avoid mid-project frustration, verify whether your chosen starter set includes the following essential supplies, or prepare to source them separately from local supermarkets or hardware stores:
- Protective Gear: Working with concentrated pigments can easily stain skin and nails for days. Ensure your kit includes high-quality nitrile or heavy-duty rubber gloves; the thin, oversized plastic gloves included in cheaper kits tear easily and let liquid seep in. You should also secure a plastic apron to protect your clothing and heavy-duty plastic sheeting or large trash bags to cover your workspace.
- Application and Mixing Tools: If you are doing detail work or tie-dye, squeeze bottles with fine-tip nozzles are indispensable. For immersion dyeing, you will need dedicated mixing tools, such as stainless steel or heavy-duty plastic spoons. Avoid using wooden spoons or aluminum pots, as wood absorbs the dye permanently and aluminum can react chemically with certain dye formulations.
- Fixing Agents and Mordants: Depending on the dye type, you may need auxiliary chemicals to set the color. Check if your kit includes soda ash (for fiber-reactive dyes) or alum (for natural dyes). If you are using an all-purpose dye, you will need to supply your own non-iodized table salt or white vinegar. Having these on hand before you start prevents interruptions during the critical chemical-binding phase.
- Clear Instruction Manuals: A high-quality starter set must include a detailed, step-by-step instruction guide. This manual should explicitly state the required water temperatures, the exact sequence of mixing and soaking, and the recommended curing and rinsing times. Clear guidelines prevent common beginner mistakes, such as rinsing the fabric too early or using water that is too cold to activate the dye.
Safe Dyeing Practices for Singapore Homes
Executing a fabric dye project in a typical Singapore home, such as an HDB flat or apartment, requires careful planning to protect your living space and ensure personal safety. Because space can be limited and ventilation varies, setting up a designated, well-prepared work area is essential before opening any dye packages.
First, prioritize proper ventilation. When mixing dry dye powders or working with hot-water dye baths that release steam, ensure you are in a well-ventilated area. Open your kitchen or service yard windows and turn on exhaust fans or standing fans to keep air circulating. Inhaling fine dye powder can irritate your respiratory tract, so it is highly recommended to wear a standard face mask while transferring dry powder into water.
Second, protect your home fixtures from permanent staining. Many modern Singapore apartments feature countertops and basins made of engineered stone, quartz, marble, or light-colored ceramics. These materials are highly porous and can absorb synthetic dye pigments almost instantly, leaving permanent stains. Avoid using your kitchen sink or bathroom basin for the actual dyeing process. Instead, perform all mixing, soaking, and dyeing inside dedicated, inexpensive plastic utility tubs or large stainless steel pots. Place these containers on top of a double layer of heavy-duty plastic sheeting on your floor or balcony to catch any accidental splashes.
Third, practice responsible wastewater disposal. Once your dyeing and curing process is complete, you will need to dispose of the remaining dye bath and perform the initial fabric rinses. Pour the wastewater down a utility drain or directly into the toilet bowl rather than the kitchen sink, as toilet bowls are typically made of vitreous china which is highly resistant to staining. Always run plenty of cold tap water simultaneously to dilute the dye as it flushes, preventing the pigment from settling in your PVC drainage pipes or staining the grout between your bathroom floor tiles.
Finally, manage the drying and curing phase carefully under local climate conditions. Singapore’s high relative humidity can significantly prolong the time it takes for wet fabrics to dry, which increases the risk of mildew forming on damp fibers. After thoroughly rinsing your dyed fabric until the water runs completely clear, hang the items to dry in a well-ventilated service yard or balcony. Keep the fabric out of direct sunlight during the initial drying phase, as strong UV rays can cause wet, freshly dyed fibers to fade prematurely. Utilizing a standing fan directed at the hanging fabric will accelerate the drying process and keep your newly customized textiles fresh and odor-free.
Frequently Asked Questions (FAQ)
Can I use standard fabric dye on synthetic blends?
Standard all-purpose and fiber-reactive dyes are chemically formulated to bond with natural cellulose or protein fibers and will not adhere effectively to synthetic materials. If you attempt to use these standard dyes on a fabric blend containing more than 35% polyester, acrylic, or nylon, the synthetic fibers will reject the pigment, resulting in an extremely pale, washed-out, or heathered appearance. For fabrics with high synthetic content, you must check the garment care label and specifically source specialized disperse dyes designed for synthetics, which require a prolonged boiling process to open up the synthetic fibers and lock in the color.
How do I prevent newly dyed fabric from bleeding?
To prevent your newly dyed fabric from bleeding color onto other garments during future washes, you must thoroughly remove all unfixed, excess pigment immediately after the dyeing process. Begin by rinsing the dyed item in cold, running water until the water runs completely clear, then wash it separately in your washing machine on a cold cycle using a mild, pH-neutral detergent. For the first three to four subsequent wash cycles, continue to wash the dyed item separately or with very similar colors. Utilizing a commercially available color-catcher sheet in the wash cycle can also help trap any stray dye particles before they can redeposit onto other fabrics.
Is it safe to use my kitchen sink for dyeing?
It is strongly advised not to use your kitchen sink for mixing or applying fabric dye. Kitchen sinks made of composite granite, solid surface materials, acrylic, or older ceramic are highly susceptible to permanent chemical staining from fabric pigments. Furthermore, performing chemical dye processes in areas dedicated to food preparation presents a cross-contamination risk. To keep your kitchen safe and stain-free, always conduct your dyeing projects inside a dedicated plastic storage tub or a stainless steel basin placed on a protected floor or balcony, reserving your plumbing fixtures solely for disposing of highly diluted wastewater.
Community discussion
Share your experience or ask a question. Comments are reviewed before publication.