
Architecture students in Singapore require an engineering drawing board that balances precision, structural stability under high humidity, and portability for studio commutes. While premium European and Japanese brands offer unmatched accuracy for final-year thesis work, mid-range and portable options provide the flexibility needed for daily foundation coursework. Selecting the right board involves understanding how different materials and sizes interact with the demands of architectural drafting and Singapore’s unique tropical environment.
What Architecture Students Need in a Drawing Board
When embarking on an architectural education, the choice of an engineering drawing board directly impacts the precision of your line work, orthographic projections, and manual renderings. The board serves as the foundation for every structural line you draw, making its dimensions, material composition, and stability critical factors in your academic workflow.
Size and format compatibility represent the first major decision point. Standard architectural coursework in Singapore typically utilizes A1 (approximately 594 x 841 mm) and A2 (approximately 420 x 594 mm) paper sizes for floor plans, detailed sections, and elevations. An A1 board provides the expansive surface area required for comprehensive design studio submissions, allowing you to lay out large sheets of tracing paper or vellum with sufficient margin space. However, an A2 board is often the practical limit for students who must frequently transport their work. When selecting a board, ensure it offers at least 50 mm of extra clearance beyond the standard paper dimensions to accommodate drafting tape, parallel rulers, and margin notes without restricting your drawing hand.
Products mentioned in this guide
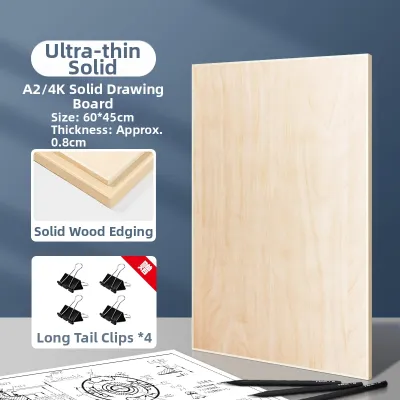

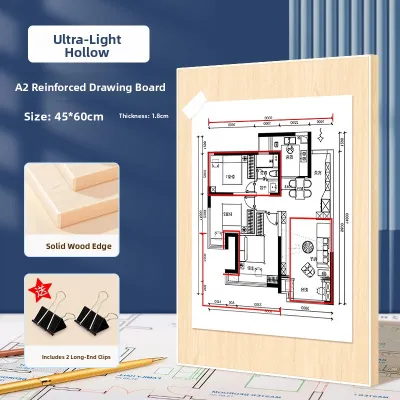
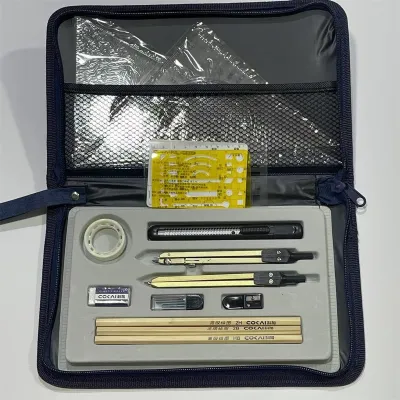
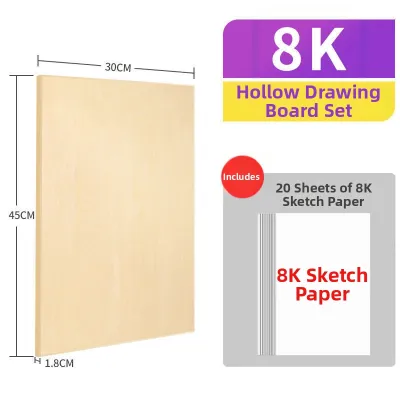

Prices are valid at publication and may change. Please refer to the product page for the latest price.
Singapore’s tropical climate introduces a significant environmental challenge that many standard drawing boards fail to withstand. High relative humidity levels, which frequently exceed 80 percent, can cause untreated wood or low-grade fiberboard to absorb moisture from the air. This absorption leads to localized swelling, warping, and sagging, which ruins the flat plane required for precise drafting. Moisture also encourages the growth of mold along the edges of the board, which can easily transfer to and ruin expensive cartridge paper. To combat this, look for boards constructed from moisture-resistant medium-density fiberboard (MDF) sealed with thick melamine, high-density plastics, or anodized aluminum, which remain structurally inert in humid conditions.
Surface smoothness and edge straightness are the primary determinants of drafting accuracy. Any microscopic dip or texture on the board’s surface will cause your technical pens or hard graphite pencils to jump, resulting in uneven line weights or unintended ink blots. The guide edges must be perfectly straight to ensure that T-squares or parallel motion attachments slide without any play or wobbling. You can perform an observable test by placing a high-precision metal straightedge on its side across the board’s surface; if you can see light passing through any gaps between the ruler and the board, the surface is uneven and unsuitable for high-precision technical drawing.
Finally, you must navigate the trade-off between portability and stability. A heavy, solid board provides a reassuringly stable base that will not shift when you are applying firm pressure with a technical pen or erasing large areas of graphite. However, carrying a heavy board on the MRT or public buses during peak-hour commutes to campus is exhausting and increases the risk of damaging the board’s corners. Conversely, an ultra-lightweight board is easy to carry but may slide across slick studio desks unless secured with rubber grip pads or table clamps. Balancing these factors depends heavily on whether you have a dedicated, secure desk space in your university’s design studio or if you must work primarily from a home setup.
Top Engineering Drawing Board Brands to Consider
To help you choose the right tool for your specific academic stage and budget, we have categorized the leading engineering drawing board options into three distinct tiers. Each category addresses different patterns of studio use, portability requirements, and financial investment levels.

Premium Brands for Studio and Professional Use
Premium engineering drawing boards are engineered for final-year architecture students, master’s candidates, and professionals who require absolute precision and long-term durability. These boards are designed to serve as permanent fixtures on a dedicated studio desk, offering a level of stability and mechanical refinement that cheaper alternatives cannot match.
These high-end boards typically feature drafting surfaces made from high-density, resin-coated wood composites or aircraft-grade anodized aluminum. The edges are often reinforced with steel or brass tracks to facilitate the smooth, friction-free movement of integrated parallel rulers or professional drafting heads. The parallel motion systems on these premium models utilize steel wire cables rather than nylon cords, preventing the stretching or snapping that can occur over years of tension. This construction allows the board to support heavy, professional-grade drafting arms and vertical tracking machines without any flexing or loss of calibration.
Before investing in a premium board, you must verify its physical compatibility with your existing drafting accessories. Check the manufacturer’s specifications for pre-drilled mounting holes on the underside of the board, which are necessary for attaching adjustable floor stands or mechanical drafting heads. If you plan to use a third-party parallel ruler, measure the thickness of the board’s edge to ensure the mounting clamps will fit securely without slipping or damaging the surface coating. It is also wise to check if the brand offers proprietary replacement parts, such as wire tensioners or replacement clear acrylic rulers, to ensure your investment remains functional throughout your academic career.
These premium options come with distinct physical and financial limitations. Their heavy weight, often exceeding 6 kilograms for A1 models, makes them highly impractical for daily commuting between your home and the campus studio. They also require a substantial financial commitment, with prices often starting at several hundred Singapore dollars. Consequently, these boards are best suited for students who have secured a permanent, lockable desk space in their university studio where the equipment can remain set up safely throughout the semester.
Reliable Mid-Range Brands for Daily Coursework
For the majority of undergraduate architecture students, particularly those in their first to third years, mid-range engineering drawing boards offer the ideal balance of performance, durability, and cost. These boards are designed to handle the daily wear and tear of foundation coursework without requiring a massive financial outlay.
These boards are commonly constructed from high-quality MDF cores sealed with a durable melamine or vinyl laminate surface. This laminated face provides a smooth, non-porous writing surface that resists moisture absorption and is easy to clean. The edges are typically protected by impact-resistant ABS or PVC banding, which helps prevent chipping when the board is bumped against door frames or desk edges during transport. Many mid-range boards come equipped with integrated parallel motion rulers that slide along side-mounted plastic tracks, offering a reliable guide for quick horizontal line work.
When evaluating a mid-range board, pay close attention to the density of the core and the quality of the edge finishing. You can assess the core density by tapping the center of the board; a dull, solid thud indicates a dense, high-quality core that is unlikely to sag under the weight of heavy paper rolls or reference books, whereas a hollow, high-pitched sound suggests a lower-density board that may flex under pressure. Examine the seams where the top laminate sheet meets the plastic edge banding; there should be no visible gaps, glue squeeze-out, or peeling edges, as these are the primary entry points for humidity to penetrate and swell the inner wood fibers.
While highly versatile, mid-range boards do have limitations. They generally lack the specialized mounting points required for heavy-duty professional drafting machines, meaning you will need to rely on universal, clamp-on adapters if you choose to upgrade your tools later. Additionally, while lighter than premium models, an A1 mid-range board can still be cumbersome to carry on public transport, often requiring a dedicated, padded carrying case with a shoulder strap to make the commute manageable.
Budget and Portable Options for Quick Sketches
Budget-friendly and highly portable engineering drawing boards are excellent secondary tools for architecture students. They are ideal for site analysis trips, outdoor sketching sessions, or as a lightweight backup board for working in temporary campus spaces or coffee shops.
These boards prioritize low weight and ease of transport, often utilizing hollow-core plastics, high-impact polystyrene, or thin (6 mm to 9 mm) moisture-sealed MDF. Many models feature built-in carrying handles, integrated metal or plastic paper clips along the top edge, and folding wire legs that allow you to tilt the board to a comfortable drawing angle on any standard table. Instead of complex wire-guided parallel rulers, these portable boards often use simple, snap-on plastic T-squares or basic slide-and-lock rulers that run along a single side track.
To ensure a portable board is functional for technical work, you must physically test its surface hardness and clip mechanisms. Place a sheet of standard tracing paper on the board and press a hard drafting pencil, such as a 4H or 6H, firmly against the surface; if the pencil tip leaves a permanent indentation or groove in the board material, the surface is too soft for precise ink work and will ruin subsequent drawings. Additionally, test the tension of the built-in paper clips. The clips must exert enough pressure to hold delicate vellum or tracing paper securely in place against Singapore’s occasional outdoor breezes, but they must not have sharp edges that could tear or puncture the paper when clamped.
These budget options are not designed for heavy-duty, long-term technical drafting. The lightweight plastic and thin wood structures are highly susceptible to warping if they are left in damp environments, exposed to direct tropical sunlight for extended periods, or stored in the hot trunk of a car. They also lack the absolute rigidity and edge precision required for complex, multi-layered architectural overlays, making them best suited for conceptual sketching, site mapping, and preliminary design phases rather than final technical presentations.
Comparing Key Features Across Recommended Brands
To help you decide which category of engineering drawing board best fits your current academic needs and budget, the table below compares the key structural and functional differences across the three main tiers.
| Category | Typical Material | Best Use Case | Weight & Portability | Drafting Machine Compatibility |
|---|---|---|---|---|
| Premium Studio | Resin-coated wood, anodized aluminum | Final-year thesis, professional construction documents | Heavy (5kg+); low portability, best for fixed studio desks | High; features pre-drilled mounting holes and heavy-duty tracks |
| Reliable Mid-Range | Melamine-coated MDF, ABS edge banding | Daily undergraduate coursework, foundation years | Moderate (3kg – 5kg); manageable with a padded shoulder bag | Moderate; requires universal clamp-on adapters |
| Budget & Portable | High-impact plastic, thin MDF, hollow-core | Site visits, conceptual sketching, field analysis | Light (under 2.5kg); high portability, built-in handles | Low; incompatible with standard drafting machines |
Interpreting this comparison requires analyzing your current semester workload and studio environment. If your upcoming modules focus heavily on hand-drafting construction details, structural sections, and precise perspective projections, investing in a Reliable Mid-Range or Premium Studio board is essential to ensure your lines remain perfectly parallel and your measurements accurate. Conversely, if your curriculum emphasizes digital modeling with only occasional hand-drawn conceptual diagrams, a Budget & Portable board will save you money and physical strain during your commutes.
Always check the exact model specifications when purchasing, as reputable brands often manufacture both student and professional lines under similar names. For example, a brand’s “student” model may feature plastic components and a lighter MDF core, while their “professional” model of the same size utilizes aluminum tracks and a high-density, moisture-resistant core. Verifying these material specifications before finalizing your purchase ensures you do not inadvertently buy a board that lacks the durability required for your specific studio tasks.
Where to Buy and What to Check Before Purchasing
Finding the right engineering drawing board in Singapore involves visiting specialized retail channels where you can physically inspect the equipment before committing to a purchase. Local art supply specialists, such as those located in the Bras Basah Complex or major shopping malls, carry a wide selection of drafting boards, parallel rulers, and technical drawing accessories. Campus cooperative bookstores at major institutions like the National University of Singapore (NUS) or local polytechnics often stock student-grade boards at competitive prices at the start of the academic year. If you choose to purchase from an online marketplace, ensure the seller has a reliable return policy in case the board is damaged or warped during transit.
When purchasing a drawing board in person, use this physical inspection checklist to ensure you receive a flawless piece of equipment:
- Surface Flatness: Place a precision steel ruler on its edge across the board's surface at multiple angles (horizontal, vertical, and diagonal) to check for any warping or dipping.
- Edge Integrity: Run your fingers along all four edges and corners of the board to check for chipping, cracks, or peeling laminate that could snag your T-square or allow moisture to enter the core.
- Ruler Glide: Slide the parallel motion ruler up and down the full length of the board; it should glide smoothly without catching, squeaking, or twisting out of horizontal alignment.
- Locking Grip: Engaged the locking mechanism on the parallel ruler and apply moderate hand pressure to the center of the bar; the ruler should remain firmly in place without slipping.
- Track Cleanliness: Inspect the guide tracks or wire cables for any debris, fraying, or manufacturing defects that could impede smooth operation.
Once you have purchased your board, protecting it from Singapore’s humid climate is vital for extending its lifespan. Always store your drawing board vertically rather than flat on the floor, as concrete and tile floors can hold moisture that seeps into the bottom edge of the board. Keep the board away from direct sunlight, which can dry out plastic components, cause adhesive failure along the edge banding, and warp the drawing surface. After a long studio session, wipe down the board with a dry microfiber cloth to remove sweat, skin oils, and graphite dust, ensuring a clean and dry surface for your next architectural masterpiece.
Frequently Asked Questions (FAQ)
Can I use a standard T-square with a board that has a built-in parallel motion ruler?
While it is mechanically possible to use a standard T-square on a board equipped with a built-in parallel motion ruler, doing so is generally inefficient and prone to introducing drafting errors. A built-in parallel ruler relies on an internal wire-and-pulley system or dual-side tracks to maintain horizontal alignment across the board. A standard T-square, on the other hand, requires a perfectly straight, unobstructed board edge along which its wooden or plastic head can slide.
If you attempt to use both simultaneously, the mounting brackets, wires, or tracks of the parallel motion system will likely obstruct the head of your T-square, preventing it from making flush contact with the board’s edge. This misalignment introduces parallax errors, causing your horizontal lines to drift out of parallel. If you must use a T-square, you should park the parallel ruler at the very bottom of the board or remove it entirely. Additionally, verify that the thickness of the board’s edge matches the depth of your T-square’s stock to prevent the T-square from wobbling or slipping over the top of the board during use.
How do I clean ink stains or graphite smudges from a coated MDF drawing board?
Maintaining a pristine drawing surface is essential for preventing the transfer of dirt, graphite, and dried ink onto your clean drafting paper. To clean graphite smudges and loose dust without scratching the melamine or vinyl coating, start by gently rubbing the affected areas with a soft, clean kneaded eraser or a specialized dry drafting powder bag. Avoid using hard plastic erasers, which can leave shiny patches on the matte finish of the board, altering its surface texture.
For stubborn technical pen ink stains or ground-in graphite, dampen a clean microfiber cloth with lukewarm water and a single drop of mild, non-abrasive dish soap. Gently wipe the surface in circular motions, taking care not to scrub aggressively. Never use harsh chemical solvents, acetone, rubbing alcohol, or abrasive scouring pads, as these substances will strip the protective melamine or vinyl coating, exposing the raw MDF core beneath and ruining the smooth glide of your parallel ruler. Once you have finished cleaning, immediately dry the entire board with a clean, dry towel to prevent any moisture from seeping into the edge seams and causing the wood fibers to swell.
Community discussion
Share your experience or ask a question. Comments are reviewed before publication.