
If you have never held an embroidery needle before, the prospect of starting your first project can feel both exciting and slightly overwhelming. The sheer variety of hoops, fabric weights, needle sizes, and thread types available in craft stores can easily lead to decision paralysis. This is where a DIY embroidery kit becomes invaluable, offering a curated, all-in-one solution that bypasses the complex setup phase.
For an absolute beginner, the best DIY embroidery kit is one that features a pre-printed (stamped) pattern on high-quality cotton fabric, a sturdy adjustable hoop, pre-sorted stranded cotton floss, and comprehensive, highly visual step-by-step instructions. This combination ensures you can focus entirely on learning basic stitches without worrying about design transfer or material compatibility. By starting with a well-designed kit, you can build your confidence and hand-eye coordination before moving on to more complex, self-sourced projects.
What to Look for in a Beginner-Friendly DIY Embroidery Kit
When evaluating your first embroidery kit, focusing on a few critical criteria will help you avoid low-quality options that lead to early frustration.
Products mentioned in this guide
Prices are valid at publication and may change. Please refer to the product page for the latest price.
Instruction Clarity When you are learning to embroider, written instructions alone are rarely sufficient. Look for kits that feature clear, step-by-step illustrated guides showing exactly where the needle enters and exits the fabric for each stitch type. Many modern kits now include QR codes that link directly to short video tutorials, which are incredibly helpful for visual learners struggling to master techniques like the French knot or split stitch.
Pattern Simplicity A beginner-friendly design should rely almost entirely on foundational stitches. Look for patterns that utilize the backstitch (ideal for clean outlines), the straight stitch (for simple petals and leaves), and the satin stitch (for filling in small shapes). Avoid kits that feature highly intricate details, complex shading, or advanced techniques like the long-and-short stitch, as these require a level of tension control that takes time to develop.
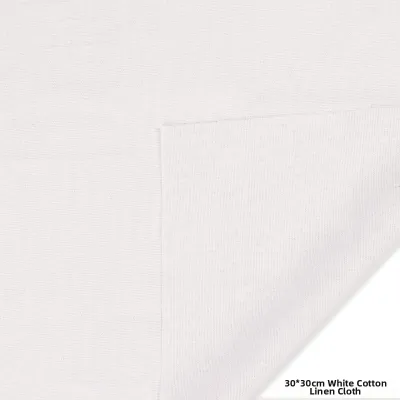
Material Quality The quality of the components directly impacts your stitching experience. A cheap wooden hoop that splinters can snag your fabric or thread, while low-grade polyester thread is highly prone to static, tangling, and fraying. The fabric should be a medium-weight cotton or linen with a tight, stable weave that can withstand repeated needle punctures without warping or tearing.
Completeness A true beginner kit must be entirely self-contained. It should include the pre-printed fabric, a properly sized hoop, the correct needles, and more than enough thread to complete the project (ideally 30% extra to account for mistakes). Some premium kits also include helpful extras like a metal needle threader, a pair of small thread snips, and a backing felt to cover the messy stitches when you display your finished work.
Stamped vs. Unstamped Patterns: Choosing Your First Canvas
One of the most important decisions you will make when purchasing a kit is choosing between a stamped pattern and an unstamped pattern.

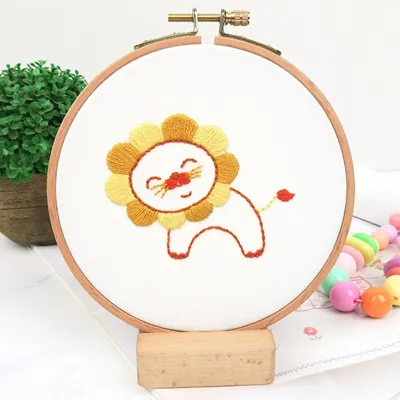
Stamped Kits Stamped embroidery kits feature the design printed directly onto the fabric using water-soluble ink. This is the ultimate beginner-friendly option because there is no setup required; you simply mount the fabric in the hoop and follow the printed lines. Once your project is complete, a quick soak in cool water dissolves the ink entirely, leaving only your clean stitches. The only major limitation is that you must keep the fabric completely dry while working, as sweat from your hands or an accidental spill can smudge or erase the pattern prematurely.
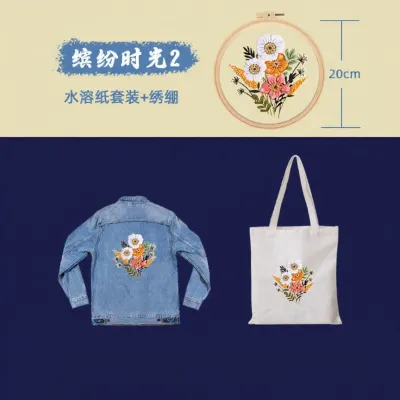
Unstamped or Transfer Kits Unstamped kits provide a blank piece of fabric alongside a paper pattern that you must transfer yourself. This is typically done using carbon transfer paper, tracing the design against a bright window, or using water-soluble stabilizer sheets that stick to the fabric and dissolve later. While this process adds several steps before you can actually begin stitching, it offers immense flexibility, allowing you to reuse the pattern on other items like tote bags, denim jackets, or pillowcases.
Recommendation Framework For your very first project, a stamped kit is highly recommended because it eliminates transfer anxiety and lets you focus entirely on stitch mechanics. Once you have completed one or two stamped designs and feel comfortable with needle control, transitioning to an unstamped kit or a transfer pattern is an excellent way to expand your skills. This progression teaches you how to handle different fabric types and prepares you for independent, non-kit embroidery projects.
Top DIY Embroidery Kit Recommendations for First-Time Stitchers
Best Overall Kit for Complete Beginners
The DMC Mindful Making Embroidery Kit series is an exceptional choice for those seeking a premium, reliable introduction to the craft. DMC is the global gold standard for embroidery floss, and their curated kits are designed specifically to promote relaxation through simple, repetitive stitches.
- What is Included: Each kit typically contains a 15cm wooden embroidery hoop, a piece of 100% cotton fabric pre-printed with the design, genuine DMC Mouliné Spécial stranded cotton thread, an embroidery needle, and highly detailed, multi-lingual instructions.
- Stitch Types Required: These designs rely almost exclusively on basic stitches like the backstitch, stem stitch, and lazy daisy.
- Estimated Completion Time: Approximately 6 to 10 hours of relaxed stitching.
- Limitations: Wooden hoops can sometimes require a bit of light sanding if there are minor burrs, but the overall component quality is exceptionally high.
Best Budget-Friendly Option
For those who want to try the hobby without a significant financial commitment, a Generic Botanical Stamped Embroidery Kit available on online marketplaces is a highly practical choice.
- What is Included: These budget kits, typically priced between S$8 and S$15, include a 20cm adjustable plastic hoop, pre-printed cotton-linen blend fabric, generic polyester-cotton threads, two crewel needles, and a printed instruction sheet.
- Why it Works: Interestingly, the budget plastic hoops included in these kits often feature a non-slip inner groove that holds fabric tighter than cheap bamboo hoops, making them highly practical for beginners. The designs are usually simple floral wreaths that are highly forgiving of minor mistakes.
- Trade-offs: The thread is less silky than premium DMC floss and may tangle more easily if pulled too quickly. The instructions may also feature minor translation errors, though the diagrams are usually sufficient.
Best Kit for Kids and Family Crafting
Designed specifically for younger crafters aged 6 and up, the DMC My First Embroidery Kit (or equivalent blunt-needle kits) prioritizes safety and ease of handling.
- Safety Features: These kits replace sharp embroidery needles with blunt metal or plastic tapestry needles and swap fine cotton floss for thick, soft acrylic yarn.
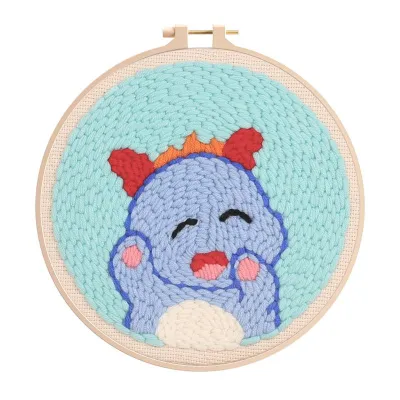
- Ease of Use: The patterns are printed on a stiff, wide-mesh plastic canvas or heavy-weave fabric with large, pre-punched holes. This design completely eliminates the risk of painful finger pricks while making it incredibly easy for children to see where the needle needs to go, fostering fine motor skills and patience in a safe, collaborative environment.
- Educational Value: These kits teach basic spatial awareness and pattern-following skills, making them an excellent weekend bonding activity for families.
Best Modern or Minimalist Design
For adults who prefer a contemporary aesthetic over traditional multi-colored floral patterns, a Modern Line Art Embroidery Kit is an exceptional choice.
- Visual Outcome: These designs often feature continuous single-line drawings of faces, abstract geometric shapes, or simple Scandinavian-style botanical outlines.
- Color Palette: They utilize a highly restricted color palette—often just black, terracotta, and olive green thread on a neutral cream linen background.
- Stitch Simplicity: Because these designs rely almost exclusively on the stem stitch or split stitch to create fluid, sweeping lines, they are incredibly quick to learn and yield a sophisticated finished piece that looks like a professional modern art print, ready to hang on any gallery wall.
How to Verify Kit Quality and Completeness Before Buying
Before purchasing a kit online or in a local craft store, take a moment to inspect the product specifications and reviews to ensure you are getting high-quality components.
The Embroidery Hoop When evaluating a kit, pay close attention to the hoop’s tightening mechanism. Look for hoops equipped with a sturdy metal screw that features a cross-recess or slot, which allows you to use a small screwdriver to tighten the hoop far more securely than hand-tightening alone. Bamboo hoops are lightweight and common, but they can sometimes warp or splinter in humid climates. Smooth, solid beechwood hoops or double-ringed plastic hoops with a locking ridge are much more stable and hold fabric tension significantly better over long stitching sessions.
Embroidery Floss High-quality kits provide 100% long-staple Egyptian cotton floss that has been mercerized to increase its strength, luster, and dye retention. Check whether the kit provides pre-sorted threads on a cardboard organizer, which prevents tangling and confusion. To verify colorfastness—especially with deep shades like red, navy, or black—you can perform a quick test before stitching: moisten a small scrap of the thread and press it firmly against a white paper towel. If any dye transfers, the color is not fully set, meaning you must exercise extreme caution when washing the finished piece to prevent colors from bleeding into the white fabric.
Needles and Extras An embroidery needle (also known as a crewel needle) should have a sharp point to easily pierce the fabric and a medium-sized, elongated eye to accommodate multiple strands of floss. A good beginner kit should include at least two needles in case one is lost or bent. Additionally, look for kits that include a simple wire-loop needle threader, which saves immense eye strain, and a pair of small, sharp thread snips. If you plan to frame your finished piece in the hoop, a kit that includes a pre-cut piece of backing felt is a major bonus, allowing you to neatly cover the messy back of your stitches.
Common First-Time Stitching Mistakes and How to Avoid Them
Even with the best kit, beginners often run into a few common hurdles. Knowing how to troubleshoot these issues early will keep your crafting experience enjoyable.
Tension Issues One of the most common mistakes beginners make is pulling their stitches too tight. When you pull the thread with too much force, it puckers the fabric around the design, creating permanent wrinkles that cannot be ironed out even after washing. Conversely, leaving stitches too loose can cause the loops of thread to sag and snag. Aim for a balanced, gentle tension—the thread should sit flat and flush against the fabric surface without pulling the fabric fibers out of alignment.
Thread Management Never use a piece of thread longer than the distance from your fingertips to your elbow (roughly 45 to 50 centimeters). While it may be tempting to use a long thread to avoid re-threading the needle, long strands constantly rub against the fabric as you stitch, leading to static buildup, severe tangling, fraying, and knotting. Additionally, always split your six-strand embroidery floss correctly: instead of pulling the strands apart sideways, pull one individual strand straight up out of the bundle, then repeat for the second or third strand before bunching them back together.
Hoop Setup To maintain even tension, your fabric must be mounted in the hoop properly. Start by loosening the outer hoop’s screw and separating the two rings. Place the inner ring on a flat surface, lay your fabric over it (ensuring the design is centered), and press the outer ring down over the fabric. Tighten the screw slightly, then work your way around the hoop, gently pulling the fabric edges outward to remove any slack. Once the fabric is taut like a drum—giving a clear, hollow sound when tapped with your finger—tighten the screw completely using a screwdriver or coin.
Finishing the Back Avoid tying large, bulky knots at the beginning or end of your thread, as these can create lumps that show through the front of light-colored fabrics or prevent the hoop from sitting flat against a wall. Instead, secure your starting thread by leaving a 5cm tail on the back and stitching over it with your first few stitches to lock it in place. To finish a thread, flip the hoop over, slide your needle under three or four existing stitches on the back, loop the thread through to create a small, flat anchor knot, and snip the excess close to the fabric.
Frequently Asked Questions (FAQ)
Do I need to buy extra supplies with a DIY embroidery kit?
A high-quality beginner kit is entirely self-contained, meaning you do not need to purchase any additional materials to complete the project. However, as you progress, you may find a few inexpensive upgrades highly beneficial. A dedicated pair of ultra-sharp embroidery scissors will give you cleaner cuts than standard household scissors, while a magnetic needle minder will prevent you from losing your needle on the sofa. If you stitch in the evening, a bright, adjustable craft lamp can significantly reduce eye strain.
How long does it take to finish a beginner embroidery kit?
The time required to complete a beginner kit varies widely depending on the size of the hoop, the complexity of the design, and your stitching speed. A simple 15cm floral design typically takes between 5 to 12 hours of active stitching. Because embroidery is a slow, meditative craft, there is no need to rush; many beginners prefer to stitch for 30 minutes to an hour each evening, completing their first project over the course of two to three weeks.
Can I wash the finished embroidery from a DIY kit?
Before washing, always check the specific kit’s care label or manufacturer instructions, as some specialty threads or fabrics may have unique requirements. For standard cotton or linen kits with water-soluble printed patterns, hand washing is highly effective. Submerge the finished piece in a bowl of cool water with a drop of mild, pH-neutral detergent and let it soak for 10 to 15 minutes without scrubbing. Rinse thoroughly in clean, cool water, lay the wet embroidery face-down on a clean, dry towel, and gently press the back with a warm iron to dry and smooth out any wrinkles.
Community discussion
Share your experience or ask a question. Comments are reviewed before publication.