
Starting a needlework hobby can feel overwhelming when faced with walls of loose embroidery floss, varying fabric grids, and unfamiliar needle sizes. Choosing a complete cross stitch kit set designed specifically for absolute beginners is the most reliable way to bypass this initial confusion. The ideal beginner kit provides a self-contained project with pre-sorted materials, clear instructions, and a manageable design size, allowing you to focus entirely on mastering the basic technique. By selecting a kit that matches your current skill level, you can build muscle memory, learn to read patterns, and complete your first piece of textile art with confidence. This guide will help you evaluate the essential components, avoid common beginner pitfalls, and set up your workspace for success.
What Makes a Cross Stitch Kit Set Beginner-Friendly?
When learning to cross stitch, the primary goal of your first project is to build confidence through a manageable, complete, and clearly guided experience. Cross stitching is highly repetitive and meditative, but it requires a basic understanding of grid systems and tension control. A beginner-friendly kit acts as a structured introduction, ensuring you do not get bogged down in technical preparations before you even make your first stitch.
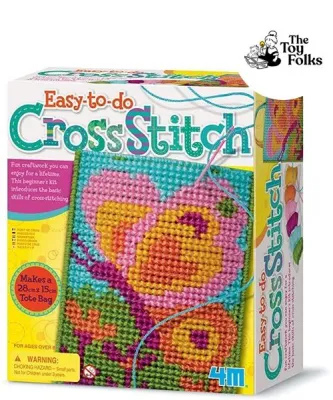
Opting for a complete cross stitch kit set rather than purchasing individual supplies piece-by-piece is highly recommended for absolute beginners. Sourcing loose supplies requires you to calculate fabric dimensions, match thread colors, select the correct needle size, and purchase an appropriate hoop. A complete kit pre-matches these components, saving time and preventing early mistakes, such as using thread that is too thick for the fabric grid.
Products mentioned in this guide
Prices are valid at publication and may change. Please refer to the product page for the latest price.
The scale of your first project also plays a significant role in your long-term enjoyment of the craft. It is highly beneficial to start with a small, achievable design—such as a simple geometric motif or a bookmark—rather than a massive wall hanging. Large projects can take dozens of hours to complete, which often leads to fatigue and abandoned work. Completing a small project within a few evenings provides immediate gratification and encourages you to progress.
Another critical factor in beginner success is the visibility of the fabric grid, which is determined by the “fabric count” (the number of holes per inch). For beginners, a lower fabric count means larger holes and more visible grids, making it significantly easier to see where to insert your needle. Selecting a kit with a beginner-friendly fabric count keeps the experience relaxing and enjoyable.
Essential Components to Check in Your First Kit
Before purchasing any cross stitch kit set, verify that the package contains all the necessary tools and materials to complete the project. Some products marketed as kits only include the pattern and thread, leaving you to source the fabric and tools separately. Reading the product description helps ensure you are buying a truly self-contained set.

Fabric Type and Hoop Quality
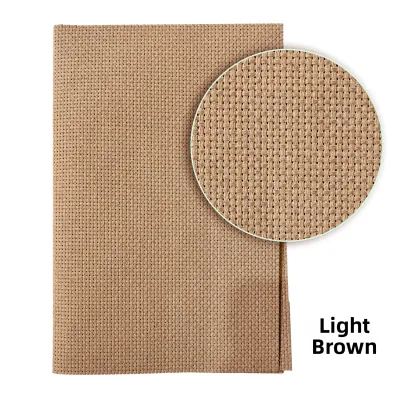
The foundation of any cross stitch project is the fabric, and for absolute beginners, 14-count Aida cloth is the standard. Aida cloth is a stiff cotton fabric woven with a distinct grid pattern that creates clear, easily visible holes. A 14-count fabric has 14 stitches per inch, offering an ideal balance: the holes are large enough to see clearly without magnifying tools, yet the finished design retains a clean, detailed appearance.
An equally important component is the embroidery hoop, which holds the fabric taut while you work. Look for kits that include a sturdy hoop made of smooth wood or high-quality plastic with a functional tightening screw. Flimsy hoops or those without a reliable screw mechanism fail to maintain tension, causing the fabric to sag repeatedly. Sagging fabric leads to uneven stitch tension and distorted patterns.
Additionally, check the hoop size relative to the design dimensions. Ideally, the included hoop should frame the entire pattern comfortably. If the design is larger than the hoop, you must reposition the hoop over completed stitches as you work. For a beginner, working within a single, fully framed area is much simpler and prevents the risk of crushing or dirtying completed stitches.
Thread Organization and Needle Type
The way the embroidery thread (or floss) is packaged inside the kit dramatically affects your setup time. High-quality beginner kits provide pre-sorted, pre-cut threads arranged on a flat cardboard or plastic bobbin organizer, with each color clearly labeled with its pattern symbol. This allows you to pull a single strand and begin stitching immediately. Kits with loose, tangled skeins require hours of sorting, which increases the likelihood of color confusion.
The type of needle included is another detail to verify. Cross stitch requires a tapestry needle, which features a blunt tip and a large eye. Unlike sharp embroidery needles, a blunt tapestry needle slides smoothly through the existing holes in the Aida fabric rather than piercing or splitting the woven threads. Using a sharp needle by mistake can damage the fabric structure and make it difficult to achieve clean, uniform stitches.
Finally, check the thread material. Reputable kits typically supply 100% cotton embroidery floss, which is favored for its smooth texture, subtle sheen, and durability. Cotton floss is less prone to fraying or knotting during use compared to synthetic alternatives. Furthermore, high-quality cotton threads are processed to be colorfast, meaning the colors will not bleed if the finished piece is washed.
Pattern Clarity and Instruction Format
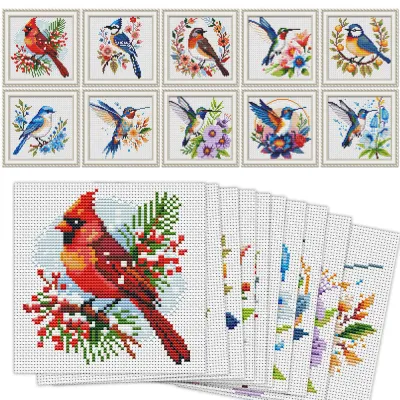
A cross stitch pattern is essentially a map, and its clarity determines how easily you can follow the design. The kit should include a high-contrast printed chart featuring large, distinct symbols for each thread color. Avoid patterns where the symbols are too small or highly similar to one another, as this leads to eye strain and mistakes. A clear, comprehensive color key must accompany the chart, linking each symbol directly to the organized thread colors.
For an absolute beginner, the instruction manual must be detailed and easy to comprehend. Look for kits that offer step-by-step written instructions accompanied by clear diagrams. These instructions should cover fundamental techniques: separating the six-strand floss, executing a basic full cross stitch, performing a backstitch for outlines, and securing the thread at the beginning and end of a section without tying bulky knots.
Consider also the physical format of the pattern. While some modern kits provide a digital download link or a QR code, physical, printed charts are generally preferred for first-time stitchers. A printed paper chart allows you to physically cross off completed sections with a pencil or highlighter, helping you track your progress without staring at a screen or worrying about device battery life.
Kit Features to Avoid as an Absolute Beginner
When browsing online marketplaces or local craft shops, it is easy to be drawn to beautiful, intricate designs without realizing they are intended for advanced stitchers. To ensure your first experience is positive, there are several specific kit features you should actively avoid. Recognizing these red flags early will save you from purchasing a project that is too complex or frustrating to complete.
First, steer clear of kits that feature high-count fabrics, such as 18-count, 22-count, or specialty fabrics like linen and evenweave. High-count fabrics have much smaller holes, which require excellent eyesight and steady hands. Linen and evenweave do not have a pre-defined grid of holes like Aida cloth; instead, you must count the individual threads of the fabric weave to place your stitches. This requires advanced counting skills and precise tension control, making it highly unsuitable for your very first project.
Second, avoid patterns that rely heavily on fractional stitches—such as quarter (1/4) or three-quarter (3/4) stitches—or complex color-blending techniques. Fractional stitches require you to pierce the middle of an Aida fabric square, which is difficult to do neatly without experience. Color blending, where you thread your needle with two different colored strands simultaneously to create a shaded effect, adds an extra layer of thread management that can easily lead to tangling and uneven tension. Stick to designs that use only full cross stitches and minimal backstitching.
Third, exercise caution when considering “stamped” cross stitch kits. While stamped kits can be convenient, low-quality versions often suffer from poorly aligned printing. If the printed design is offset even slightly from the physical holes of the fabric, it becomes extremely confusing to decide where to place your stitches. Additionally, some cheap stamped kits use low-grade inks that smudge easily from hand moisture, potentially ruining the design, or permanent inks that cannot be washed away after stitching.
Finally, watch out for misleading product listings that advertise a “complete set” but omit crucial tools in the fine print. Some budget-friendly kits may omit the embroidery hoop, needles, or a proper thread organizer, providing only loose floss and a piece of fabric. Sourcing these missing tools separately increases your overall cost and delays your project. Always read the contents list carefully to verify that the hoop, needles, and a pre-sorted organizer are explicitly included.
How to Read and Verify Kit Specifications Before Buying
Developing the ability to analyze product specifications and seller descriptions will help you make an informed purchase, especially when shopping on online marketplaces. Manufacturers often use technical terms that can be confusing if you do not know what to look for. By verifying a few key details, you can ensure the kit you receive matches your expectations and skill level.
One of the first calculations you should perform is verifying the relationship between the stitch count, the fabric count, and the actual finished design size. The product specifications should list the dimensions of the design in stitches (for example, 70 stitches wide by 70 stitches high). To find the finished size in inches, divide the stitch count by the fabric count. For a 70×70 stitch design on 14-count Aida, the calculation is 70 divided by 14, which equals a finished design size of 5×5 inches. Ensure that the included fabric piece is at least two to three inches larger than the design on all sides to allow for comfortable hooping and framing.
Another critical factor is thread sufficiency. Reputable cross stitch brands typically include a 20% to 30% surplus of embroidery floss for each color to account for beginner mistakes, tension variations, and thread tails. Suspiciously cheap, unbranded kits often cut costs by providing the exact amount of thread required under perfect conditions, or even less. If you make a few mistakes and need to undo your work, you may run out of thread. Look for listings that explicitly state they include extra thread or floss.
User reviews are an invaluable resource when evaluating a kit’s real-world quality. When reading reviews on e-commerce platforms, bypass the generic five-star ratings and search specifically for feedback regarding instructions, thread quality, and completeness. Look for mentions of “missing items,” “poor translation in instructions,” “fragile needles,” or “tangled threads.” If multiple reviewers note that the instruction manual is incomprehensible or that the thread keeps fraying, it is best to look for an alternative kit.
Lastly, always check the manufacturer’s recommended age or skill level on the packaging or product detail page. Many established brands use clear labeling such as “Beginner,” “Easy,” or “Level 1” to guide consumers. If a kit is labeled as “Intermediate” or “Expert,” or if it lacks any skill rating but features a highly detailed design with dozens of subtle color gradients, it is likely too advanced for an absolute beginner. Selecting a kit specifically certified for beginners ensures the learning curve remains gentle and enjoyable.
Unboxing and Setting Up Your First Cross Stitch Kit
Once your cross stitch kit set arrives, taking the time to set up your workspace and prepare your materials properly will set you up for a smooth, frustration-free stitching experience. Rushing directly into stitching without preparation often leads to tangled threads, frayed fabric edges, and alignment mistakes. Follow these simple, low-risk steps to organize your project before you make your first stitch.
Start by preparing your workspace. Choose a well-lit area, preferably near a window for natural light, or under a bright adjustable lamp to reduce eye strain. In warm climates like Singapore, working in a cool, air-conditioned room can prevent your hands from perspiring, which helps keep the fabric and threads clean. Lay out all the kit components on a clean, flat surface. Take out the pattern chart, the pre-sorted thread organizer, the fabric, and the needles. Familiarize yourself with the color key on the pattern and locate the corresponding threads on your organizer so you know exactly which symbol matches which color.
Before you mount your fabric, protect the raw edges of your Aida cloth. Because Aida is a loosely woven fabric, the edges will naturally begin to fray as you handle it during the project. To prevent this in a safe, reversible way, wrap a strip of painter’s tape or masking tape along all four raw edges of the fabric. This simple step keeps the edges neat and prevents loose threads from tangling with your embroidery floss while you work.
Next, mount the fabric securely into the embroidery hoop. Loosen the screw on the outer hoop and separate the inner and outer rings. Lay the inner ring flat on your table, place your prepared Aida cloth over it, and then press the outer ring down over the fabric and the inner ring. Gently pull the edges of the fabric to smooth out any wrinkles, then tighten the screw. Perform the “drum-tight” test: tap the center of the fabric with your finger; it should feel firm and sound like a drum. Be careful not to pull the fabric too tightly or unevenly, as this can distort the square grid of the Aida cloth and cause your finished stitches to look warped.
Finally, establish a safe habit for needle storage. Tapestry needles are small and easily lost in couch cushions or carpets, which poses a safety risk to children and pets. When you need to pause your stitching, never leave the needle loose on your workspace. Instead, park the needle by weaving it through an unused section of the Aida cloth currently held in your hoop, or store it securely in a dedicated pincushion or a magnetic needle minder. Keeping your tools organized ensures your new hobby remains safe and enjoyable for everyone in your home.
Frequently Asked Questions (FAQ)
What is the difference between stamped and counted cross stitch kits?
The primary difference lies in how you follow the pattern. In a stamped cross stitch kit, the design is printed directly onto the Aida fabric using water-soluble ink. You simply stitch directly over the printed symbols, which eliminates the need to count grid squares. In a counted cross stitch kit, the fabric is completely blank, and you must refer to a separate printed paper chart, counting the squares on the grid to determine where to place each stitch on the fabric. While stamped kits require less mental effort to start, counted cross stitch is the traditional method that teaches you how to read charts, allowing you to transition to a much wider variety of designs in the future.
Do I need to wash my cross stitch project before framing?
Washing your completed cross stitch project is generally recommended because it removes natural oils from your hands, dust, hoop creases, and any water-soluble grid lines or stamped ink. However, before washing, you must check the manufacturer’s care instructions included in your kit. Some specialty kits use hand-dyed threads or delicate fabrics that are not colorfast and may bleed if submerged in water. If the kit instructions permit washing, gently hand wash the piece in lukewarm water with a mild, dye-free detergent, rinse thoroughly, and lay it flat on a clean towel to dry. Never wring or twist the wet fabric, as this can distort your stitches.
Can I use my own embroidery floss if the kit runs out?
Yes, you can easily use your own embroidery floss if you run out of a specific color. Most reputable cross stitch kits list the industry-standard color codes—typically from brands like DMC or Anchor—directly on the pattern’s color key. You can take this code to a local craft store or an online retailer to purchase an exact matching skein of six-strand cotton embroidery floss. If your kit does not list standard color codes, you can cut a small sample of the remaining thread and bring it to a local shop to visually match it against the available skeins under natural light.
Community discussion
Share your experience or ask a question. Comments are reviewed before publication.