
To start acrylic pouring in Singapore successfully, choosing the right paint brand and matching starter kit is essential to avoid cracking, muddy colors, or paint peeling. Fluid art relies on precise chemical balances to achieve the beautiful, flowing cell patterns that define the medium. While any paint can technically be thinned, using incompatible paints or low-quality starter kits often leads to disappointing results, such as dull finishes and flaking surfaces.
Top paint brands like Liquitex (both Soft Body and Basics lines), Amsterdam Standard Series, and Pébéo Studio Acrylics offer the ideal pigment quality and consistency for fluid art. For beginners, comprehensive kits that include pre-matched pouring mediums ensure chemical compatibility and a smooth learning curve, while budget craft bundles serve as low-risk entry points for casual experimentation. Understanding how these products behave in Singapore’s humid climate will help you select the best supplies for your artistic goals.
How to Evaluate Acrylic Pouring Paints and Starter Kits
Evaluating acrylic pouring supplies requires an understanding of paint viscosity, which directly impacts how colors flow and interact on the canvas. Acrylic paints are generally categorized into three main types: high-flow, soft-body, and heavy-body. High-flow acrylics have an ink-like, watery consistency that requires very little medium to pour, but they can be difficult for beginners to control. Soft-body acrylics feature a smooth, creamy texture similar to yogurt, making them the industry favorite for fluid art because they thin down easily without losing pigment strength. Heavy-body acrylics are thick and buttery, designed for textured brushwork; while they can be used for pouring, they require a significant amount of medium and vigorous mixing, which often introduces unwanted air bubbles and risks over-diluting the paint binder.
Products mentioned in this guide
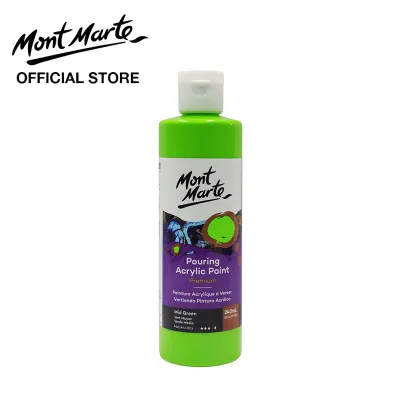
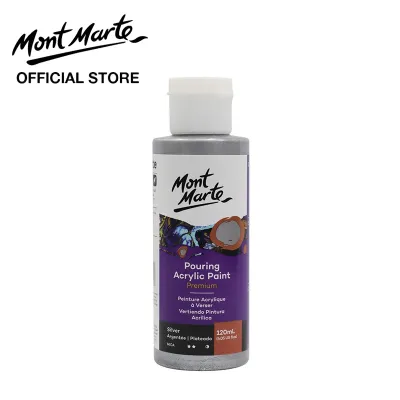
Prices are valid at publication and may change. Please refer to the product page for the latest price.
The choice of thinning agent is another critical factor in a successful pour. While tap water is a common and inexpensive additive, relying on it too heavily will ruin your artwork. Water thins paint by separating the acrylic polymer binder molecules. If water makes up more than thirty percent of your paint mixture, the binder breaks down, resulting in poor adhesion, surface cracking (known as crazing), and a dull, chalky finish once dry. A dedicated pouring medium, on the other hand, is a liquid acrylic resin that thins the paint’s viscosity while preserving its structural integrity, gloss, and adhesive properties.
Because the final smoothness, drying speed, and water resistance of your pour depend entirely on the specific combination of paint, medium, and canvas, you should always perform a trial pour. Mix a small batch of your chosen paint and medium on a test tile or scrap cardboard, observing how smoothly it spreads and how it dries over 48 hours before starting your actual project. Always check the manufacturer’s label on both your paint and medium to find the recommended mixing ratios, as these formulas vary between brands.
When shopping for a starter kit, a truly comprehensive set should eliminate the guesswork of sourcing individual components. A high-quality kit must contain chemically compatible paints and pouring mediums, along with essential mixing accessories such as graduated mixing cups, sturdy stirring tools, and pre-primed canvases. Some basic craft bundles only include standard paints without any pouring medium, leaving you with thick paints that cannot flow. Ensuring your kit includes a dedicated pouring medium is the most important step to preventing early frustration.
Before starting any fluid art project, make it a habit to review the manufacturer’s instructions and safety labels on all your products. Acrylic pouring is generally safe, but different mediums and additives may have specific handling guidelines, skin contact warnings, or ventilation requirements. Reading these labels beforehand ensures a safe, clean, and highly enjoyable creative process.
Top Acrylic Pouring Paint Brands for Beginners
The brand of paint you select plays a major role in the success of your fluid art, directly affecting pigment vibrancy, cell formation, and how evenly the paint dries. High-quality paints contain finely ground pigments suspended in strong acrylic binders, which prevent colors from blending into a muddy gray when poured together. Lower-grade paints often use cheap fillers that lose their color brilliance and separate during the drying process.

When sourcing these brands in Singapore, keep in mind that local stock levels and availability can vary throughout the year. It is always wise to verify stock and check authorized dealer status before making a purchase, ensuring you receive genuine, fresh products rather than old inventory that may have separated or dried out in storage.
Liquitex Basics and Soft Body Acrylics
Liquitex is widely considered an industry-standard brand for artists of all levels, and its paint lines are exceptionally well-suited for fluid art. The Liquitex Soft Body line is particularly favored by pouring enthusiasts due to its fluid, creamy consistency. It mixes effortlessly with pouring mediums, requiring very little effort to reach a smooth, pourable state. The Basics line is a more economical, student-grade option that is slightly thicker but still maintains a highly consistent flow when thinned.
One of the greatest benefits of using Liquitex is its predictable pigment load. Because the brand maintains strict quality control, beginners can reliably learn color theory and predict how different shades will interact during a pour. You will not have to worry about one color completely overpowering another due to inconsistent pigment concentration.
However, there are a few limitations to keep in mind. Unless you purchase a specific Liquitex fluid art bundle, you will need to buy their pouring medium separately. This can increase your initial setup cost, but the resulting archival quality and paint performance make it a highly worthwhile investment for those wanting to create lasting pieces.
Amsterdam Standard Series Acrylics
The Amsterdam Standard Series, produced by Royal Talens, is another exceptional option that strikes an excellent balance between value, pigment quality, and fluid performance. This series is slightly thicker than high-flow paints, meaning it requires careful measurement of your pouring medium to achieve the ideal “warm honey” consistency. Beginners should expect to spend a little extra time stirring and measuring to get the viscosity just right.
Despite the slightly thicker starting consistency, Amsterdam paints are highly praised for their vibrant color payoff and outstanding lightfastness. The pigments remain bright and true even after the paint has fully cured, ensuring your finished artwork does not fade when exposed to indoor light.
To get the best results with Amsterdam Standard Series, beginners should test small batches of paint and medium mixtures on a scrap surface before pouring onto a main canvas. This trial process allows you to dial in your preferred mixing ratios and verify how the paint flows, helping you avoid common mistakes like under-thinning, which can cause uneven drying.
Pébéo Studio Acrylics
Pébéo Studio Acrylics are popular among beginners due to their high accessibility and user-friendly formulation. These paints feature a satin finish and a highly fluid starting consistency compared to traditional heavy-body acrylics. Because they are already quite fluid, they require less pouring medium to reach a pourable state, saving you money on additives and simplifying the mixing process.
This brand is particularly well-suited for classic, straightforward pouring techniques such as dirty pours and flip cups. The colors blend smoothly without immediately turning muddy, allowing novices to achieve clean, distinct layers of color with minimal effort.
The primary limitation of Pébéo Studio Acrylics lies in advanced cell creation. If you want to create high-contrast, lace-like cell patterns, you may find that these paints do not form cells as easily on their own compared to premium brands. To achieve those dramatic effects, you will need to supplement the paint with specific silicone oils or specialized cell activators.
Best All-in-One Acrylic Pouring Starter Sets
For those who want to skip the complexity of measuring and matching individual bottles, all-in-one starter sets are an excellent solution. These kits are specifically designed to provide a cohesive experience, ensuring that every paint, medium, and tool included works harmoniously together. This chemical compatibility is crucial, as mixing products from different brands without testing can sometimes lead to uneven drying speeds or chemical rejection.
However, shoppers must be cautious when browsing online. There are many low-quality or misleading kits on the market that claim to be designed for pouring but only contain cheap craft paint and standard white glue. True pouring kits include a proper acrylic binder or dedicated pouring medium; using cheap craft bundles without these binders will result in your artwork flaking, cracking, and losing its color vibrancy within weeks of drying.
Comprehensive Kits with Pouring Mediums
Premium, comprehensive kits that feature high-quality paints and dedicated, chemically matched pouring mediums offer the best introduction to fluid art. When you use paints and mediums manufactured by the same brand, you ensure perfect chemical adhesion, consistent drying times, and archival longevity. This means your finished canvas will not peel or yellow over time, preserving your creative work for years to come.
A high-quality kit should provide a generous volume of pouring medium, as fluid art consumes medium at a much faster rate than actual paint. The box should also contain durable, reusable mixing vessels, precise stirring sticks, and protective nitrile gloves. Having these items pre-packaged saves you multiple trips to the art store and ensures you have everything needed to start immediately.
While these comprehensive kits require a higher initial financial investment, they ultimately save you money by preventing wasted canvases and ruined paint. The predictable results and premium materials eliminate the trial-and-error frustration that often causes beginners to abandon the hobby prematurely.
Budget-Friendly Craft Store Bundles
If you are looking to try acrylic pouring as a casual weekend activity or want a fun project for children, budget-friendly craft store bundles are a highly accessible entry point. These kits are widely available and offer a low-cost way to experience the basic mechanics of fluid art without committing to professional-grade prices.
However, these budget sets come with clear trade-offs. They typically feature a lower pigment load, meaning the colors may dry slightly darker or less vibrant than they appeared when wet. Additionally, they often come in very small paint volumes, limiting you to one or two small canvases, and they may lack a dedicated pouring medium entirely, relying instead on pre-thinned formulas that can be prone to cracking.
To get the best performance out of a budget craft bundle, consider supplementing the kit with a high-quality, standalone pouring medium purchased separately. Mixing a small amount of professional medium into the budget paints can dramatically improve their flow, reduce the risk of cracking, and enhance the overall gloss of your finished piece.
Essential Additives and Tools to Complete Your Setup
Once you have your paints and starter kit, a few key additives and tools can elevate your fluid art from simple color blends to dynamic, cell-filled masterpieces. The most popular additive for creating cells is 100% silicone oil. Adding just two to three drops of silicone oil to your mixed paint before pouring creates a resist effect, forcing the heavier paint layers to sink while the lighter colors rise to the surface, forming beautiful, distinct cells and intricate lacing.
To activate these cells and remove trapped air bubbles, artists use heat guns or small culinary torches. Passing a gentle heat source over the freshly poured wet paint expands the air bubbles, popping them instantly and pulling the underlying paint layers to the surface to create dramatic cell patterns.
Safety is paramount when using heat tools in your art studio. Always verify the manufacturer’s safety instructions for your specific heat gun or torch before turning it on. Ensure your room is highly ventilated, keep the heat source moving constantly to avoid scorching or burning the paint, and never use heat tools near flammable solvents, aerosols, or alcohol-based products.
The surface you pour onto also plays a major role in the longevity of your artwork. Always use properly primed canvases that have been treated with gesso. Raw, unprimed canvas or low-quality cardboard will absorb the moisture from the paint too quickly, causing the paint layer to warp, sink, and eventually peel away from the surface as it dries.
Finally, do not underestimate the importance of proper workspace protection and cleanup gear. Acrylic pouring is inherently messy, and wet paint can easily run off the edges of your canvas. Protect your table with a thick silicone mat or heavy-duty plastic drop cloths, wear nitrile gloves to protect your skin, and use raised drying racks—such as plastic cups or push pins inserted into the back of your canvas frame—to prevent your wet artwork from sticking to the table as it cures.
Where to Buy Reliable Art Supplies in Singapore
Sourcing authentic art supplies in Singapore is straightforward if you know where to look, but it requires some selectivity to avoid low-quality counterfeits. For the best results, purchase your paints and mediums from established local art supply chains, specialty craft retailers, or official brand online stores. These retailers maintain temperature-controlled storage and rotate their stock regularly, ensuring your paints arrive fresh and ready to use.
Be highly cautious when purchasing from unverified third-party sellers on online marketplaces. Acrylic paints are sensitive to temperature extremes; if they are stored in hot, unventilated warehouses or left in transit for extended periods, the emulsion can break down, leaving you with clumpy, dried-out, or completely unusable paint. Furthermore, counterfeit art supplies are common on discount platforms, and these cheap imitations lack the safety certifications and pigment quality of genuine brands.
When choosing a local retailer, look for those that provide clear, detailed product descriptions, including manufacturing batch codes or expiration details where applicable. A reliable seller should also offer responsive local customer support and a clear return policy for items that are damaged or dried out during transit, giving you peace of mind as you invest in your creative hobby.
Frequently Asked Questions (FAQ)
Do I need to add water to my acrylic pouring mix?
While you can add a tiny amount of water to adjust viscosity, you should never rely on water as your primary thinning agent. Excessive water breaks down the acrylic polymer binder, which weakens the paint’s structure and leads to cracking, flaking, and dull colors once dry. To increase fluidity while maintaining the paint’s strength, vibrancy, and adhesion, always use a dedicated acrylic pouring medium.
How long does an acrylic pour take to dry completely?
There is a major difference between when a pour is dry to the touch and when it is fully cured. While an acrylic pour may feel dry on the surface within 24 to 48 hours, the underlying layers can take up to 30 days to cure completely. Because Singapore has high ambient humidity, drying times will be significantly extended; you must leave your canvas on a level surface in a dust-free, well-ventilated area during this period to ensure it cures evenly.
Community discussion
Share your experience or ask a question. Comments are reviewed before publication.