
A complete back-to-school stationery checklist requires a strategic mix of stickers and labels tailored to your child’s primary school grade. Lower primary students need highly durable, color-coded name tags to prevent lost items, while upper primary students require functional indexing tabs, minimalist labels, and color-coded markers to manage multiple subjects and complex schedules. Selecting the right materials and adhesives ensures these organizational tools survive the school year, whether they are on a water bottle subjected to daily washing or a textbook tucked into a school bag.
Planning your labeling strategy before the school term begins saves time and prevents the mid-year scramble to replace lost items. By matching the durability of the label to the daily wear and tear of each school item, you can establish an efficient system that helps your child stay organized and responsible. This guide breaks down how to choose the right materials and provides grade-specific checklists to streamline your back-to-school preparation.
How to Choose the Right Materials and Sizes for School Labels
Selecting the correct label material is the foundation of a successful school organization system. For items that undergo daily washing or are exposed to moisture—such as water bottles, lunchboxes, snack containers, and umbrellas—waterproof synthetic materials like vinyl or polyester are essential. These materials resist water, oil, and tearing, ensuring the printed name remains legible. Conversely, standard paper labels are highly cost-effective and perfectly suitable for dry environments, making them the ideal choice for textbooks, exercise books, and the interiors of folders.
Products mentioned in this guide
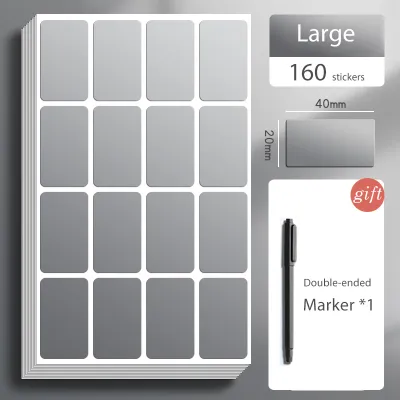
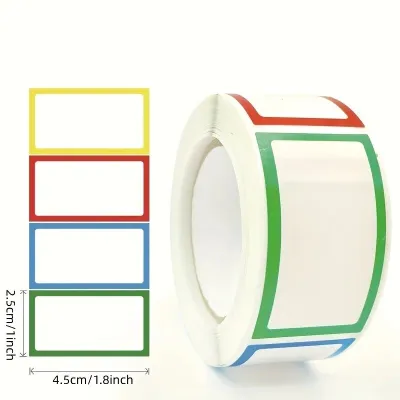
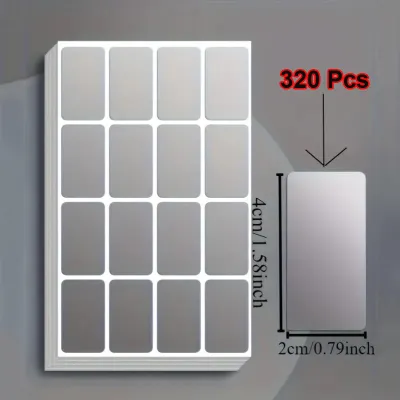
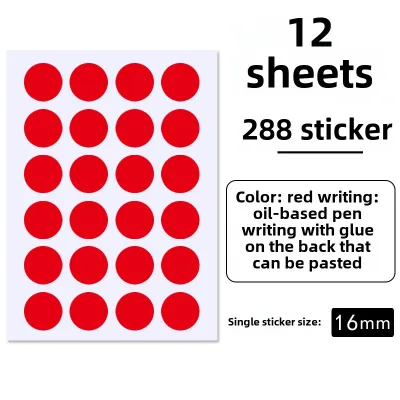
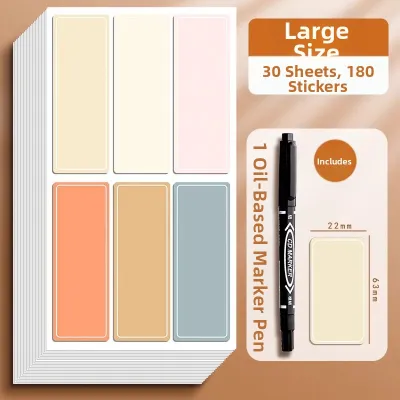
Prices are valid at publication and may change. Please refer to the product page for the latest price.
Adhesive strength must also match the intended lifespan of the item. Permanent acrylic-based adhesives are designed for long-term ownership marking, bonding securely to plastics, metals, and paper covers. These are excellent for personal items that your child will keep for the entire year or longer. For shared school resources, rented textbooks, or temporary files that will be repurposed next semester, opt for removable silicone-based adhesives. These allow you to peel the label off cleanly without leaving a sticky residue or tearing the underlying surface.
Label dimensions must be carefully matched to the physical dimensions of the stationery. Large rectangular labels (typically 30mm by 50mm or larger) provide ample space for the student’s full name, class, and subject, making them perfect for textbook covers. Narrow book spines require slim strip labels (approximately 5mm to 10mm wide) to prevent the edges from wrapping around the cover and peeling. For small, curved items like pens, pencils, rulers, and erasers, micro-labels (around 6mm by 22mm) are necessary. These smaller labels must be flexible enough to wrap around tight curves without lifting at the corners.
Before purchasing labels in bulk, perform a few simple observable checks to verify their quality. Inspect the thickness of the label sheet; high-quality vinyl labels feel substantial and do not tear easily when stretched. Run a finger along the edges of the sheet to check for adhesive bleed, which indicates poor manufacturing and can cause the labels to attract dirt once applied. To verify ink compatibility, write on a sample label with your preferred pen or marker; observe the drying speed and check for smudging or bleeding. If the ink smears after a few seconds, the label material may require a specialized permanent marker rather than a standard ballpoint pen.
Lower Primary Checklist: Name Tags and Basic Organization
For students in lower primary (Primary 1 to Primary 3), the primary goal of labeling is ownership identification and helping young children recognize their personal belongings. At this stage, children are still adapting to managing their own gear in a busy classroom environment. Highly visible name labels with distinct colors or simple icons help younger students quickly identify their items, reducing the likelihood of mix-ups during recess or physical education classes.

Your lower primary checklist should prioritize waterproof vinyl labels for all personal care items. This includes water bottles, food containers, cutlery cases, and personal hand sanitizers. Standard paper labels should be reserved for textbooks, workbooks, drawing blocks, and writing pads. Because younger students often handle their books with damp hands, applying a clear protective laminate over paper book labels can significantly extend their lifespan and prevent the ink from smudging.
Subject organization can be greatly simplified through color-coded labels. Assigning a specific color to each core subject—such as blue for English, red for Mathematics, and green for Mother Tongue—allows young children to visually categorize their materials. By placing a matching color-coded sticker on the spine of the textbook, the workbook, and the corresponding subject file, your child can quickly pull the correct materials from their school bag without needing to read every title. This builds confidence and speeds up transitions between lessons.
Reward stickers are another valuable addition to the lower primary checklist. Parents and teachers can use these visually engaging stickers—featuring stars, motivational words, or cheerful illustrations—to provide positive reinforcement for completed homework, neat handwriting, or good behavior. Keeping a small sheet of these stickers in your child’s homework folder allows you to mark milestones and track progress interactively.
To estimate the quantity of labels needed for a lower primary student, use a simple curriculum-based calculation rather than buying random assortments. Count the number of core subjects and multiply by the number of required books and files per subject (typically three to four). Add your child’s personal items, including their pencil case, water bottle, lunchbox, wallet, and umbrella. A practical formula is: (Number of Books x 1.2) + (Number of individual stationery items like pencils, rulers, and scissors) + 10 spare waterproof labels for mid-year additions. This ensures you have enough labels to cover all initial gear with a comfortable buffer for replacements.
Upper Primary Checklist: Advanced Organization and Indexing
As students transition to upper primary (Primary 4 to Primary 6), their organizational needs shift from basic ownership marking to advanced time management and academic indexing. The volume of learning materials increases dramatically, with students managing multiple specialized subjects, thick reference books, past-year exam papers, and project portfolios. Labels at this stage serve as functional tools to help students navigate their study materials efficiently.
Index and divider tabs are essential components of the upper primary checklist. These sturdy, write-on plastic tabs allow students to divide thick ring binders and multi-subject folders into clear, accessible sections. By labeling tabs for specific topics, homework, notes, and practice papers, students can locate reference materials quickly during revision. Opt for durable plastic tabs that resist bending and tearing, ensuring they survive constant flipping throughout the school year.
Name labels for older students should transition to a more minimalist design. Upper primary students often prefer discreet, professional-looking labels over bright, cartoonish designs. Small, clear, or metallic name labels are ideal for marking high-value items such as scientific calculators, geometry sets, electronic dictionaries, and specialized drawing instruments. These labels protect ownership without drawing unnecessary attention.
Functional markers, such as page flags and color-coded dot stickers, are invaluable for active studying and exam preparation. Students can use small page flags to mark key formulas, vocabulary lists, or historical dates in their textbooks for quick reference. Color-coded dot stickers can be applied to practice papers to track progress: for example, a red dot can indicate a question that requires teacher clarification, a yellow dot for a minor mistake to review later, and a green dot for a successfully mastered concept. This visual tracking system makes self-directed study far more structured and effective.
When calculating label quantities for upper primary, focus heavily on indexing and study markers. While you will need fewer individual name labels for basic stationery, the demand for organizational tabs and page flags is much higher. Plan for at least two sets of multi-colored index tabs per semester to cover major subject folders. For study markers, a pack of 100 to 200 page flags in various colors will easily see a student through the intensive exam preparation phases.
Application and Maintenance Tips for Long-Lasting Labels
Even the highest-quality label will fail if it is not applied correctly. To ensure your labels remain securely bonded to school gear throughout the academic year, proper surface preparation is critical. Before applying any label, clean the target surface thoroughly to remove dust, grease, and manufacturing residues. Wipe the area with a clean, dry microfiber cloth. For plastic or metal items, a quick wipe with a mild soapy water solution, followed by complete drying, creates an optimal bonding surface. Avoid applying labels to damp or cold surfaces, as moisture prevents the adhesive from making full contact.
Strategic placement is another key factor in label longevity. Always position labels on flat, smooth areas of the item. Avoid placing them over seams, textured surfaces, or sharp curves, as the natural stiffness of the label material will eventually cause the edges to lift. On water bottles and lunchboxes, place the label away from high-friction zones, such as the direct grip area or the bottom edge that rubs against school bag side pockets. This simple adjustment minimizes daily wear and tear and keeps the label intact.
When the school year ends or items need to be repurposed, removing old labels safely prevents damage to your stationery. To remove stubborn adhesive labels, apply gentle heat using a hair dryer on a low setting for ten to fifteen seconds. This softens the adhesive, allowing you to peel the label off smoothly. For any remaining sticky residue, apply a small amount of mild household oil, such as vegetable oil or baby oil, to a cloth and rub the area gently. Wash the item with warm, soapy water afterward to remove the oil.
Always observe safety boundaries and stop conditions when applying or removing labels. Before using any adhesive removers or applying heat, consult the manufacturer’s care instructions for specialized items. For example, high heat can damage delicate plastic folders or warp thin ruler materials, while strong solvents can strip the protective coatings off insulated stainless steel flasks or scientific calculator screens. If in doubt, test a small, inconspicuous area of the item first.
Frequently Asked Questions (FAQ)
Can I use the same name labels for both clothing and stationery?
Standard stationery labels are not suitable for clothing. Stationery labels are designed for rigid, non-porous surfaces and lack the flexibility required for fabric. When applied to uniforms, physical education shirts, or socks, standard labels will quickly peel off during movement or disintegrate in the washing machine. For clothing, you must use specialized iron-on fabric labels or fabric-safe stamp inks. Iron-on labels utilize a heat-activated adhesive that fuses with the fabric fibers, allowing the label to stretch and withstand repeated washing and drying cycles without lifting.
How do I prevent waterproof labels from peeling off water bottles?
To maximize the lifespan of waterproof labels on water bottles, the most critical step is allowing the adhesive to cure. After applying the label firmly to a clean, dry surface, let it sit undisturbed for 24 to 48 hours before exposing it to water or washing. This curing period allows the adhesive bond to reach maximum strength. When washing labeled bottles, hand-washing with a soft sponge is highly recommended. If you must use a dishwasher, place the labeled items on the top rack, away from the intense heat of the bottom heating element, which can degrade the adhesive over time.
Are there specific label sizes required for standard school textbooks?
While there are no official school regulations governing label sizes, matching the label to the book’s dimensions ensures neatness and legibility. For the front covers of standard textbooks and workbooks, a rectangular label measuring approximately 30mm by 60mm is ideal. This size provides sufficient space to write the student’s name, class, and subject clearly in a readable font size. For book spines, narrow strip labels measuring around 10mm by 50mm are highly recommended. Placing these on the lower spine allows teachers and students to identify the book easily when it is stacked vertically on classroom shelves.
Community discussion
Share your experience or ask a question. Comments are reviewed before publication.