
Preparing a classroom for a new school term requires reliable visual aids that keep students engaged and lessons organized. A well-equipped presentation setup centered around a high-quality flipchart board is one of the most versatile tools a teacher can use. This guide provides a comprehensive checklist and selection framework to help you choose the right boards, paper refills, markers, and accessories for your classroom.
By planning your presentation supplies before the school year begins, you can avoid mid-term disruptions and ensure your lessons remain highly visible and interactive. Whether you are teaching in a compact primary school classroom or a spacious secondary lecture hall, selecting the correct combination of tools will enhance your daily teaching flow.
The Core Back-to-School Presentation Checklist
Having a structured checklist ensures you do not overlook essential items during the busy back-to-school shopping season. A complete presentation setup requires a balance of durable hardware, compatible paper consumables, and high-visibility writing instruments.
Products mentioned in this guide
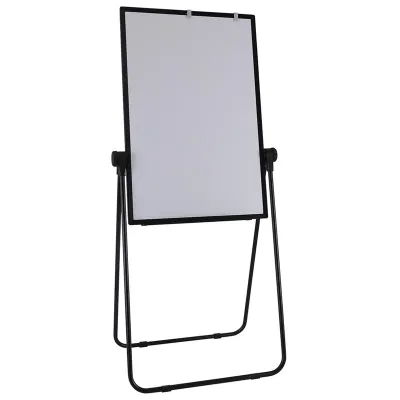
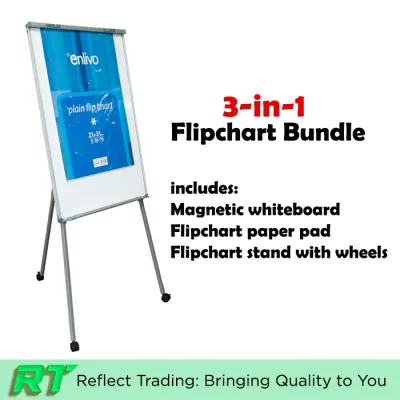
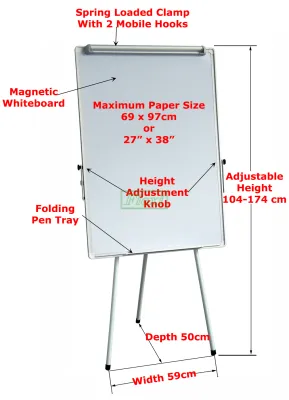
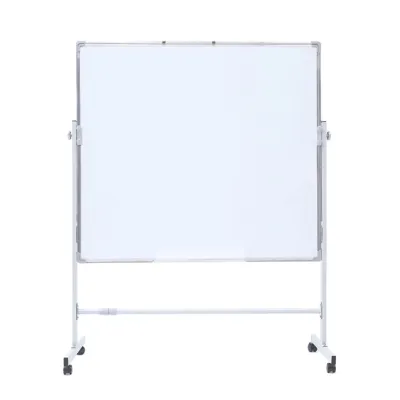
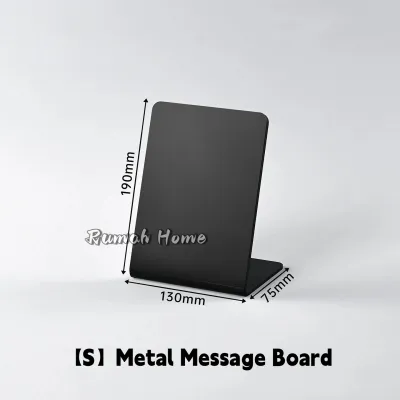
Prices are valid at publication and may change. Please refer to the product page for the latest price.
Before the school term starts, verify that you have the following essential items ready for your classroom:
- Presentation Boards: A sturdy mobile, tripod, or wall-mounted flipchart board that fits your classroom layout.
- Paper Pads: At least two to three compatible flipchart paper refills (plain, ruled, or grid format).
- Writing Instruments: Low-odor, high-contrast markers designed specifically for paper, along with dry-erase markers if your board has a dual-purpose surface.
- Erasers and Cleaners: A dedicated whiteboard eraser and a gentle, alcohol-free cleaning spray to maintain the board's surface.
- Interactive Accessories: Magnetic clips, physical or telescopic pointers, and adhesive notes to encourage student participation.
If your selected board features a magnetic steel surface, you can expand your checklist to include magnetic borders, color-coded magnets, and magnetic document holders. These additions allow you to display student work or lesson outlines alongside your handwritten notes without damaging the paper.
Space and storage are critical considerations for typical classroom layouts. In classrooms where floor space is limited, a wall-mounted board or a folding tripod easel that can be tucked away when not in use is often the most practical choice. For larger, flexible learning spaces, a mobile board with smooth-rolling casters allows you to transition easily between whole-class instruction and small-group activities.
Choosing the Right Flipchart Board for Your Classroom
Selecting the right flipchart board involves evaluating your teaching style, classroom size, and how often you need to move the board between different learning zones. The three primary board configurations are easel (tripod) models, wall-mounted boards, and mobile stands with casters.

Easel or tripod boards are highly portable and excellent for classrooms where the presentation area changes frequently. They typically feature folding legs, making them easy to store in a utility closet during school holidays. When choosing a tripod model, look for sturdy leg-locking mechanisms to prevent the board from sliding or collapsing during active writing sessions.
Wall-mounted flipchart boards are ideal for permanent teaching stations where floor space is at a premium. These boards are secured directly to the classroom wall, providing maximum stability. However, they lack mobility, so you must ensure the mounting height is comfortable for your writing style and clearly visible to all students from their desks.
Mobile stands with casters offer the greatest flexibility for modern, collaborative classrooms. These units allow you to wheel the board directly to student groups for interactive brainstorming. To ensure safety in active classroom environments, verify that the mobile base has a wide, stable footprint and that at least two of the casters feature reliable wheel locks to keep the board stationary while you write.
Beyond mobility, pay close attention to the board’s surface features. Melamine surfaces are lightweight and budget-friendly but are best suited for light use as they are prone to ghosting over time. Lacquered steel surfaces are magnetic, highly durable, and offer excellent dry-erase performance, making them the preferred choice for daily classroom use. Always match the board’s dimensions (typically 60cm x 90cm or 70cm x 100cm) to your classroom depth to ensure students at the back can read your notes clearly.
Selecting Flipchart Pads and Paper Refills
Not all flipchart paper is created equal, and choosing incompatible refills can lead to frustrating setup issues during a lesson. Before purchasing paper pads, perform a compatibility check by matching the pad’s dimensions, hole spacing, and binding type to your specific board model. Many boards feature adjustable hooks or universal clamp systems that accommodate various pad brands, but fixed-pin boards require precise hole alignment.
Paper quality is another critical factor that directly impacts your presentation’s clarity. Look for paper with a weight of at least 70 gsm (grams per square meter) to 80 gsm. Thinner paper is highly susceptible to ink bleed-through, which ruins the subsequent pages on the pad and can even stain the board surface underneath.
Because smoothness, bleed resistance, and drying speed depend on the exact combination of paper weight and marker ink, perform a quick test stroke on a corner of the pad before writing a full lesson. If the ink feathers or shows through on the reverse side, consider upgrading to a heavier paper weight or switching to water-based markers.
Different lesson types benefit from specific paper formats:
- Plain Sheets: Best for free-form drawing, mind-mapping, and visual diagrams.
- Ruled Sheets: Ideal for language lessons, spelling lists, and structured writing exercises.
- Grid or Quadrille Sheets: Excellent for mathematics, graphing, and keeping columns aligned.
- Self-Stick Sheets: Feature an adhesive strip along the top edge, allowing you to peel pages off and stick them directly to classroom walls for gallery walks or group presentations.
To avoid mid-semester shortages, plan your bulk paper consumption per term. A practical estimate for a standard classroom is one to two full pads per term, depending on how frequently you use physical flipcharts versus digital screens. Purchasing paper in multi-pack boxes often provides better value and ensures you always have a fresh pad ready.
Markers, Erasers, and Presentation Accessories
Your choice of writing tools directly affects how easily students can follow your lessons. When selecting markers for flipchart paper, prioritize water-based, low-odor formulas. Unlike standard alcohol-based permanent markers, water-based inks are designed to sit on top of the paper fibers rather than soaking through them, significantly reducing the risk of bleed-through.
For the dry-erase portions of your board, select quick-dry dry-erase markers that can be wiped away cleanly without leaving dark smudges. Choose markers with a chisel tip if you want the flexibility to write both broad, high-visibility strokes and fine details, or bullet tips for consistent, bold line widths.
Color strategy plays a vital role in student comprehension and visual retention. Always use high-contrast colors like black, dark blue, dark green, and red for your primary text and core concepts. These colors remain legible from the back of the classroom. Use brighter accent colors like orange or purple sparingly to highlight key terms, draw arrows, or color-code different steps in a process. Avoid light yellow or pastel shades, as they are nearly impossible to read under standard classroom lighting.
To maintain your board’s surface integrity, invest in high-quality cleaning tools. A dense microfiber eraser is highly effective for daily dry-erase cleaning because it traps marker dust without scratching the board’s protective coating. Keep a bottle of alcohol-free board cleaning spray on hand for weekly deep cleans to remove stubborn residue and prevent ghosting.
Interactive accessories can transform a passive presentation into an engaging group activity. Use magnetic clips to hang reference charts or student worksheets directly onto a magnetic board. A physical or telescopic pointer helps direct student attention to specific parts of your diagram without blocking their view. You can also use large, brightly colored adhesive notes to create interactive matching games or to gather quick student feedback during a lesson.
Setup, Storage, and Maintenance Guidelines
Proper setup and routine maintenance will extend the lifespan of your presentation equipment and keep your classroom looking organized. When assembling and placing your flipchart board, position it at a slight angle away from windows and direct overhead lights to minimize glare. Ensure there is a clear sightline from every student desk to the entire writing surface.
When storing your supplies, keep paper pads flat in a dry, climate-controlled environment. In humid climates, paper fibers absorb moisture from the air, which can cause the sheets to curl, sag, or feather when written on. To prevent markers from drying out prematurely, always store them horizontally so the ink remains evenly distributed between the tip and the reservoir, and ensure the caps click tightly into place after every use.
Establish a routine cleaning schedule to keep your board in top condition. Wipe the dry-erase surface with a clean microfiber cloth at the end of every day. Avoid using abrasive sponges, household glass cleaners, or harsh chemical solvents, as these can strip away the board’s specialized dry-erase coating, leading to permanent staining.
Knowing when to replace your presentation supplies prevents classroom disruptions. Inspect your board regularly for signs of permanent staining (ghosting that cannot be removed with standard cleaner), deep surface scratches, or structural instability such as loose joints or faulty casters. If the board wobbles significantly while writing or no longer erases cleanly, it is time to replace the unit to maintain a professional and safe learning environment.
Frequently Asked Questions (FAQ)
Can I use standard whiteboard markers on a flipchart board?
Yes, you can use standard whiteboard markers on a flipchart board, provided the board has a laminated, dry-erase surface behind the paper pad. However, if you are writing directly on the paper sheets, standard whiteboard markers may bleed through more easily than water-based paper markers. Always check the manufacturer’s specifications to confirm if your board’s backing material is rated for dry-erase use, as non-laminated melamine or cardboard backings will stain permanently if written on directly.
How do I prevent flipchart paper from tearing at the binding?
To prevent pages from tearing, always turn them from the top center or top corners rather than pulling them from the bottom. When purchasing paper pads, look for options with reinforced cardboard headers or plastic binding strips that distribute tension evenly. Additionally, ensure your board’s paper clamp or hooks are fully aligned with the pad’s pre-punched holes, and use extra magnetic clips at the bottom of the pad to keep the paper stable during active lessons.
What is the best way to store partially used flipchart pads over the school holidays?
Store partially used flipchart pads completely flat in a cool, dry location to prevent the paper from warping or absorbing moisture. In humid environments, wrapping the pads in clean plastic wrap or storing them inside a sealed flat drawer protects the paper fibers from humidity and dust. Always store your markers horizontally in a drawer or organizer box during long breaks to ensure the ink does not pool at one end, which can cause the tips to dry out or leak.
Community discussion
Share your experience or ask a question. Comments are reviewed before publication.