
Quick Answer: Which Template Material is Best for Quilting?
Selecting the right quilt template material is a foundational decision that directly affects the accuracy of your patchwork, the safety of your cutting process, and the lifespan of your tools. Rigid acrylic templates generally offer superior precision and durability when you are using a rotary cutter. Their robust thickness provides a solid physical barrier that guides the rolling blade safely and keeps your cuts perfectly straight or uniformly curved.
Conversely, thin flexible plastic templates are better suited for tracing patterns by hand, hand-appliqué work, or English Paper Piecing (EPP). Because they lie completely flush against the fabric, they eliminate the visual distortion known as shadowing, allowing you to draw highly accurate lines with a marking pen before cutting with fabric shears. Ultimately, the best choice depends entirely on the cutting tool you plan to use, your preferred quilting method, and whether you require a rigid guide or a pliable tracing stencil.
Understanding the Materials: Acrylic vs. Flexible Plastic
To make an informed choice, you must first understand what these materials actually are and how their manufacturing processes influence their performance in your sewing room. In the quilting industry, “acrylic” refers to rigid sheets of polymethyl methacrylate (PMMA), commonly known by brand names like Plexiglas or Perspex. When shopping, always check the manufacturer’s specifications for the exact thickness and grade. Premium quilting templates are typically made from cast acrylic, which is more uniform in thickness and less prone to chipping than cheaper extruded acrylic. Standard rotary-cutting templates are usually 3mm (approximately 1/8 inch) thick, while templates designed for longarm quilting machines are 6mm (approximately 1/4 inch) thick to prevent the machine’s hopping foot from slipping over the ruler.
Products mentioned in this guide
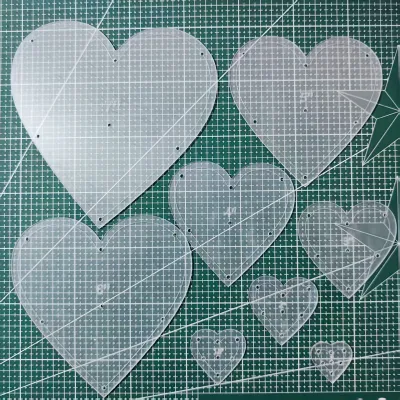
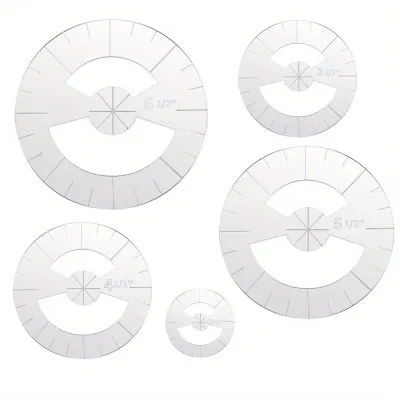
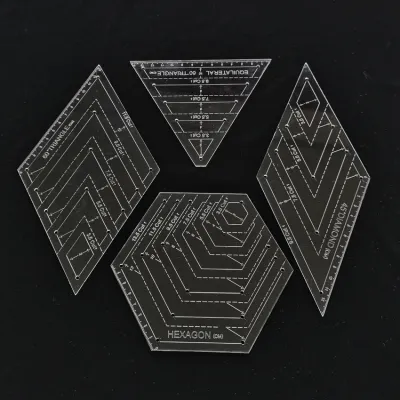
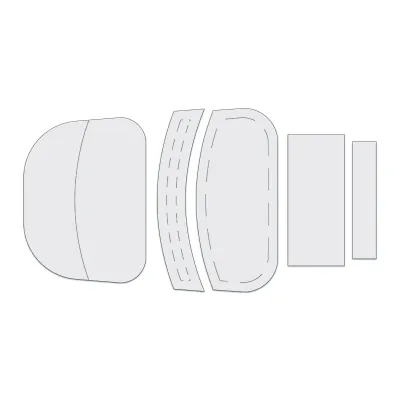
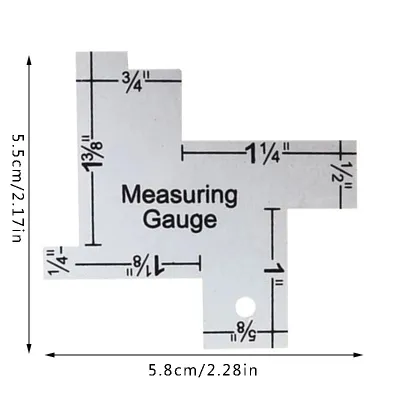
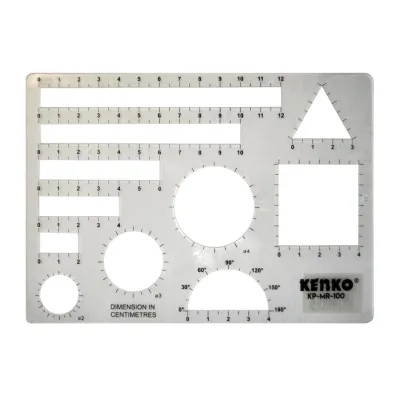
Prices are valid at publication and may change. Please refer to the product page for the latest price.

On the other hand, “flexible plastic” templates are made from thinner, pliable synthetic polymers such as Mylar (a brand name for biaxially-oriented polyethylene terephthalate, or BoPET), polyvinyl chloride (PVC), or acetate. These sheets generally range from 0.1mm to 1mm in thickness. They can easily be cut with standard household scissors or utility knives, making them popular for custom, DIY template creation.
Beyond the base polymer, the manufacturing method plays a critical role in the quality of the template’s edge. High-quality acrylic templates are typically laser-cut. This process uses a high-powered light beam to melt through the material, leaving a polished, glass-like edge that allows rotary blades to glide smoothly. However, lower-quality laser cutting can sometimes leave tiny, melted micro-bumps or sharp corners. Flexible plastic templates are usually die-cut or stamped out of large sheets. If the cutting dies are dull, this process can leave rough burrs or thin plastic flashing along the perimeter. Always run your finger carefully along the edges of any new template to check for these imperfections before placing them on expensive quilting cotton.
Precision and Cutting Accuracy
Achieving seamless points and perfectly matched seams in a finished quilt requires extreme cutting accuracy. The physical properties of your template material dictate how easily you can maintain this precision across dozens or hundreds of identical fabric cuts.
Rotary Cutter Compatibility
Using a rotary cutter requires applying downward and forward pressure simultaneously. A rigid acrylic template, with its 3mm profile, provides a stable, non-flexing vertical wall. This wall physically prevents the sharp, circular blade of your rotary cutter from riding up over the edge of the template. It keeps the blade tracking in a perfectly straight line or a true, unyielding curve.
Thin flexible plastic templates do not offer this protection. Under the lateral pressure of a rotary cutter, a thin plastic sheet can easily flex, buckle, or shift. Even worse, the razor-sharp rotary blade can easily climb over the low-profile edge, slicing directly into the plastic template itself. This not only ruins the template’s edge for future use but also poses a serious safety risk to your fingers.
Edge Smoothness
Any imperfection along the edge of your template will directly compromise your cutting accuracy. When a template edge has burrs, nicks, or melting marks, the rotary blade or marking pen will stall or jump as it hits these obstacles. This results in jagged fabric edges or distorted chalk lines.
Before starting a project, perform a physical inspection: run a dry cotton swab along the template’s perimeter. If the cotton fibers catch on the edge, the surface is rough and may snag your fabric or cause your cutting tool to slip. While minor rough spots on acrylic can sometimes be polished out with ultra-fine sandpaper, damaged edges on thin plastic templates are usually permanent, requiring you to replace the template entirely.
Thickness and Shadowing
While the thickness of rigid acrylic is excellent for rotary cutting, it introduces a challenge when tracing. Because the template is 3mm thick, a marking pen or pencil cannot sit completely flush against the bottom edge where the template meets the fabric. This physical offset creates a visual gap, or “shadowing,” which can cause you to draw a line that is slightly larger than the actual template template.
To compensate for this shadowing, you must hold your marking tool at a consistent angle, or use a fine-tipped fabric pen that can reach closer to the bottom corner. Thin flexible plastic templates excel in this scenario. Because they are incredibly thin and lie flat against the fabric surface, they eliminate shadowing entirely. Your marking tool can trace the exact perimeter of the shape with absolute fidelity, making flexible plastic the superior choice for intricate hand-appliqué patterns that require precise pencil lines.
Durability and Wear Resistance
Quilting projects often require cutting the same shape dozens of times, meaning your templates must withstand repetitive friction, blade contact, and handling over several years.
Scratch and Clouding Resistance
Acrylic is a highly transparent material, but it is susceptible to surface scratches. Over time, friction from acrylic rulers, metal pins, and stray rotary blades can create micro-scratches on the underside of the template. These scratches scatter light, causing the material to cloud over. When a template becomes cloudy, it is difficult to see the grainline or pattern of the fabric underneath, which makes precise alignment challenging.
Flexible plastics like Mylar are highly resistant to surface scratching and do not cloud easily under normal handling. However, they are prone to permanent creasing. If a flexible template is bent too sharply during storage or transport, it will develop a white crease line that permanently warps the flat profile of the sheet.
Edge Degradation
Repeatedly running a rotary cutter against a template edge causes micro-wear. Over time, thin plastic templates will develop tiny nicks, grooves, or peeling layers where the blade has scraped the material. Once these nicks form, the template is no longer mathematically accurate, and your rotary blade will naturally drift into those grooves during subsequent cuts.
Rigid acrylic is far more resilient to this type of edge degradation. While a direct impact from a dropped tool can chip or crack an acrylic corner, the polished edges of a quality acrylic template will remain clean, straight, and true through thousands of rotary cuts, provided you maintain proper cutting form.
Warping and Temperature Sensitivity
Both acrylic and flexible plastics are sensitive to environmental conditions, particularly heat. In tropical climates like Singapore, temperatures can rise significantly in enclosed spaces. Leaving your quilting templates in a hot car trunk, near a sunny window, or too close to a hot ironing board can cause both materials to warp.
Acrylic has a higher heat distortion temperature than cheap PVC or acetate, but once it warps, it is virtually impossible to flatten completely. Thin flexible plastics warp at even lower temperatures, and once they lose their flat profile, they will bubble up on your fabric, allowing the rotary blade or marking pen to slip underneath. Always store your templates in a cool, climate-controlled environment away from direct heat sources.
Visibility and Marking Convenience
To align your templates perfectly with the fabric’s print or grainline, you must be able to see through the material clearly and mark your guidelines without damaging the tool.
Transparency and Tinting
High-quality cast acrylic offers exceptional optical clarity, allowing you to perform “fussy cutting”—the process of targeting and cutting a specific motif from a fabric print, such as a single flower or a geometric pattern, to feature in your quilt block.
In contrast, many flexible plastic sheets have a slight blue, yellow, or grey tint, or feature a matte, textured finish designed to reduce glare. While this matte finish can make printed grid lines easier to read under bright sewing room lights, it reduces overall transparency, making it harder to align the template precisely with subtle fabric patterns or fine grainlines.
Marking Tools and Erasability
When working on complex layouts, you may need to write temporary notes, alignment guides, or block numbers directly on your templates.
- On Acrylic: Water-soluble fabric markers, dry-erase markers, and chalk pencils work beautifully. The smooth, non-porous surface of acrylic allows these marks to be wiped away completely with a damp cloth. However, you should always perform an erasability check on a small, inconspicuous corner of a new template before marking the center, as some highly pigmented inks can leave faint, permanent ghost stains.
- On Flexible Plastic: Matte-finished Mylar holds graphite pencil lines exceptionally well, which can be erased with a standard vinyl eraser. However, smooth PVC or acetate sheets often repel water-based inks, causing the ink to bead up and smudge onto your hands or your fabric.
Grip and Slippage
Because polished acrylic is incredibly smooth, it has a very low coefficient of friction when placed on dry cotton quilting fabric. When you apply downward pressure with your hand, the template can easily slide or pivot mid-cut, ruining your fabric and potentially putting your fingers in the path of the rotary blade.
To prevent this, you should check if your purchased acrylic templates feature built-in grip elements, such as laser-etched textured undersides or pre-applied non-slip coatings. If they do not, you will need to apply aftermarket solutions like adhesive silicone rings, clear grip tape, or fine sandpaper dots to the underside of the template to ensure it stays locked in place during use.
Decision Framework: How to Choose the Right Template
To help you decide which material is best for your specific quilting style, use the following structured decision framework.
Choose Acrylic If:
- You primarily use a rotary cutter: The 3mm thickness is essential for guiding a rolling blade safely and accurately.
- You are cutting standard geometric shapes: For squares, half-square triangles, hexagons, or diamonds, rigid acrylic provides the absolute dimensional stability needed for perfect seam matching.
- You need long-term durability: If you plan to make multiple quilts using the same pattern, acrylic will withstand years of repetitive use without wearing down.
- Your budget allows for a long-term investment: In the Singapore market, individual acrylic templates or small sets generally range from S$15 to S$40, depending on the complexity of the shapes and the brand.
Choose Flexible Plastic If:
- You prefer hand-tracing and scissor cutting: If you trace your shapes onto fabric with a pencil and cut them out with fabric shears, the flush fit of thin plastic is highly advantageous.
- You are working on appliqué or English Paper Piecing (EPP): Pliable templates can be pinned directly to fabric, folded, or wrapped, which is essential for hand-sewing techniques.
- You want to design custom, one-off shapes: You can easily buy blank plastic template sheets for S$2 to S$10, draw your own custom designs, and cut them out at home using household scissors.
- You need compact storage: Flexible templates can be stored in binders or lightweight folders without adding bulk or weight.
| Feature | Rigid Acrylic Templates (3mm) | Flexible Plastic Templates (0.1mm – 1mm) |
|---|---|---|
| Primary Cutting Tool | Rotary Cutter | Fabric Scissors / Shears (after tracing) |
| Best For | Rotary cutting, straight lines, long-term reuse | Hand tracing, appliqué, EPP, custom DIY shapes |
| Safety Profile | High (prevents blade from jumping) | Low (blade can easily cut through or jump over) |
| Shadowing Effect | Yes (requires compensation when tracing) | No (lies perfectly flush against fabric) |
| Average Price Band | S$15 – S$40 per set / specialty piece | S$2 – S$10 for blank sheets or basic sets |
Verify Before You Buy
Before purchasing any quilt template, never rely solely on generic material names like “plastic” or “acrylic,” as marketing terms can sometimes be misleading. Always check the product description for the exact thickness (3mm for rotary cutting, 6mm for longarm work) and look for verified user reviews mentioning edge finish quality. If you are buying clear templates, confirm whether they come with a protective paper backing that must be peeled off before use, as this backing is often mistaken for a cloudy or scratched surface.
Care and Maintenance for Longevity
Proper maintenance preserves the optical clarity and edge precision of your quilting templates, protecting your investment for years to come.
Safe Cleaning Methods
To clean lint, finger oils, or temporary marking inks from your templates, wash them with a few drops of mild dishwashing soap and lukewarm water. Always use a clean, soft microfiber cloth to wipe the surface.
Strict Warning: Never use harsh household solvents, glass cleaners, rubbing alcohol (isopropyl alcohol), acetone, or ammonia-based sprays on acrylic templates. Chemical exposure causes acrylic to undergo a destructive process called “crazing.” This creates thousands of microscopic cracks deep within the material, permanently clouding the template and destroying its structural integrity, making it highly brittle and prone to snapping under light pressure.
Proper Storage Practices
Store your templates flat in a shallow drawer or hang them vertically on a pegboard using their pre-drilled hanging holes. Avoid stacking heavy, heavy objects on top of your templates, as uneven weight distribution can cause permanent bowing or stress fractures. Keep all templates out of direct tropical sunlight to prevent UV degradation, which can make both acrylic and flexible plastics yellow and brittle over time.
Frequently Asked Questions (FAQ)
Can I use a rotary cutter on thin plastic templates?
You should strongly avoid using a rotary cutter directly against thin, flexible plastic templates. Because these templates are typically less than 1mm thick, they do not provide a sufficient physical barrier to guide a rolling rotary blade. Under the pressure of cutting, the sharp blade can easily slice into or shave off the edge of the plastic, permanently ruining the template’s dimensions. More importantly, the blade can easily jump over the low-profile edge and cause severe cuts to your fingers. For safe rotary cutting, always use a rigid acrylic template or a specialized quilting ruler that is at least 3mm thick.
How do I stop my acrylic template from slipping on the fabric?
To prevent smooth acrylic templates from sliding on your fabric, you can apply aftermarket non-slip solutions to the underside of the template. Popular options include adhesive sandpaper dots, clear silicone grip rings, or temporary non-slip adhesive sprays designed specifically for quilting rulers. Before applying any adhesive product to your template, always test it on a small, inconspicuous corner first. This ensures that the adhesive can be removed cleanly in the future without leaving a sticky residue or causing the acrylic surface to cloud and degrade.
Community discussion
Share your experience or ask a question. Comments are reviewed before publication.