
The type of presser foot you choose determines how fabric feeds through your machine, how straight your stitches lie, and whether you can execute advanced techniques like installing invisible zippers or sewing thick layers. Selecting the right presser foot sewing accessory turns difficult, frustrating tasks into smooth, precise operations.
Every sewing machine comes with a few standard feet, but a vast world of specialty attachments exists to solve specific fabric struggles. Understanding how these tools function allows you to work more efficiently, protect your materials from damage, and make informed choices when purchasing a new machine or upgrading your current setup.
Understanding Your Sewing Machine Shank and Attachment Type
Before purchasing any new presser feet, you must identify your sewing machine’s physical compatibility. The presser foot attaches to the shank, which is the vertical metal bar that holds the foot assembly above the needle plate. Sewing machines generally fall into one of three shank categories, and choosing the wrong type will prevent the foot from aligning with your needle.
Products mentioned in this guide
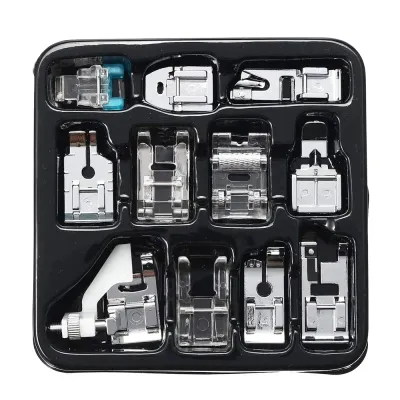
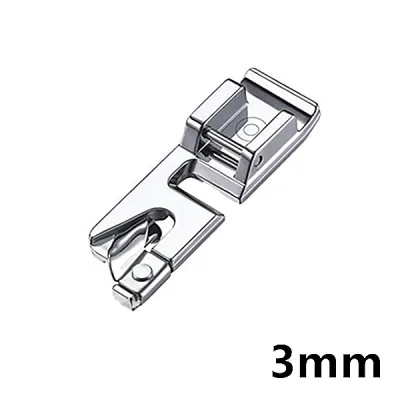
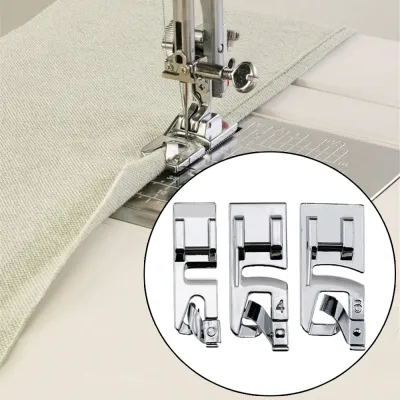
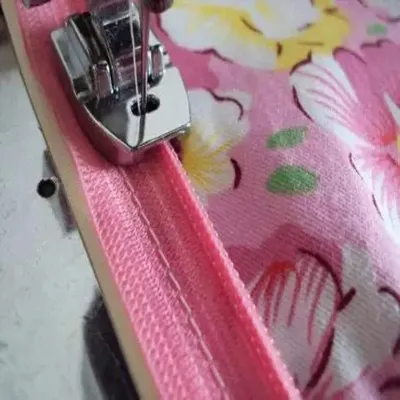
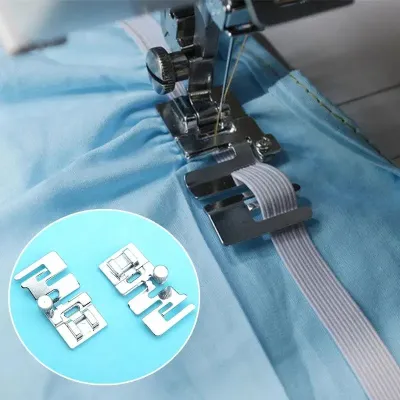
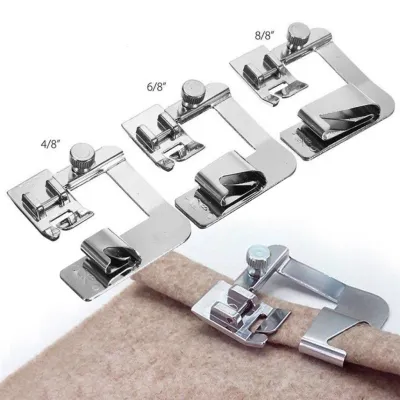
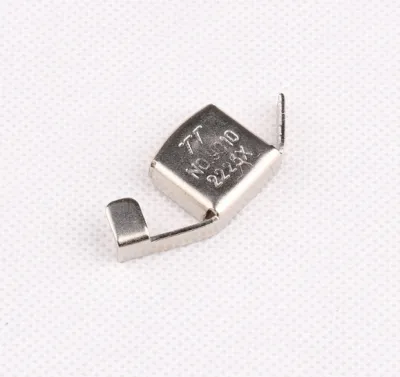
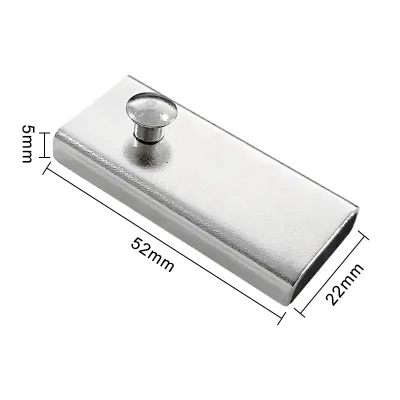
Prices are valid at publication and may change. Please refer to the product page for the latest price.
- Low Shank: This is the most common configuration for modern domestic sewing machines. The distance from the center of the thumb screw hole (when the foot is lowered) to the needle plate is approximately 12.7 mm (0.5 inches).
- High Shank: Commonly found on high-end embroidery machines, heavy-duty domestic models, and industrial machines. This distance measures approximately 25.4 mm (1 inch).
- Slant Shank: Unique to certain vintage and modern Singer sewing machines, where the shank is angled slightly forward to give the sewist a better view of the needle area.
In addition to the shank height, you must identify how the feet attach to the bar. Most modern domestic machines utilize a snap-on or quick-release system. These systems feature an ankle attached to the shank, allowing you to pop feet on and off with the press of a lever.
Older machines, heavy-duty models, and industrial systems often use screw-on feet, where each foot has its own integrated shank that must be secured directly to the bar using a small screwdriver. Always consult your machine’s manual or measure your shank height carefully before buying aftermarket accessories to avoid alignment issues that can break needles or damage your machine.
Essential Presser Feet for Everyday Sewing Tasks
Most domestic sewing machines come bundled with a core set of presser feet designed to handle basic garment construction, household repairs, and simple home decor projects. These foundational feet cover the vast majority of everyday sewing needs.

Standard / All-Purpose Foot
Often referred to as the zig-zag foot or general-purpose foot, this is the default attachment that comes pre-installed on almost every sewing machine. It features a wide, horizontal needle slot designed to accommodate both straight stitches and side-to-side needle movements, such as zig-zag and decorative stitches.
The underside of the standard foot is flat, providing even pressure across the fabric as it moves over the feed dogs. This foot is your go-to choice for basic seams, topstitching, simple repairs, and joining raw edges on medium-weight woven fabrics like cotton, linen, and canvas.
Zipper Foot
An asymmetrical design defines the zipper foot, which allows you to stitch extremely close to raised obstacles like zipper coils, piping, or heavy cording. Because a standard foot would ride up on top of these ridges and cause skipped stitches, the zipper foot is designed to slide alongside them.
Most modern zipper feet feature two bar attachments, allowing you to snap the foot onto either the left or right side of the needle holder. This flexibility lets you sew down both sides of a zipper tape without turning your fabric upside down. When using a zipper foot, always verify your needle position manually by turning the handwheel to ensure the needle clears the metal frame of the foot before pressing the foot pedal.
Buttonhole Foot
Creating neat, identical buttonholes is highly challenging without a dedicated buttonhole foot. These feet are designed to guide the machine as it sews the dense satin stitches required to secure a buttonhole opening.
- One-Step Automatic Buttonhole Foot: This long, plastic foot features a sliding compartment at the back where you insert your physical button. The machine reads the size of the button and automatically stitches a perfectly sized buttonhole in a single step.
- Four-Step Manual Buttonhole Foot: Often found on entry-level machines, this foot features printed guide lines to help you manually measure, stop, and switch stitch settings for each of the four sides of the buttonhole.
Using these guides ensures that your buttonholes remain consistent across the entire placket of a shirt or jacket.
Blind Hem Foot
For trousers, skirts, and curtains where visible stitching would ruin the clean aesthetic, the blind hem foot is indispensable. This foot features a central metal or plastic guide that aligns with a specific fold in your fabric.
When paired with your machine’s blind hem stitch, the needle zig-zags to the left just enough to catch a single thread of the outer fabric fold before returning to sew a series of straight stitches on the hem allowance. Adjusting the guide width and practicing on scrap fabric are essential steps to ensure the needle bites just enough fabric to hold the hem without showing large stitches on the right side.
Specialty Presser Feet for Specific Fabrics and Techniques
As you progress to more complex sewing projects, standard feet can sometimes struggle with challenging fabric textures, multiple thick layers, or delicate finishes. Specialty presser feet are designed to solve these specific physical challenges.
Walking Foot (Even Feed Foot)
When sewing multiple layers of fabric, the machine’s lower feed dogs pull only the bottom layer, which can cause the top layer to shift, pucker, or stretch out of alignment. The walking foot solves this issue by introducing a secondary set of mechanical feed dogs on top of the fabric.
Driven by a fork arm that rides on your machine’s needle clamp screw, the walking foot moves the top and bottom layers of fabric through the machine at the exact same speed. This feed synchronization is critical for quilting, matching plaids or stripes, sewing thick winter coats, and working with slippery or stretchy materials like satin, velvet, and knit fabrics.
Non-Stick or Roller Foot
Sticky or high-friction materials like leather, vinyl, suede, oilcloth, and coated canvas tend to cling to the metal underside of a standard presser foot. This friction causes the fabric to drag, leading to uneven stitch lengths, bunching, and potential needle breakage.
- Non-Stick Foot: Often coated with polytetrafluoroethylene (PTFE), this foot glides effortlessly over sticky surfaces without dragging.
- Roller Foot: Features small, built-in rollers that physically roll across the material, preventing friction and ensuring smooth fabric delivery.
When working with these materials, you should also check your machine’s manual to see if you can reduce the presser foot pressure to further prevent marking delicate surfaces.
Rolled Hem Foot
Creating a tiny, clean hem on lightweight fabrics like chiffon, silk, or fine linen can be incredibly tedious. The rolled hem foot automates this process using a curved metal funnel at the front of the foot.
As you feed the fabric through, the funnel automatically folds the raw edge over twice before guiding it directly under the needle for stitching. This foot produces a professional, narrow hem (typically 2 mm to 4 mm wide) that is perfect for summer dresses, scarves, and delicate table linens. It requires starting the fold manually for the first few stitches and maintaining a consistent feeding angle to keep the fabric running smoothly through the funnel.
Quarter-Inch Seam Foot
In quilting and precise patchwork, even a tiny variation in seam allowance can cause geometric blocks to misalign by the time you assemble a full quilt top. A quarter-inch seam foot features a built-in metal guide on the right-hand edge.
By keeping the raw edge of your fabric flush against this guide, you can maintain an exact 1/4-inch seam allowance along the entire length of your seam. This foot is highly valued by quilters and crafters who require absolute precision in small-scale construction.
How to Evaluate Which Presser Feet Your Sewing Machine Should Include
When shopping for a sewing machine, the included accessory bundle can vary significantly between models. Evaluating your primary sewing goals will help you determine which presser feet are essential out of the box and which ones can be purchased later.
If your focus is basic garment construction, clothing alterations, or simple home decor, prioritize machines that include a standard foot, a zipper foot, and an automatic buttonhole foot. These three tools will cover nearly all your basic sewing needs. If you live in a warm, humid climate like Singapore, you may frequently work with lightweight, breathable fabrics like linen, rayon, and silk; in this scenario, having a rolled hem foot or a walking foot in your starter kit is highly advantageous.
For those interested in quilting, look for machine packages that bundle a walking foot and a quarter-inch foot, as purchasing these specialty feet individually can add S$30 to S$80 to your overall cost. Always check the availability of the manufacturer’s accessory ecosystem before buying a machine. Reputable brands like Brother, Singer, and Janome have widely available accessories in local specialty shops and online marketplaces, making it easy to source replacement or specialty feet.
Be cautious of budget machines that boast massive bundles of 32 or 48 generic presser feet. Often, these generic feet are constructed from thin, low-quality metals or plastics that can bend easily, and many of the highly specialized feet in these kits may never be used. It is always better to invest in a machine with high-quality core performance and a few well-made, essential feet, and then purchase reliable specialty feet as your skills grow.
Best Practices for Changing and Maintaining Presser Feet
To ensure your sewing projects turn out beautifully and your machine remains in safe working order, follow these simple maintenance and operating practices.
- Safety First: Always turn off the power switch on your sewing machine before changing the presser foot or the needle. Accidentally stepping on the foot pedal while your fingers are near the needle bar can cause serious injury.
- Changing Snap-On Feet: Raise the presser foot lever to its highest position. Press the quick-release lever located behind the ankle assembly to drop the current foot. Align the horizontal bar of the new foot directly under the groove of the ankle, and lower the presser foot lever until the ankle clicks securely onto the bar.
- Changing Screw-On Feet: Use the small screwdriver provided with your machine to loosen the shank screw. Slide the old foot off, position the new foot's mounting bracket around the shank bar, and tighten the screw securely. Avoid over-tightening, which can strip the threads on the bar.
- Regular Cleaning: Lint, dust, and thread fibers quickly accumulate under the presser foot and around the feed dogs. Remove the foot regularly and use a small lint brush to clear away debris, which can otherwise cause fabric dragging and skipped stitches.
- Proper Storage: Store loose presser feet in a dedicated, partitioned accessory box or organizer case. This prevents the metal surfaces from scratching each other, protects delicate plastic guides from snapping, and ensures you can always find the correct tool for your project.
Frequently Asked Questions (FAQ)
Can I use generic or third-party presser feet on my sewing machine?
Yes, many generic snap-on presser feet will work perfectly on your sewing machine, provided the shank height (low or high) and the width of the snap-on bar match your machine’s ankle. However, highly specialized feet—such as one-step automatic buttonhole feet or proprietary dual-feed systems—rely on specific built-in sensors or mechanical linkages unique to each brand. For these advanced accessories, it is always best to purchase original equipment manufacturer (OEM) parts to ensure proper alignment and prevent damage to your machine.
Why is my fabric slipping or bunching up under the presser foot?
Fabric slipping, puckering, or bunching is usually caused by using the wrong type of presser foot for your material, incorrect presser foot pressure, or a buildup of lint. For example, sewing sticky vinyl with a standard metal foot will cause the material to drag and bunch. If your machine has a presser foot pressure dial, try adjusting it to match your fabric weight—lighter pressure for delicate or stretchy fabrics, and firmer pressure for heavy wovens. Alternatively, switching to a walking foot or a non-stick foot will often resolve feeding issues immediately.
Community discussion
Share your experience or ask a question. Comments are reviewed before publication.