
Punch needle embroidery is a comforting, tactile textile craft that transforms simple yarn and fabric into plush, textured works of art. Unlike traditional embroidery, which requires intricate stitching patterns, punch needle relies on a continuous looping mechanism that is incredibly easy to master. By pushing a hollow needle threaded with yarn through a woven foundation fabric, you create a series of uniform loops that stay in place through the natural tension of the fabric fibers. This gentle learning curve makes it an exceptionally rewarding hobby for beginners looking to create custom coasters, wall hangings, and textured cushions.
Starting your first project requires understanding how your tools interact. Because the craft relies on friction to hold the loops in place, matching your needle size, yarn weight, and fabric weave is the single most important step to success. With a few basic materials and a bit of patience, you can quickly transition from a complete novice to confidently designing and executing your own textile pieces.
Essential Tools and Materials for Your First Project
To set yourself up for a successful first project, you must select tools that are designed to work together. The punch needle system relies on a delicate balance of dimensions: the thickness of your yarn must match the inner diameter of your needle, and the weave of your foundation fabric must be loose enough to let the needle pass through but tight enough to grip the yarn once the needle is withdrawn. A basic starter setup is highly affordable, often costing between S$15 and S$30 at local craft suppliers, making it an accessible entry point into textile arts.
Products mentioned in this guide
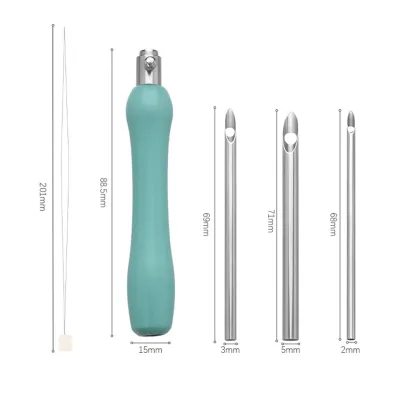
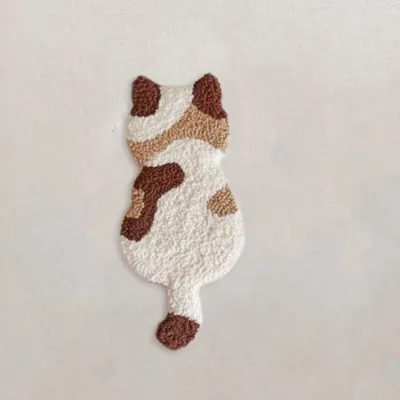
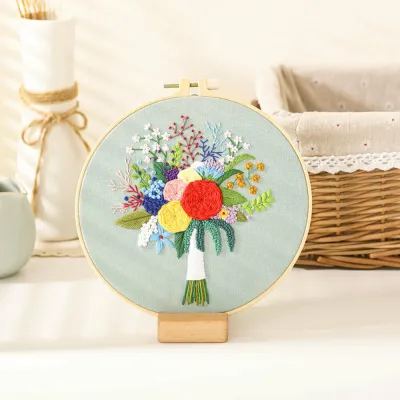
Prices are valid at publication and may change. Please refer to the product page for the latest price.
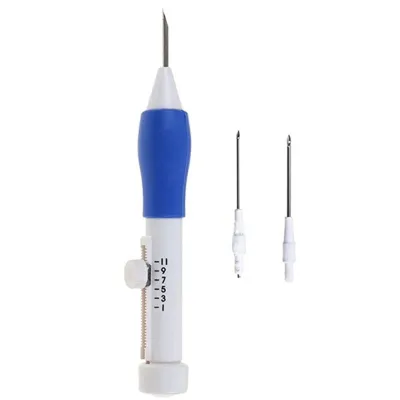
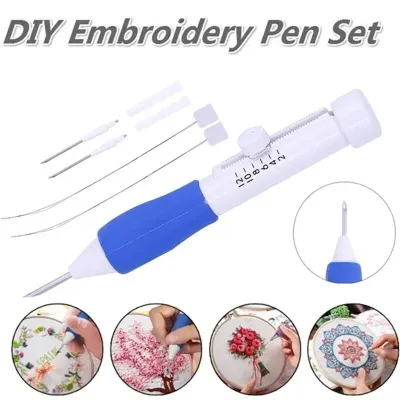
The punch needle tool itself consists of a hollow metal tip, an eyelet at the point, and a handle. These tools come in various sizes, typically measured by the diameter of the needle shaft in millimeters. For beginners, a medium-to-thick punch needle (around 4mm to 5mm) is highly recommended. This size accommodates standard medium-weight or bulky yarns, which are much easier to handle and allow you to fill space quickly. Adjustable punch needles are particularly versatile, as they feature built-in gauges that let you alter the length of the needle tip, directly controlling the height of your finished loops.
Your choice of yarn directly influences the texture and durability of your finished piece. When starting out, opt for a smooth, tightly spun acrylic or wool-blend yarn. Avoid highly textured, fuzzy, or boucle yarns for your first project, as these can snag inside the hollow needle shaft and disrupt your stitching flow. To verify if your yarn is compatible with your needle, perform a simple slide test: thread the yarn through the needle shaft and pull it back and forth. The yarn should slide completely smoothly without any resistance or catching. If it binds or feels tight, switch to a thinner yarn or a larger needle size.
The foundation fabric acts as the canvas for your loops. For thick yarn and a 4mm to 5mm needle, monk’s cloth is the gold standard. This 100% cotton fabric features a distinct even-weave pattern, typically with 12 to 14 holes per inch, which provides the perfect amount of flexibility and grip. If you are using finer threads or embroidery floss, a tighter weave fabric like linen or weavers cloth is necessary. Avoid standard cotton quilting fabrics or tightly woven canvas for thick needles, as the needle will tear the fabric threads rather than sliding between them, leaving permanent holes and preventing the loops from staying secure.
Finally, you will need a frame or hoop to hold your fabric. Standard wooden embroidery hoops can work for small, quick projects, but they often struggle to maintain the intense tension required for punch needlework. For a more reliable setup, look for a locking plastic hoop or a dedicated gripper strip frame. If you only have a wooden hoop on hand, you can improve its grip by wrapping the inner ring tightly with cotton twill tape or bias tape. This simple modification creates a non-slip surface that keeps your fabric from sagging as you punch.
Preparing Your Fabric and Setting Up the Needle
Before you make your first stitch, proper preparation of your workspace and tools will prevent the most common beginner frustrations. The foundation fabric must be stretched across your hoop or frame until it is drum-tight. To achieve this, center your fabric over the inner ring of your hoop, press the outer ring down over it, and tighten the screw slightly. Gently pull the fabric edges outward, working your way around the hoop in a circular pattern, then tighten the screw further. Repeat this process until the fabric is completely taut; when you tap the center with your finger, it should produce a clear, resonant sound like a drum.

Next, you must thread your punch needle correctly. Because the yarn runs through the inside of the needle, you cannot thread it by hand. Insert the flexible wire loop of your needle threader into the tip of the needle, pushing it all the way down the shaft until it emerges from the handle end. Insert the end of your yarn through the wire loop of the threader, then gently pull the threader back up through the needle tip. Once the yarn is pulled through the shaft, remove the threader, insert it through the eye of the needle at the tip, thread the yarn through the eye, and pull it through. Leave a tail of approximately 5 to 10 centimeters extending from the eye.
Finding a comfortable physical setup is essential for preventing hand fatigue during extended crafting sessions. Hold the punch needle relaxed in your hand, much like you would hold a thick pen or marker. Your grip should be firm enough to control the angle of the needle but loose enough to avoid cramping. Position your fabric hoop on a flat, stable surface, or hold it in your lap so that you can easily access both the front and back of the work. Ensure that the yarn feeding into the top of your needle is completely free of tangles and has plenty of slack; any tension on the supply line will pull your stitches right out of the fabric.
Step-by-Step Basic Punch Needle Techniques
The core mechanic of punch needle embroidery is simple, but it requires consistency to produce a beautiful, even texture. The first rule of punching is to always push the needle completely down into the fabric until the handle or the depth gauge flatly contacts the cloth. This ensures that every single loop on the back of your project is exactly the same height. If you only push the needle halfway down, your loops will be uneven, and the stitches are much more likely to unravel.
Once you have pushed the needle all the way down, gently lift it back up. The critical step here is to lift the needle tip only until it just clears the surface of the fabric. Do not lift the needle high off the cloth, as this pulls the yarn back up and destroys the loop you just created. Instead, keep the needle tip in constant contact with the fabric surface, grazing the fibers as you slide it forward to the next stitch location.
The direction of your movement is governed by the orientation of the needle tip. The slanted, open edge of the needle tip—known as the bevel—must always face the direction in which you are moving. If you are punching from left to right, the bevel must face to the right. If you need to change directions or turn a corner, keep the needle tip pushed down into the fabric, rotate the handle in your hand so the bevel faces your new direction, and then continue stitching. Never drag the needle sideways or backward against the bevel, as this will snag the fabric and ruin your stitch tension.
Achieving the right stitch spacing is a matter of observation and practice. As a general guideline, space your stitches about 3mm to 4mm apart, which is roughly equivalent to the width of the needle shaft itself. If you place your stitches too close together, you will overcrowd the fabric, causing it to buckle, warp, or even tear. If you space them too far apart, the foundation fabric will show through between the loops. When filling in a solid shape, work from the outside border inward in a spiral pattern, leaving about one needle-width of space between your rows to ensure a plush, seamless finish.
Troubleshooting Common Beginner Mistakes
It is entirely normal to encounter a few hiccups when learning to punch needle, but almost every common issue can be resolved with a few simple adjustments. If your loops are pulling back through the fabric as soon as you lift the needle, the most likely culprit is tension on your working yarn. Check your yarn supply to ensure it is completely slack; even a slight tug from a tangled skein or a heavy ball of yarn will pull the stitches out. Pull a generous amount of yarn off the ball so it pools loosely on your table before you begin punching.
Another reason loops fail to stay in place is a mismatch between your needle size and your fabric weave. If the holes in your foundation fabric are too large for the needle and yarn you are using, there will not be enough friction to hold the loops. Conversely, if your fabric sags during your project, the loss of tension will cause your stitches to become uneven. In humid climates, natural cotton fibers can absorb moisture from the air and stretch over time. Make it a habit to check your fabric tension every fifteen minutes and pull it tight again if it begins to feel soft.
If you make a mistake or dislike a section of your design, do not panic. One of the greatest advantages of punch needle embroidery is its reversibility. Simply pull on the working yarn to unravel the stitches you want to fix. The woven fibers of monk’s cloth or linen will retain the memory of the holes, but you can easily repair this. Use the rounded end of your punch needle handle, a fingernail, or a closed pair of scissors to gently scratch the fabric surface in a circular motion. This coaxes the woven threads back into their original positions, closing the holes and preparing the fabric to be punched again safely.
Finishing and Securing Your Punch Needle Piece
Once you have completed your design, finishing your piece correctly ensures that your hard work remains secure and beautiful for years to come. Start by turning your project over to the flat side (the back of your work). Cut your starting and ending yarn tails to a length of about 1 to 2 centimeters. You do not need to knot these tails; simply tuck them flat against the fabric or push them through to the loop side using your needle tip so they blend in with the rest of the pile.
Depending on how your finished piece will be used, you may need to apply an adhesive to secure the loops permanently. For items that will experience regular handling or friction, such as coasters, mug rugs, or floor mats, applying a thin, even layer of flexible fabric glue or non-toxic PVA glue to the back of the piece is highly recommended. When working with adhesives, always work in a well-ventilated space and follow the manufacturer’s safety instructions regarding skin contact and drying times. Allow the adhesive to cure completely before moving or cutting the fabric. For purely decorative items like framed wall art, glue is optional, as the natural tension of the fabric is usually sufficient to keep the loops secure.
To give your project a polished, professional look, turn it over to the loop side for some final grooming. Use a pair of sharp embroidery scissors to trim any uneven loops or stray yarn fibers so they match the height of the surrounding pile. If your design features distinct color blocks, you can use the tip of your closed scissors or a large tapestry needle to gently push the loops into their respective color zones, creating clean, sharp definition lines between different sections of your pattern.
Frequently Asked Questions (FAQ)
Can I use regular embroidery floss instead of yarn for punch needle?
Yes, you can use regular embroidery floss, but you must use a fine punch needle specifically designed for embroidery threads rather than a standard yarn punch needle. Fine punch needles have a much smaller shaft and eye to accommodate the delicate strands of floss. Using embroidery floss results in a highly detailed, low-profile texture that resembles fine tapestry or needlepoint, making it ideal for intricate patches, jewelry, and detailed textile art, whereas yarn creates a thick, plush, rug-like pile.
Why do my punch needle loops keep pulling out while I work?
Loops pulling out is almost always caused by accidental tension on your working yarn or lifting your needle too high off the fabric. Ensure that the yarn feeding into your needle is completely loose and free of any snags. Additionally, focus on your technique: when lifting the needle after a punch, keep the tip in constant contact with the fabric surface as you slide to the next stitch. Lifting the needle high off the fabric pulls the yarn back up, unraveling the loop you just formed.
How do I clean and maintain my punch needle tool?
To keep your punch needle functioning smoothly, regularly clear out any lint or fiber buildup from inside the hollow shaft and eye using your wire threader or by blowing gently through the tip. Store your tool in a dry, cool place to prevent any metal components from rusting. Always protect the delicate, sharp tip and bevel of the needle by keeping it in its protective cap or storage case when not in use, as any scratches or burrs on the metal can snag your fabric and ruin your stitches.
Community discussion
Share your experience or ask a question. Comments are reviewed before publication.